How to manually place an AdSense ad unit in WordPress
Google AdSense now uses Auto ads as the default method to display ads. As the name suggests, Auto ads place ads automatically on your site. Their position, number, and sizes are up to AdSense.
Publishers who would like to optimize their revenue, test different placements and networks, or control the position of ads can still place them manually. The following tutorial explains the process of creating an AdSense ad unit and placing it manually on your site.
Basic setup
Contents
For this tutorial, you’ll need
Create a new ad unit in Google AdSense
Visit your AdSense account. You can probably find it following this link.
Navigate to Ads > Ad units.
Click on one of the ad type buttons.
We will look at the two most common at types here: Display ads and In-article ads.
Tips for naming your ad unit
I see different naming styles for ad units every day. While the exact format may vary, I find it most useful to have at least the following information in the name:
- the website, if you have more than one
- position on your site
- format (e.g., “Medium Rectangle”) or size (e.g., “300×250”)
- device (e.g., “mobile” or “desktop”)
A good name allows you to find an ad again quickly. An example could be
wpadvancedads.com | below main menu | medium rectangle | mobile
You can differ from this pattern, but I highly recommend to use the same structure in all names.
A) Display ads
Display ads are the oldest and most used ad format.
Click on the icon of this ad type and start entering a name as suggested in the section above.
The correct ad size
The most critical choice for Display ads is the one about the size.
AdSense’s recommendation is to use a Responsive ad format, which means that the width and height of the ad will be selected automatically by AdSense. They usually fill out 100% of the available width of the element the ad is placed in. E.g., if your sidebar is 300px wide, the ad will be 300px wide as well. This format is the best choice for responsive themes.
There are a few situations in which you might want to have a fixed ad size. The most common is that AdSense is not always able to determine the available with so that the ad space stays unused or that you want to float text around an ad, which is also not possible with responsive ad types.
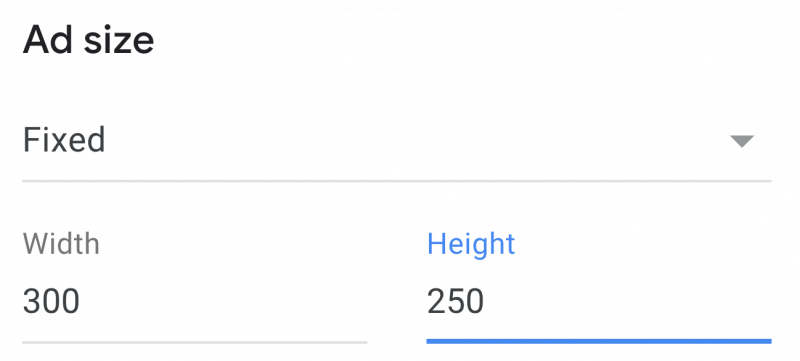
For testing, I’d recommend a 300×250 Medium Rectangle. Go to the Ad Size field at the top right, select Fixed and enter the values for width and height as in the image below.
Get the code
Click on Create to get the ad’s code.
Advanced Ads will later get the code automatically, so you don’t need to copy it. Jump ahead to this step.
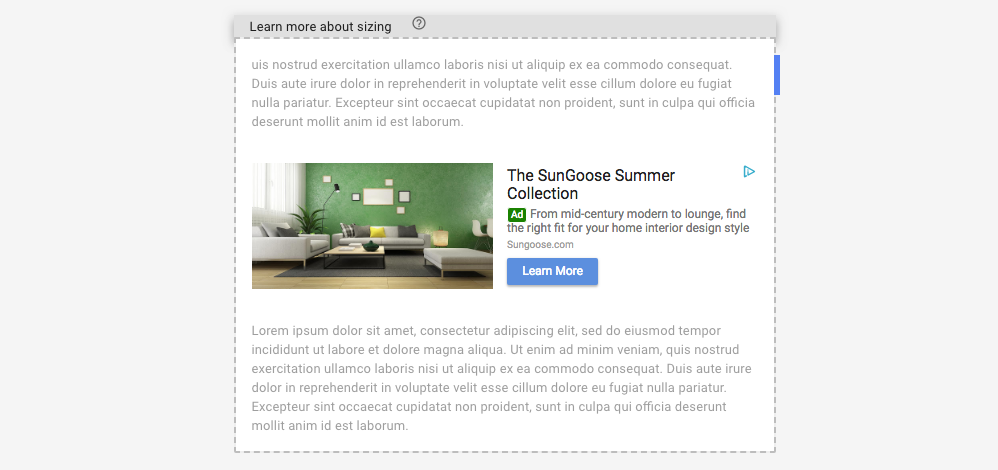
B) In-article ads
Instead of a Display ad you can also use the In-article ad, which is supposed to appear within large text blocks, like articles in a blog.
Click on the In-article ads icon on the Ad units page.
You should see a preview of an article with an ad in it now.
You can change the width of the preview with your mouse. Just drag the blue vertical rectangle at the top right of the preview window to the correct size.
In-article options
You will find additional options for this ad unit in the section at the right side of your screen.
Enter the ad unit name following the suggestions above in the name field at the top of the options field.
The Global options allow you to choose whether to display only text ads or also display ads in the In-article ad. Keep the default option enabled to increase competition on this ad.
Keep the Google-optimized styles option enabled in the Style section. No need to over-optimize something now.
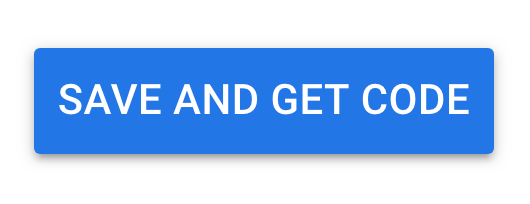
Get the code
Click on Save and get code.
Copy the code from the appearing window and move on to the next step.
Place the AdSense ad in your WordPress site
Once you have the AdSense ad code from one of the ad types above, you can log in to your WordPress site.
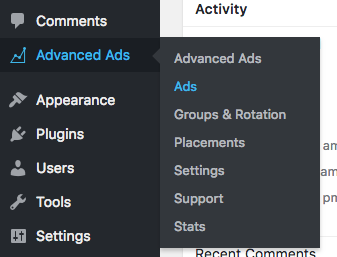
When you have Advanced Ads installed and activated, you should see an Advanced Ads menu icon in your backend.
Connect with AdSense
Go to Advanced Ads > Settings and select the AdSense tab.
Click on the Connect to AdSense button, choose your Google account and copy the verification key into the appropriate option in Advanced Ads.
Your AdSense account should now be connected to Advanced Ads and allow you to pull the ad codes automatically.
Creating the AdSense ad
Go to Advanced Ads > Ads and click on the New Ad button.
Enter a title for your ad – it is only visible to you. You can follow the suggestions I gave above for the name in AdSense or reuse it
Select AdSense ad in the Ad Type box.
From here you have two options, depending on whether you are using the Text & display or In-article ad type.
A) Text & display ads
 Example of the AdSense ad unit list in Advanced Ads
Select the ad from the ad list by clicking on the appropriate row.
Click on the Publish button to save the ad.
Go ahead to the Placing the ad section.
B) In-article ads
The In-article ad might appear in the ad list, but getting it results in an error since AdSense does not support this feature, yet.
![]()
Instead, click on the Insert new AdSense code link and paste the In-article AdSense code into the appearing text area.
Click on Get details.
The last step will import the details of the ad into Advanced Ads.
Click on the Publish button to save the ad and move on to the next step.
Placing the ad
Advanced Ads separates content (ads) and positions (placements) to make you more flexible when it comes to rotating or replacing ads.
There is a large number of options to place the ads. You can place them manually using shortcodes or a sidebar widget or use a placement to inject the ad manually without touching any code.
In the rest of this tutorial, I will explain how to add this ad to the content of your site automatically. After all, this is the best performing and recommended position for AdSense ads.
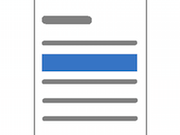
When you first hit the Publish button on the ad edit page, you will see a field like this:

It shows a few of the possible ad positions, including the one before, after and in the middle of the content.
If you don’t see this field or missed it then go to Advanced Ads > Placements and click on New Placement.
In both cases, choose the Content placement, which has the following icon.
Now, select the paragraph after which the ad should appear. A well-performing content ad appears after the first, second, or third paragraph.
On Advanced Ads > Placements you can also select a name and edit or add the ad to the placement. This step is not needed if you chose it while creating the ad.
Anyway, you should check out Advanced Ads > Placements to see that all options are selected correctly.
For further information on placements, see
Troubleshooting
New AdSense ad units might take up to 30 minutes to appear if your account is fully approved. With unapproved accounts, it might take 48 or even longer until the ad is showing up on your site.
Since 2019, AdSense can inject Auto ads on every website that contains any AdSense ad unit code. If unwanted Auto ads appear on a page with manually inserted AdSense ads, you can only disable them in your AdSense account. Find a short description of how to do this in our manual.
Still not seeing any ads? Switch the ad type in Advanced Ads to Dummy. If you see an ad output now, the problem is with AdSense and your account. If not, please follow the information on Ads not showing up.
AdSense does not suggest a specific amount of ads on your WordPress site, but there shouldn’t be too many ads too close together. AdSense can also decline to show specific ads if there are too many of them placed already.
Have you just started using Google AdSense and are unsure if you did something wrong with your setup? Open now a thread in our forum and get free support.
Let’s go!

Starting in 2009, Thomas’ own word game website grew to 40 MM page impressions per month. He then built Advanced Ads to help his colleagues to place ads and test different ad positions and networks tests without any coding skills. Thomas now enjoys improving the product for our more than 150,000 users worldwide.


