How to insert DoubleClick for Publishers (DFP) into WordPress
This tutorial about inserting DFP ads is deprecated. Please read the updated version about the integration of Google Ad Manager (formerly DFP) into WordPress.
In this article, with a video tutorial, you will learn how to implement Google DoubleClick for Publishers (DFP) into WordPress using Advanced Ads.
I will also cover the disadvantages of the separation of header and body tags and how to solve them.
Video: 09:26min
Click on the preview image to load and start the video from YouTube. By clicking you agree that your information will be sent to and processed by YouTube, LLC, 901 Cherry Avenue, San Bruno, CA 94066, USA. Read more
The setup used in this tutorial
Contents
Inserting Google DFP into WordPress
DFP is a powerful web server used for serving ads to end-users. It is especially useful for tailoring by geolocation and other demographics. Throughout the rest of the article, we will assume you are already using this function and know how to use Google DoubleClick tags and how to get them.
Insert these Google DFP tags into WordPress
A Google DFP tag is not a single tag as it is on AdSense. It has a header tag and a tag for the ad unit. The header tag contains information about the loaded ads, including their unique IDs, which we will need in this tutorial.
To set up DFP, we need at least two ad units. The first is for the header tag and the second for each ad.
Go to Advanced Ads > Ads > Create New Ad
Give your ad a title. We called ours “DFP Head”. Select the ad type “plain text and code” if it is not already pre-selected.
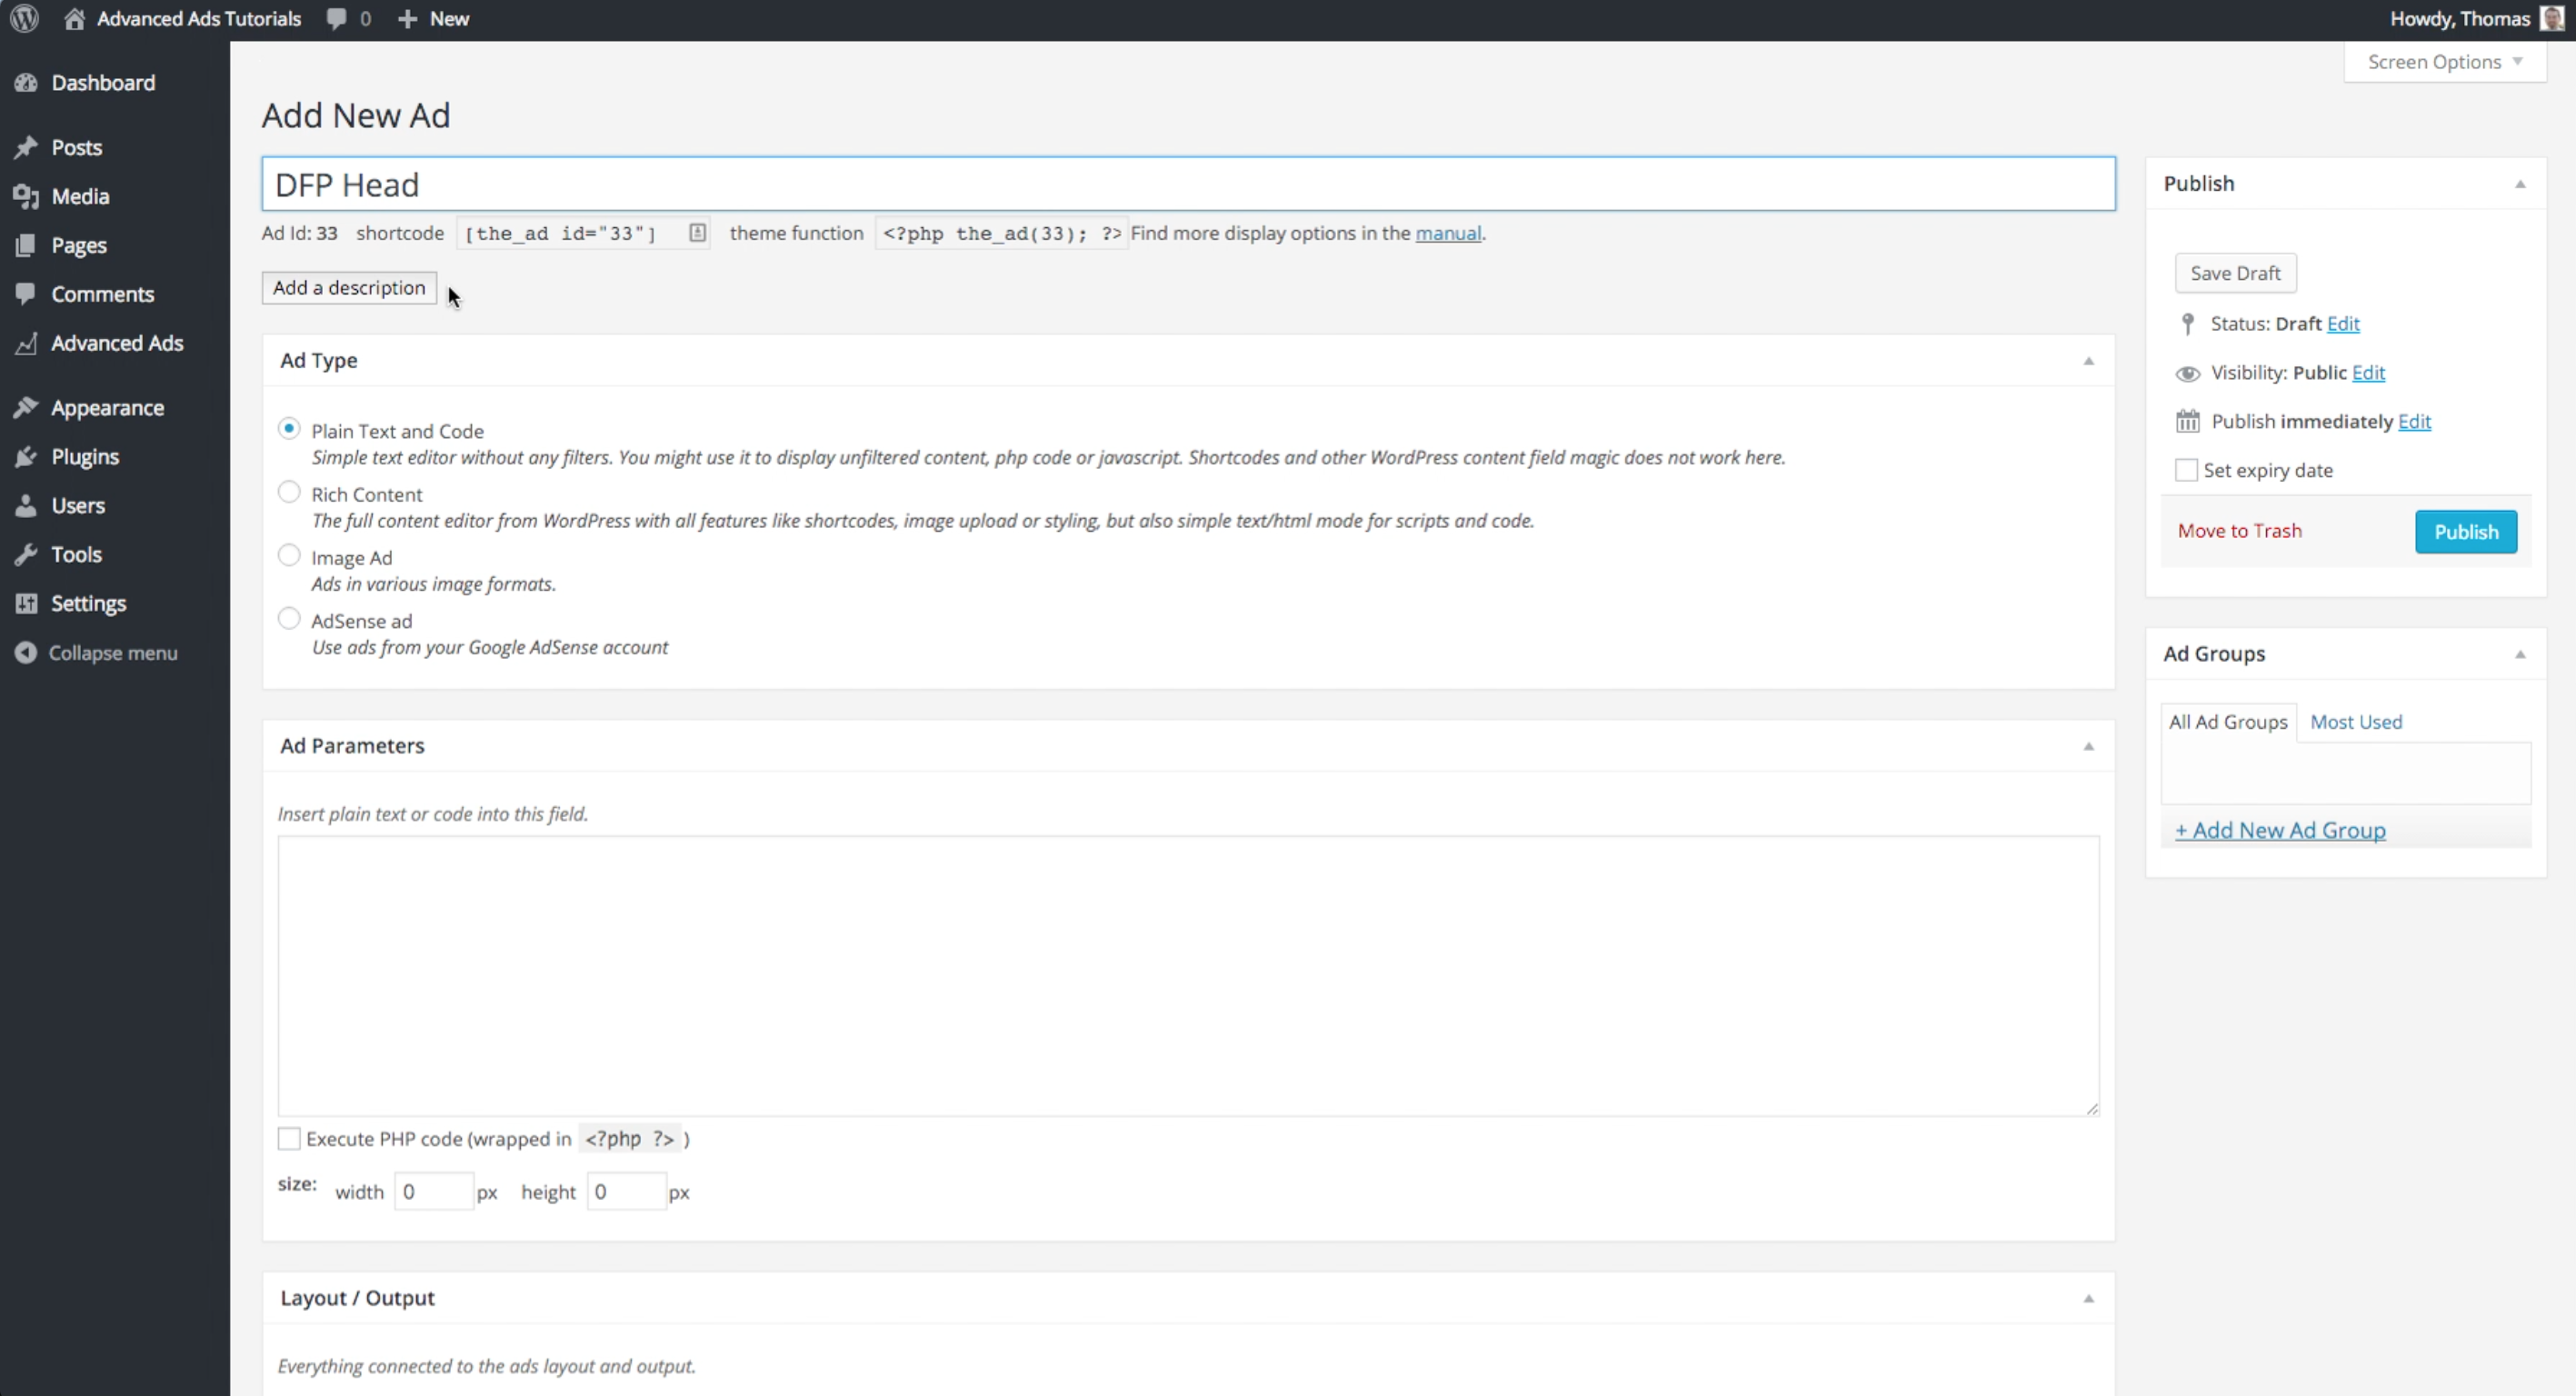 Create an ad unit for the header tag
Bring up the code again and copy the header tags from the code box and paste it into the box marked Ad parameters. Typically, you will not need to change anything else so you can publish that ad immediately.
Next, go to Placements on your dashboard and click Create New Placement. You will need to assign it to a particular type. The text you just copied was header text, so select the header type. Don’t forget to give it a name, then choose the ad or group and save.
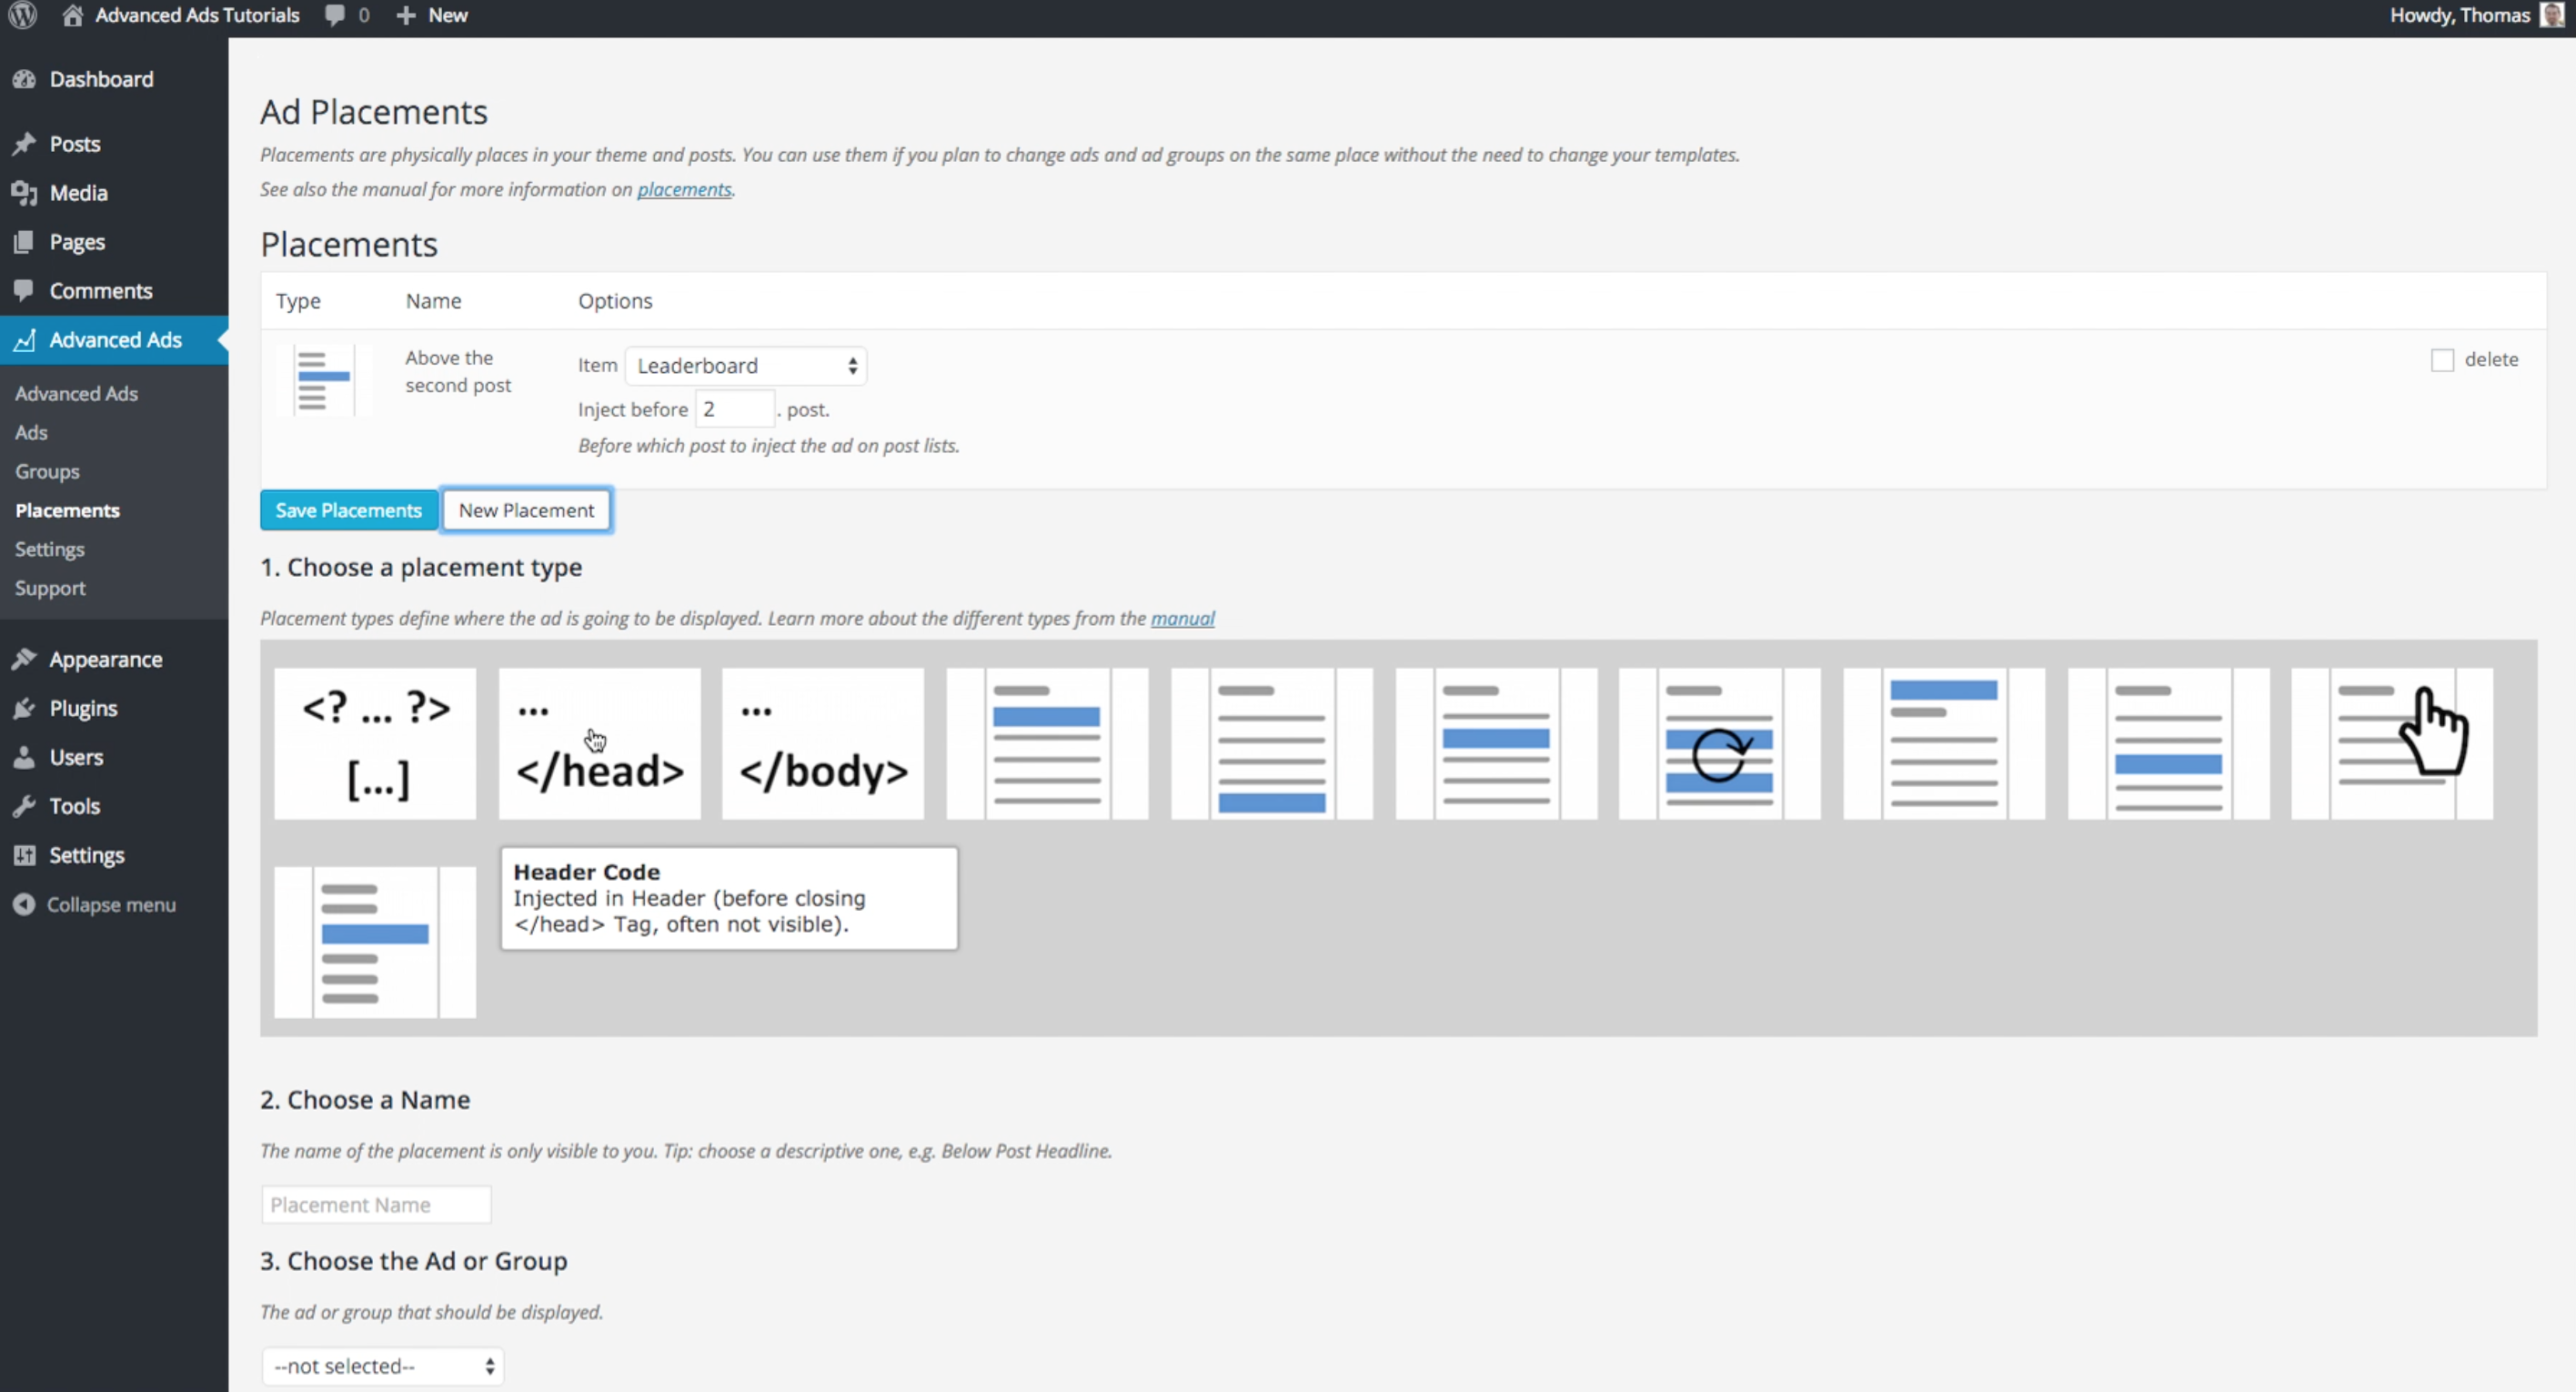 Choose the right placement for the DoubleClick tag
The header code should now be on the website.
Next, you will repeat the process for the ad codes and put them in the front end. Go to Add New Ad, give the ad a name. In this case, we call it “Skyscraper”. Copy the text from the ad code list – do one for each ad, copying only the ad text. As you can see in the image below, we have copied over the short tag’ referring to the skyscraper ad only. We place this in the ad parameters box in the WordPress client on our screen’s left-hand side.
We use fake numbers so we cannot show you how the ad should look, it is just an example.
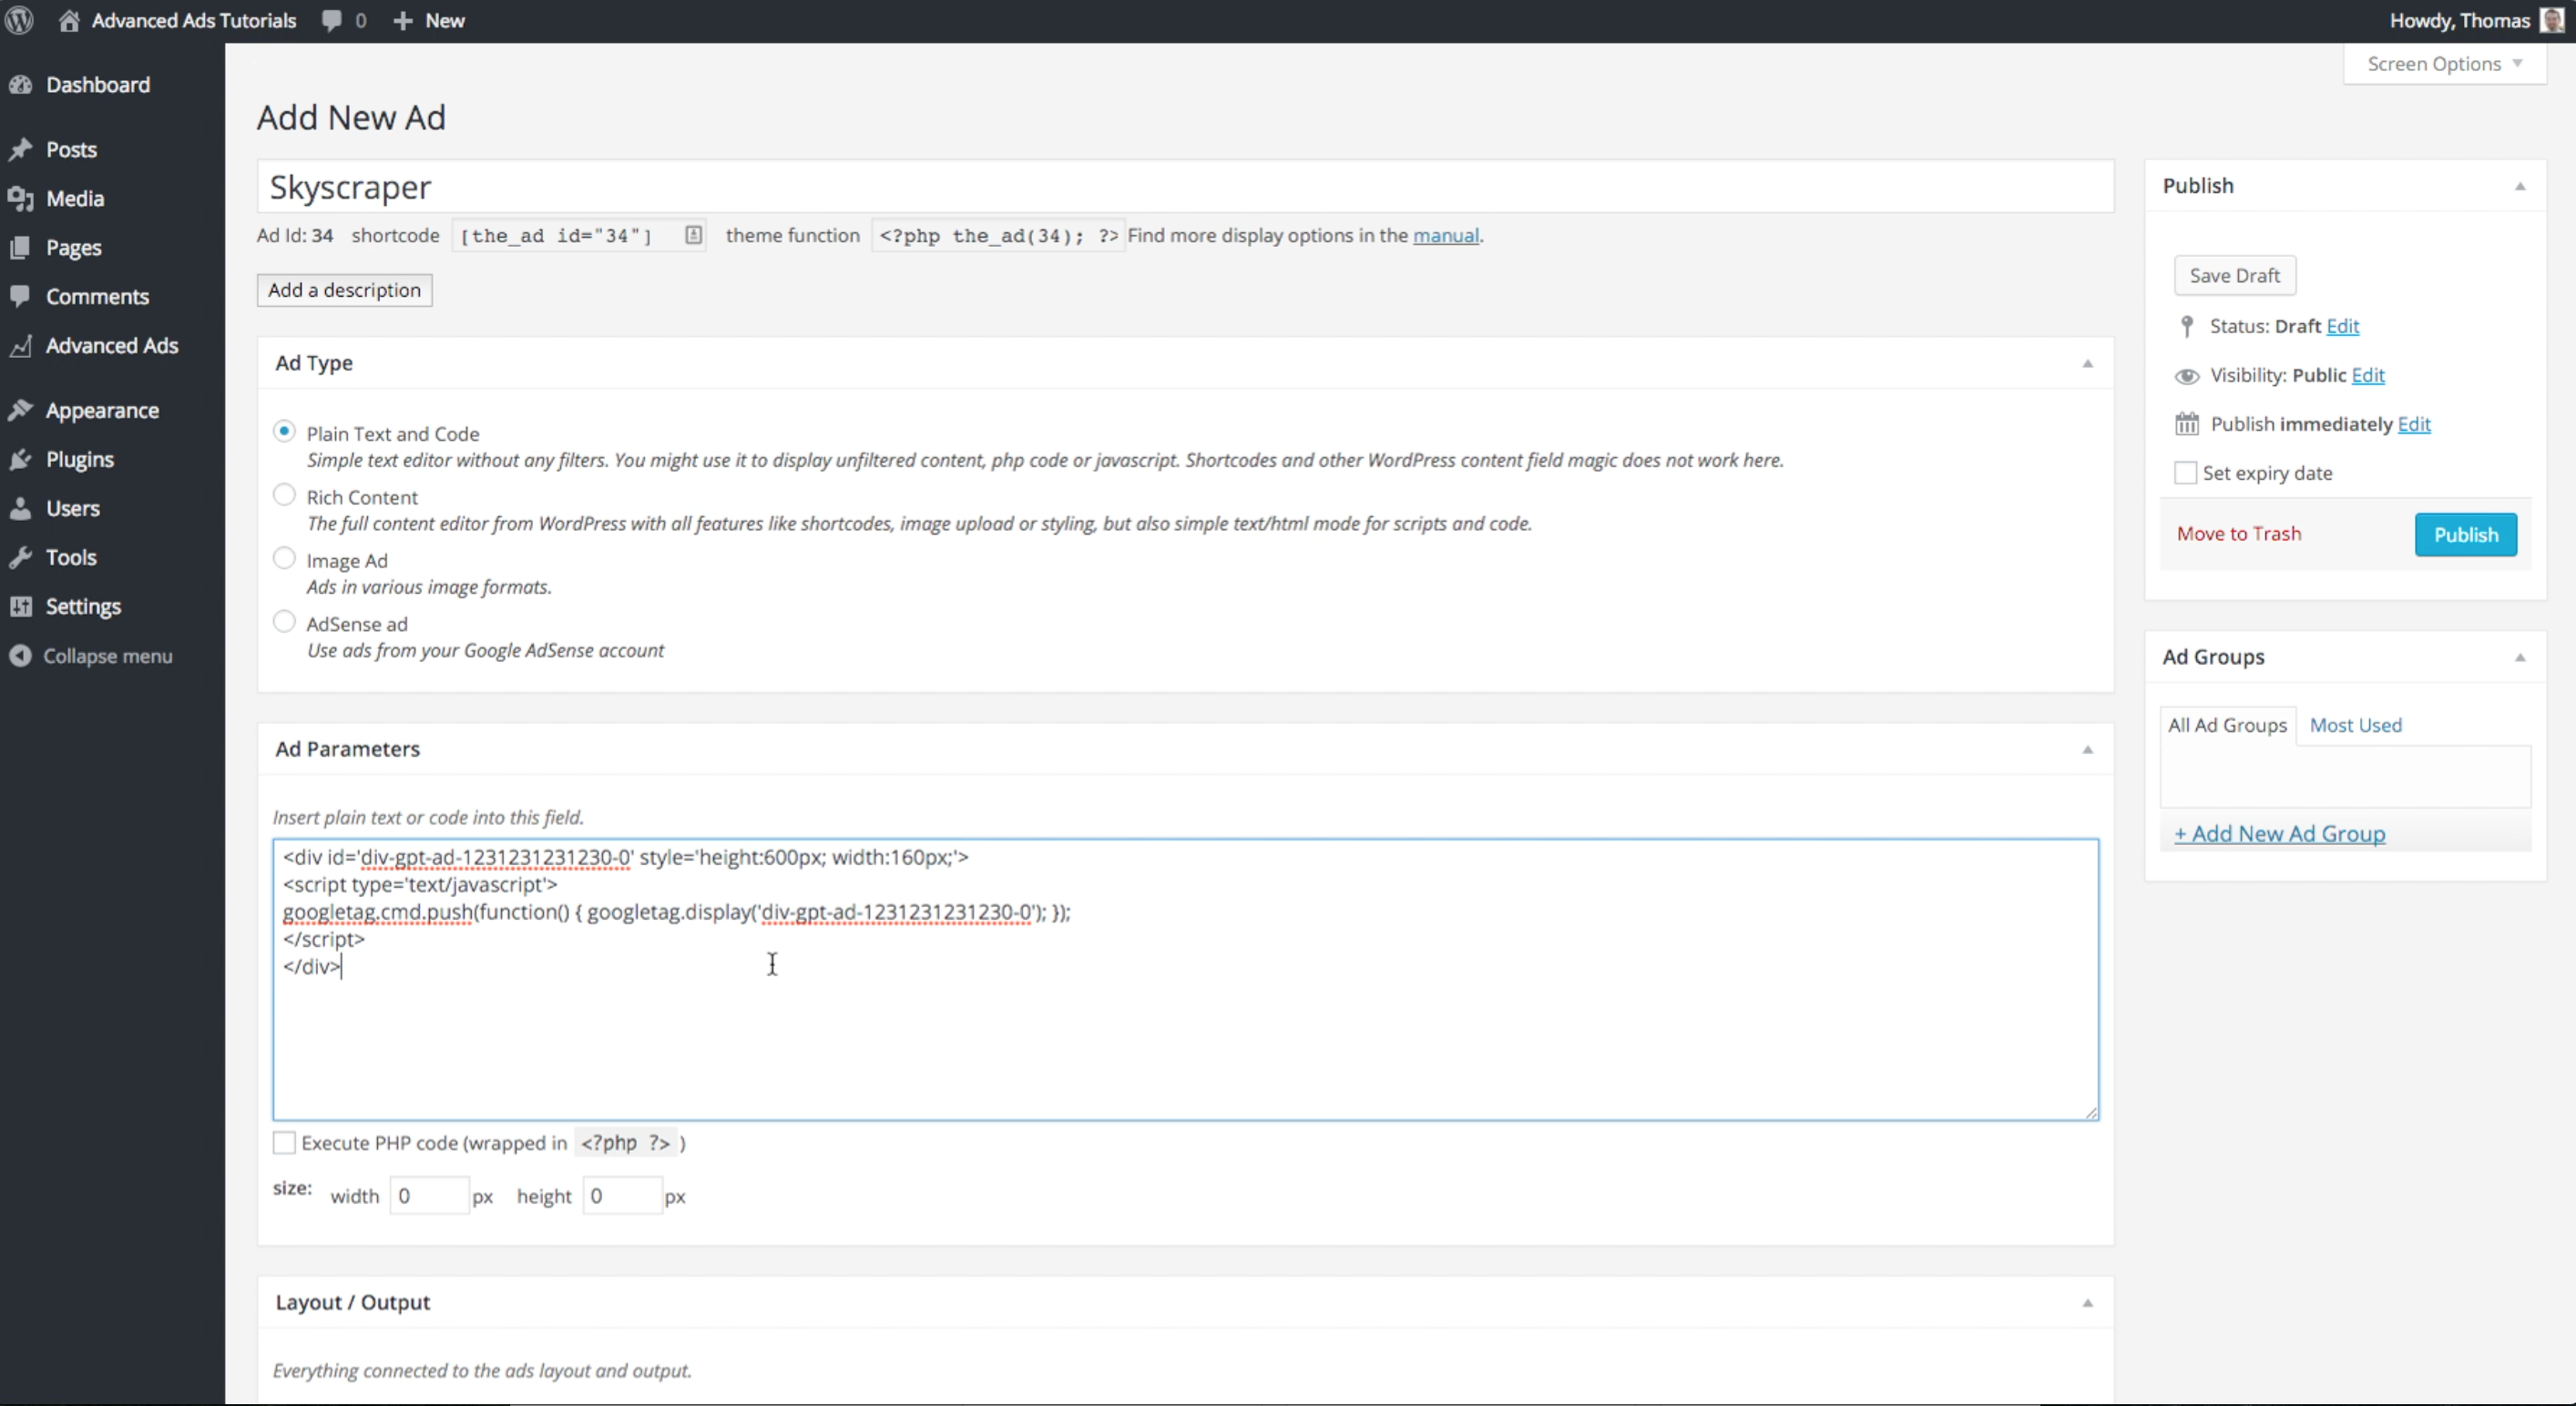 This is a typical body tag of DFP ads
Then click publish to complete the action. You should check the Google DFP ads on your website to make sure they look right. For example, you are placing them in the widget area of WordPress or on a sidebar or wherever else you are placing your ads.
Matching Header and Body Code
We want to take a brief moment to demonstrate a problem with DFP. Imagine you have just published an ad on your WordPress CMS. The header tags preload the ad content. Preloading is useful because when the ad content is added later, it loads much faster than it would if you would just load it as a separate ad.
The problem is that Google DFP believes when you preload the ad in the header content, that it ought to display it, which means they already count the impression in the DFP server. If you mix up the numbers, you will see nothing. Make sure the tags match between the ad ID in the header tags and the ad ID itself.
Selecting Locations
What if you want to display one ad on all websites but a second in only one location or a specific category? Not a problem, all you need to do is create two header units in Advanced Ads as described above.
Create one for the condition for both ads to be displayed, then a separate ad unit. For example, in the image below, we have created the header ad but removed the ad that will only appear in one place. Just one appears in the text.
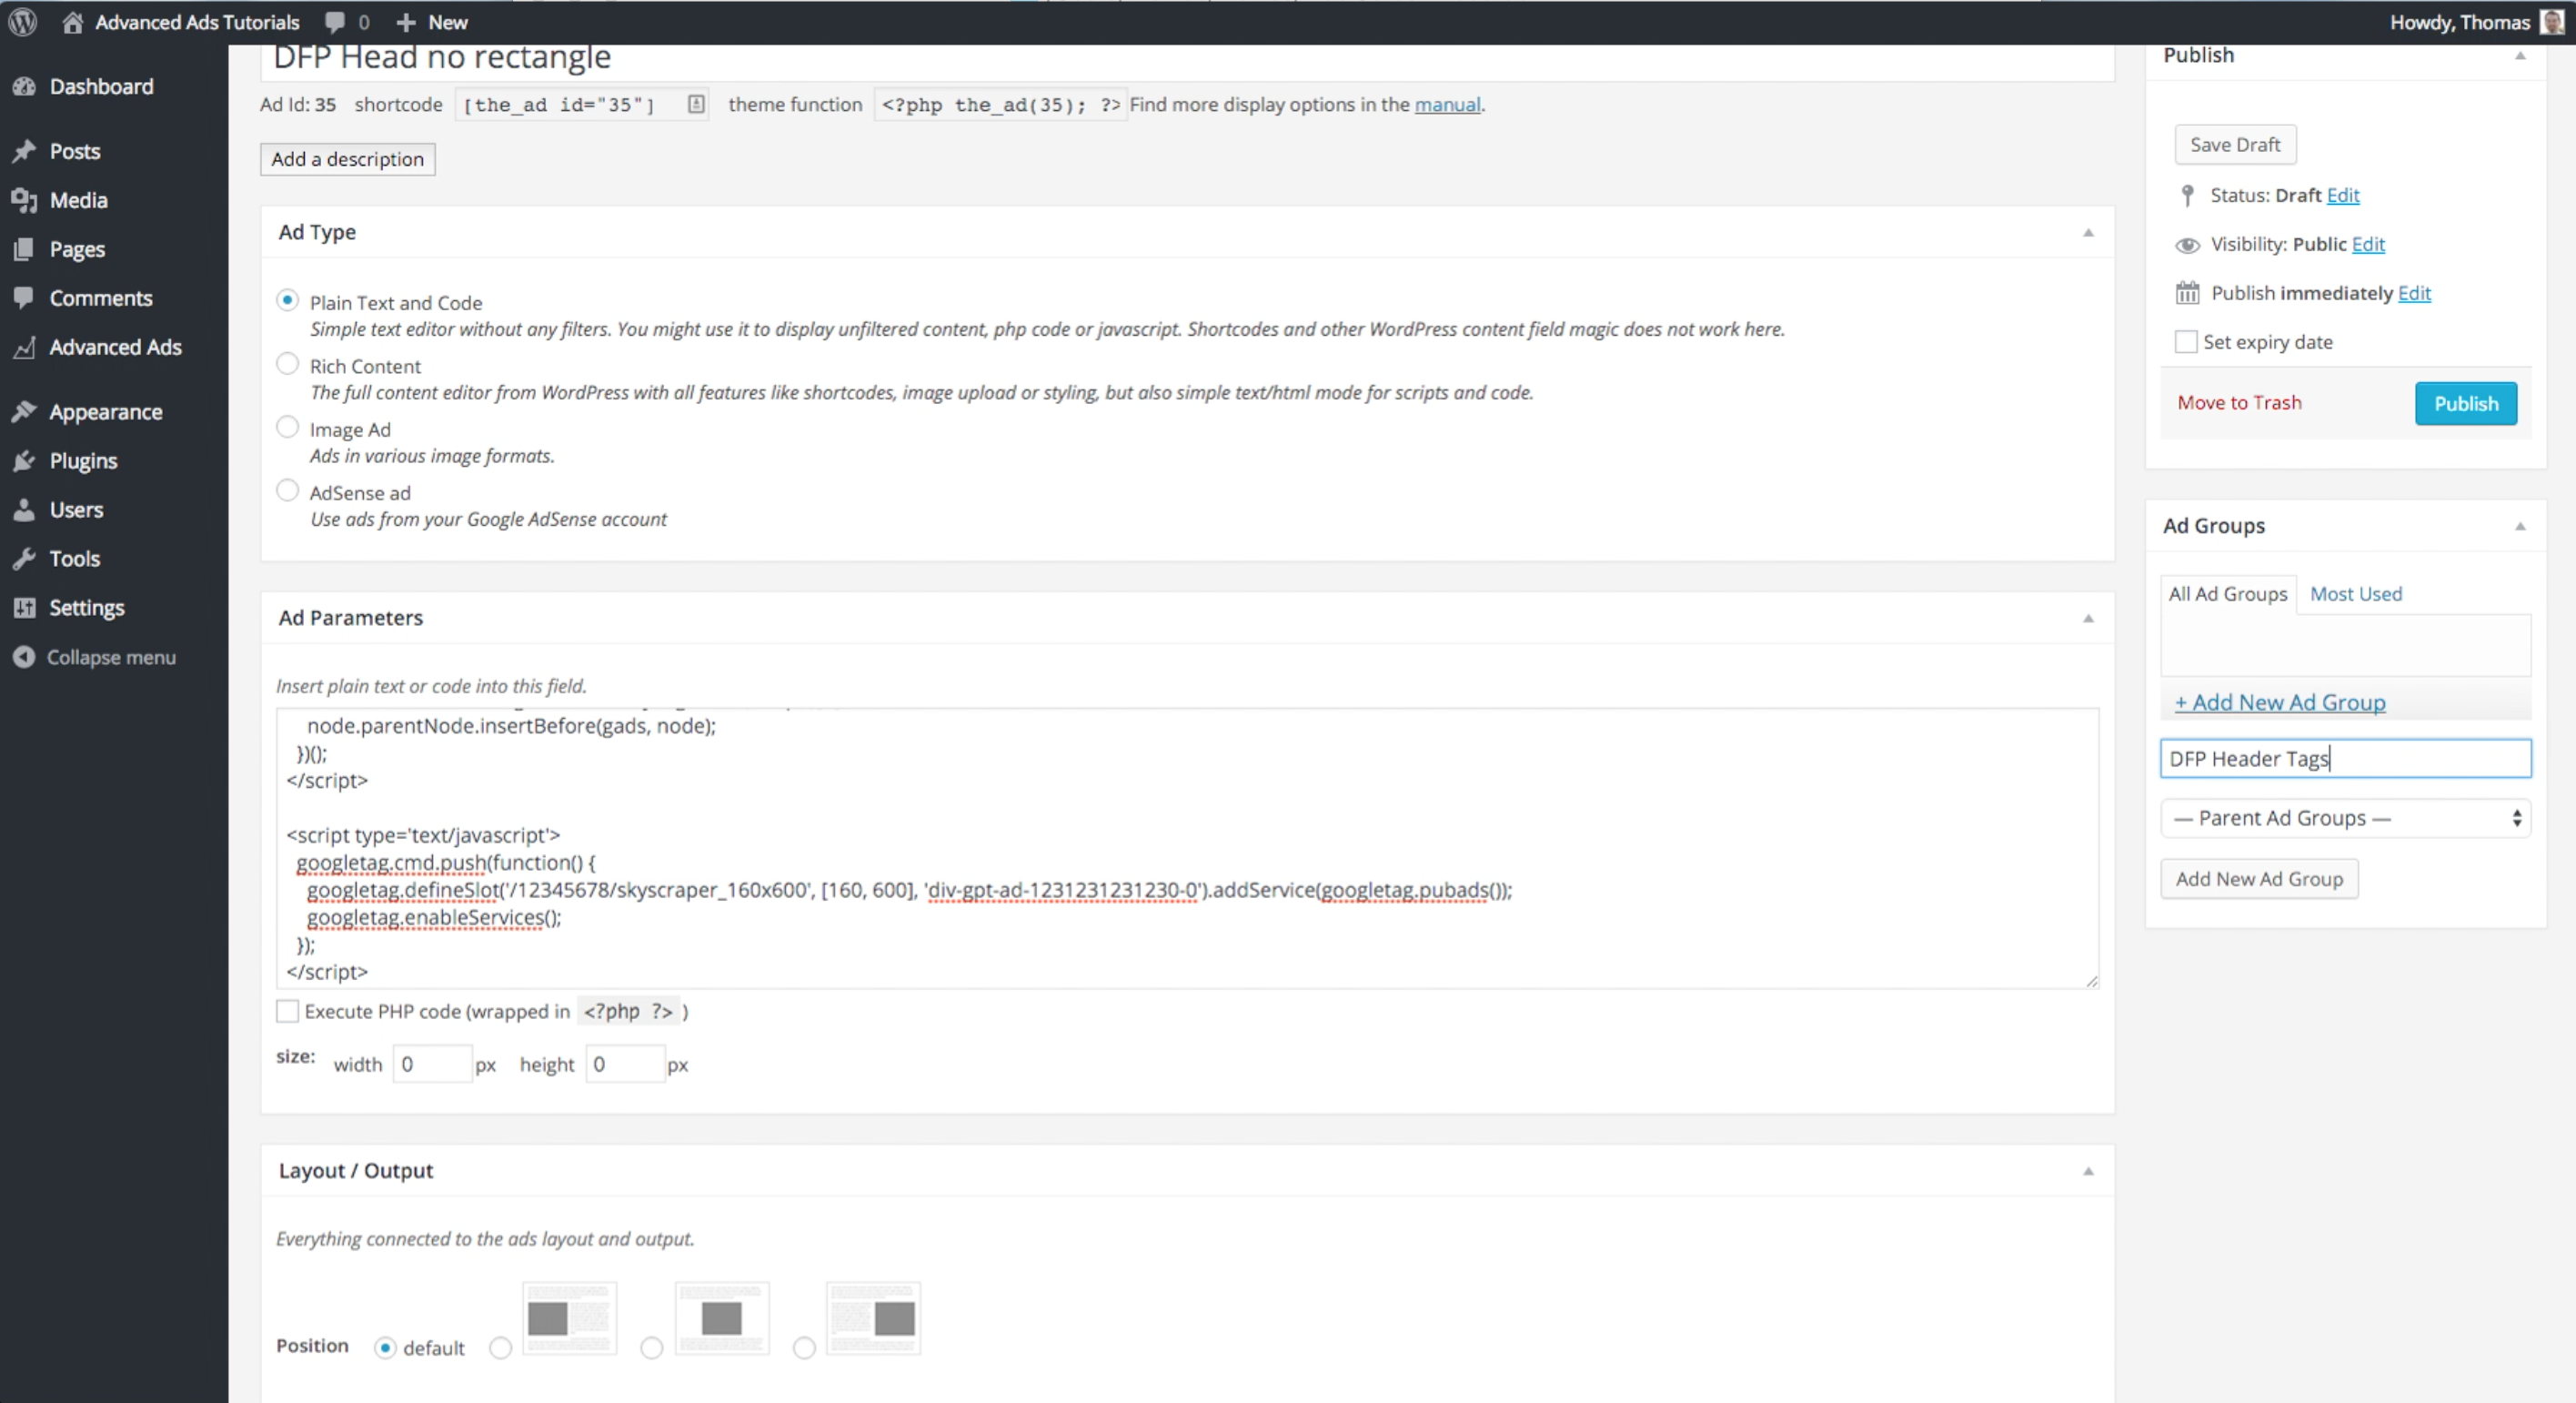 Add this ad unit to an ad group
Before publishing it, create a group. You can find this option on the right of the image above. Enter the text into the Ad Groups field. Return to any other ads and add them to the group you just created (if necessary). Then go to Placements in your sidebar and under DFP Header change the option from ads to the group.
Adding the header tags to a group ensures that only one header is selected at any one time.
Next, create a group for the ad that you want to appear only in one place. Don’t publish the group. Simply copy over the tags from the ad and then scroll down to Display Conditions. Change from Display Ad Everywhere to Set Display Conditions. A series of options will appear.
In our case, we have chosen to display in the “General” Category. So uncheck the “display all categories, tags and taxonomies”, as shown in the image above. When unchecked, it should look like the image below.
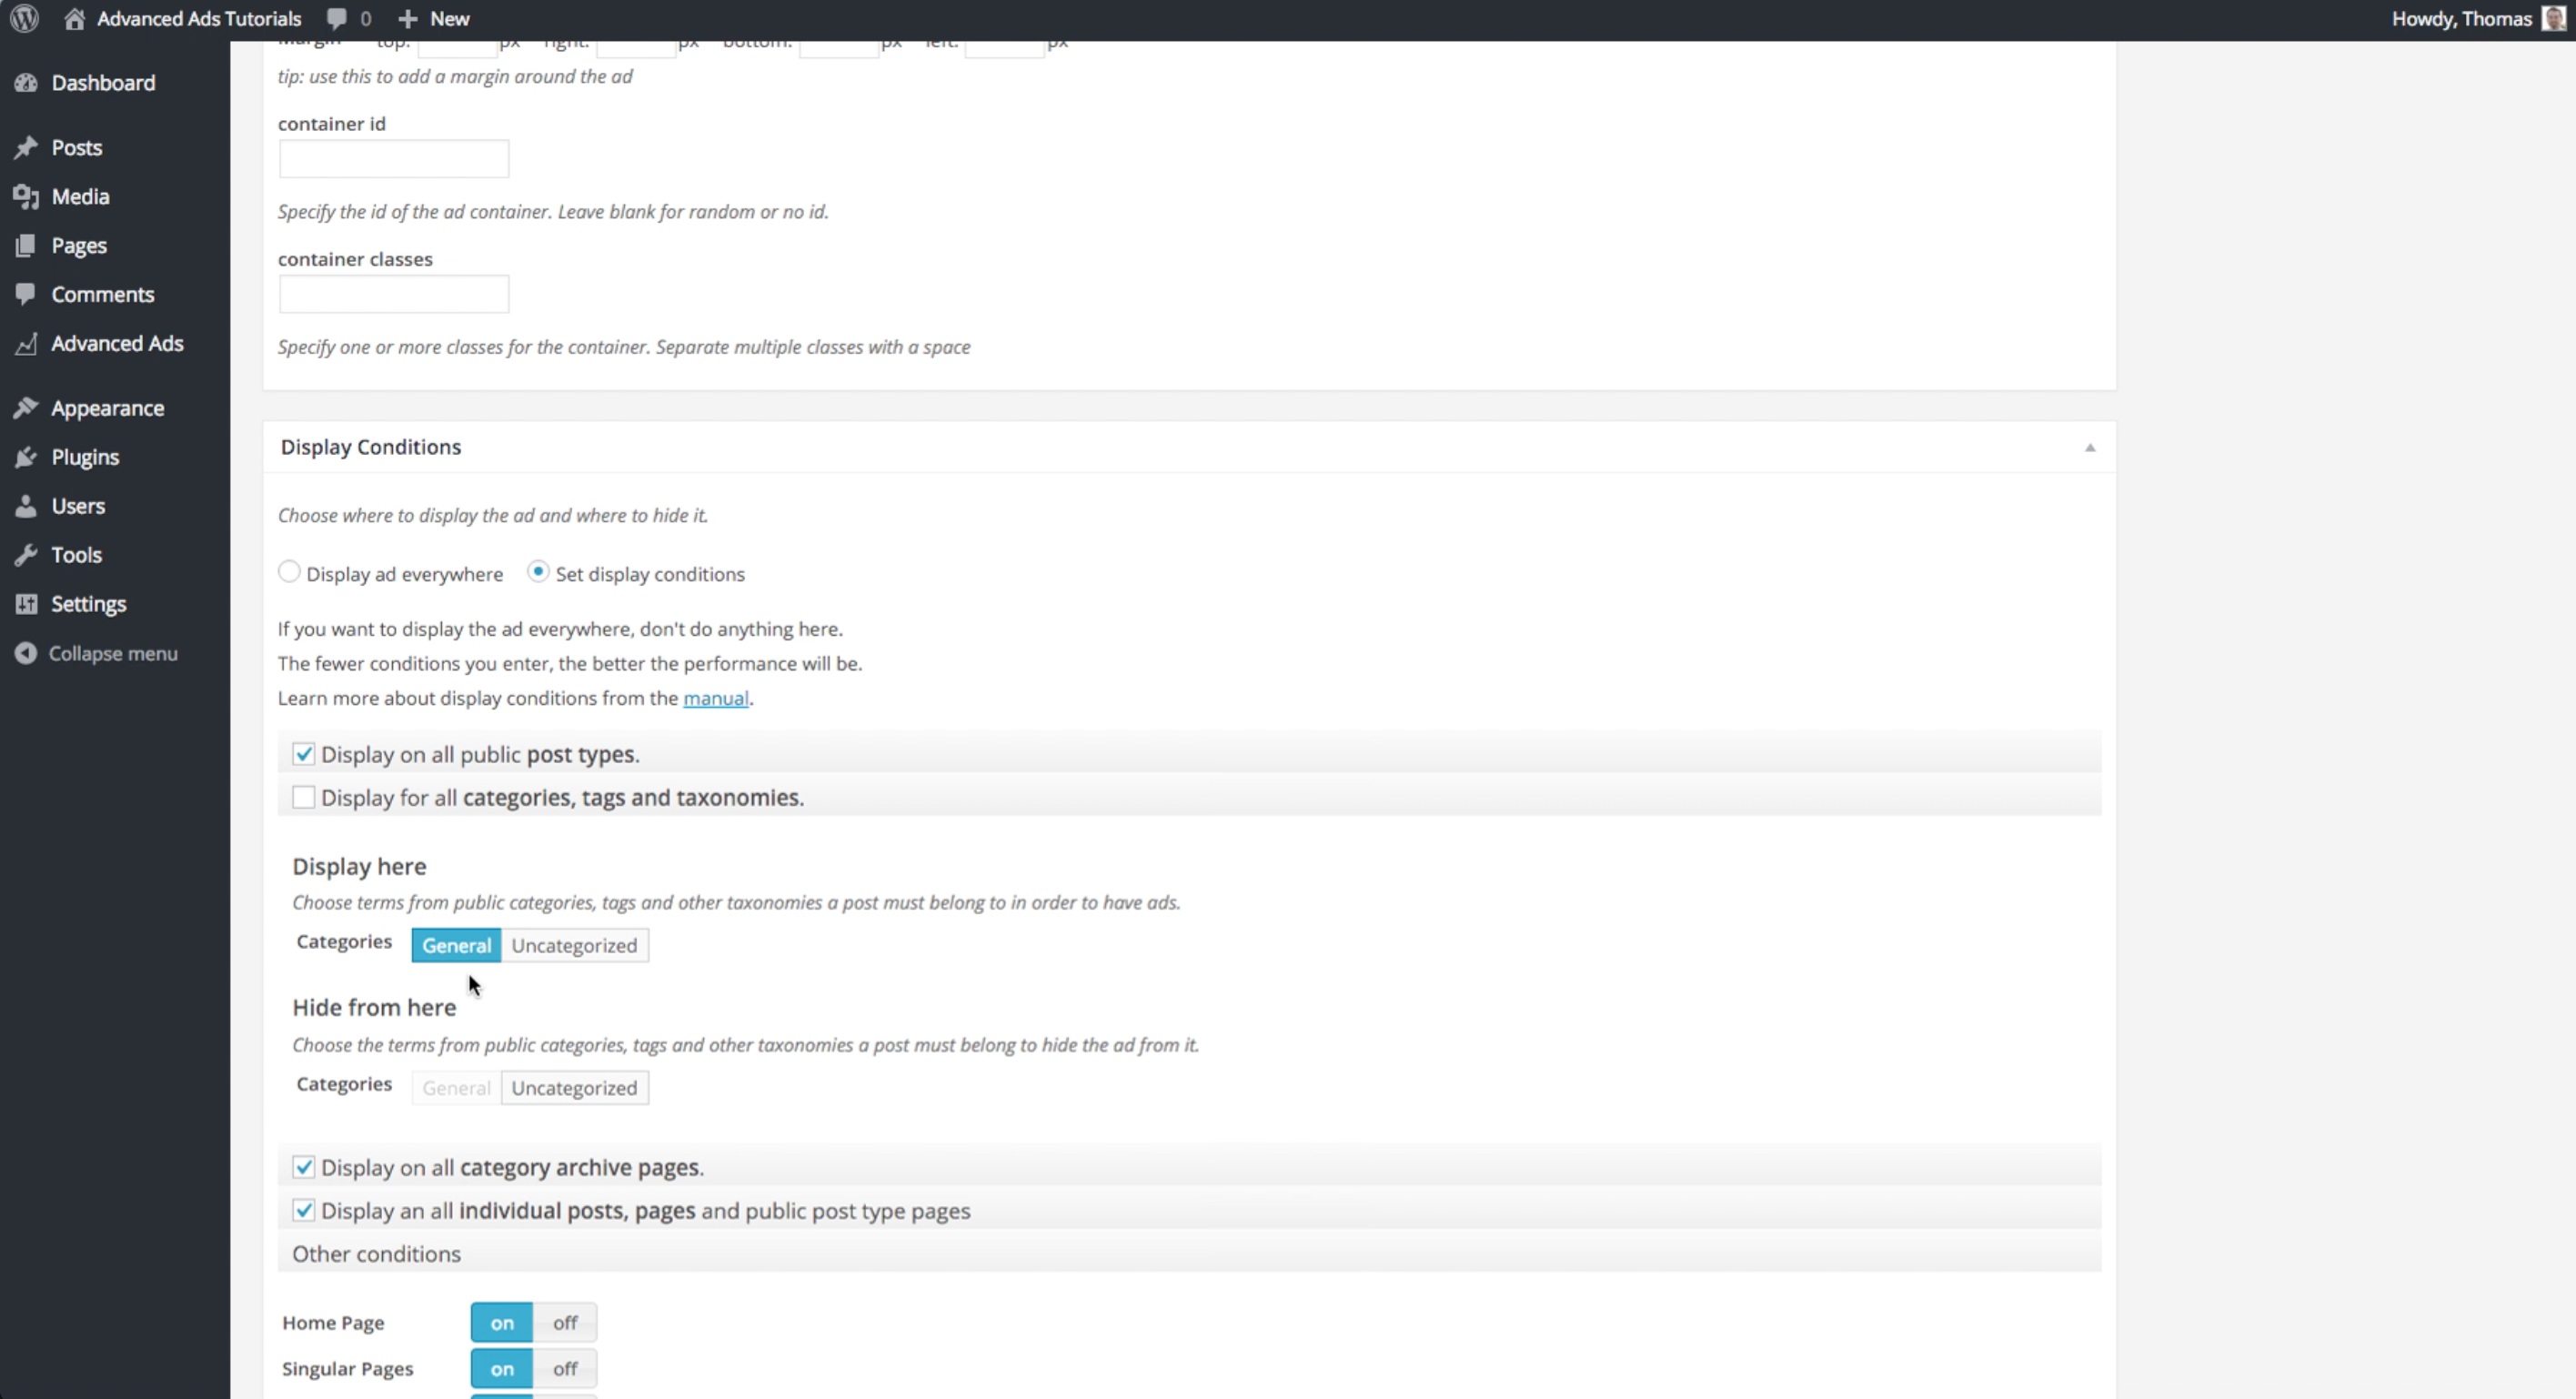 Use display conditions to limit the injection of the DFP tags
Click “General” or whichever category where you want it to display. Once you did this, you can publish the ad. By all means, check again that the ad is displayed correctly. But most importantly, you need to verify that the group does not contain the ad that you want to omit. Go back to the ads and double-check.
Note: Ensure that the header also has the same display conditions
Defining the Order
Go to Advanced Ads > Groups
In the image below, you can see on the right-hand side under “ads” an ordered list. It is crucial to ensure that the header code with the most restrictions loads first. We use the second one with the two ads as a fall back should anything not function properly.
Check the one with the conditions. Click edit on the left-hand side, and the screen should look like this.
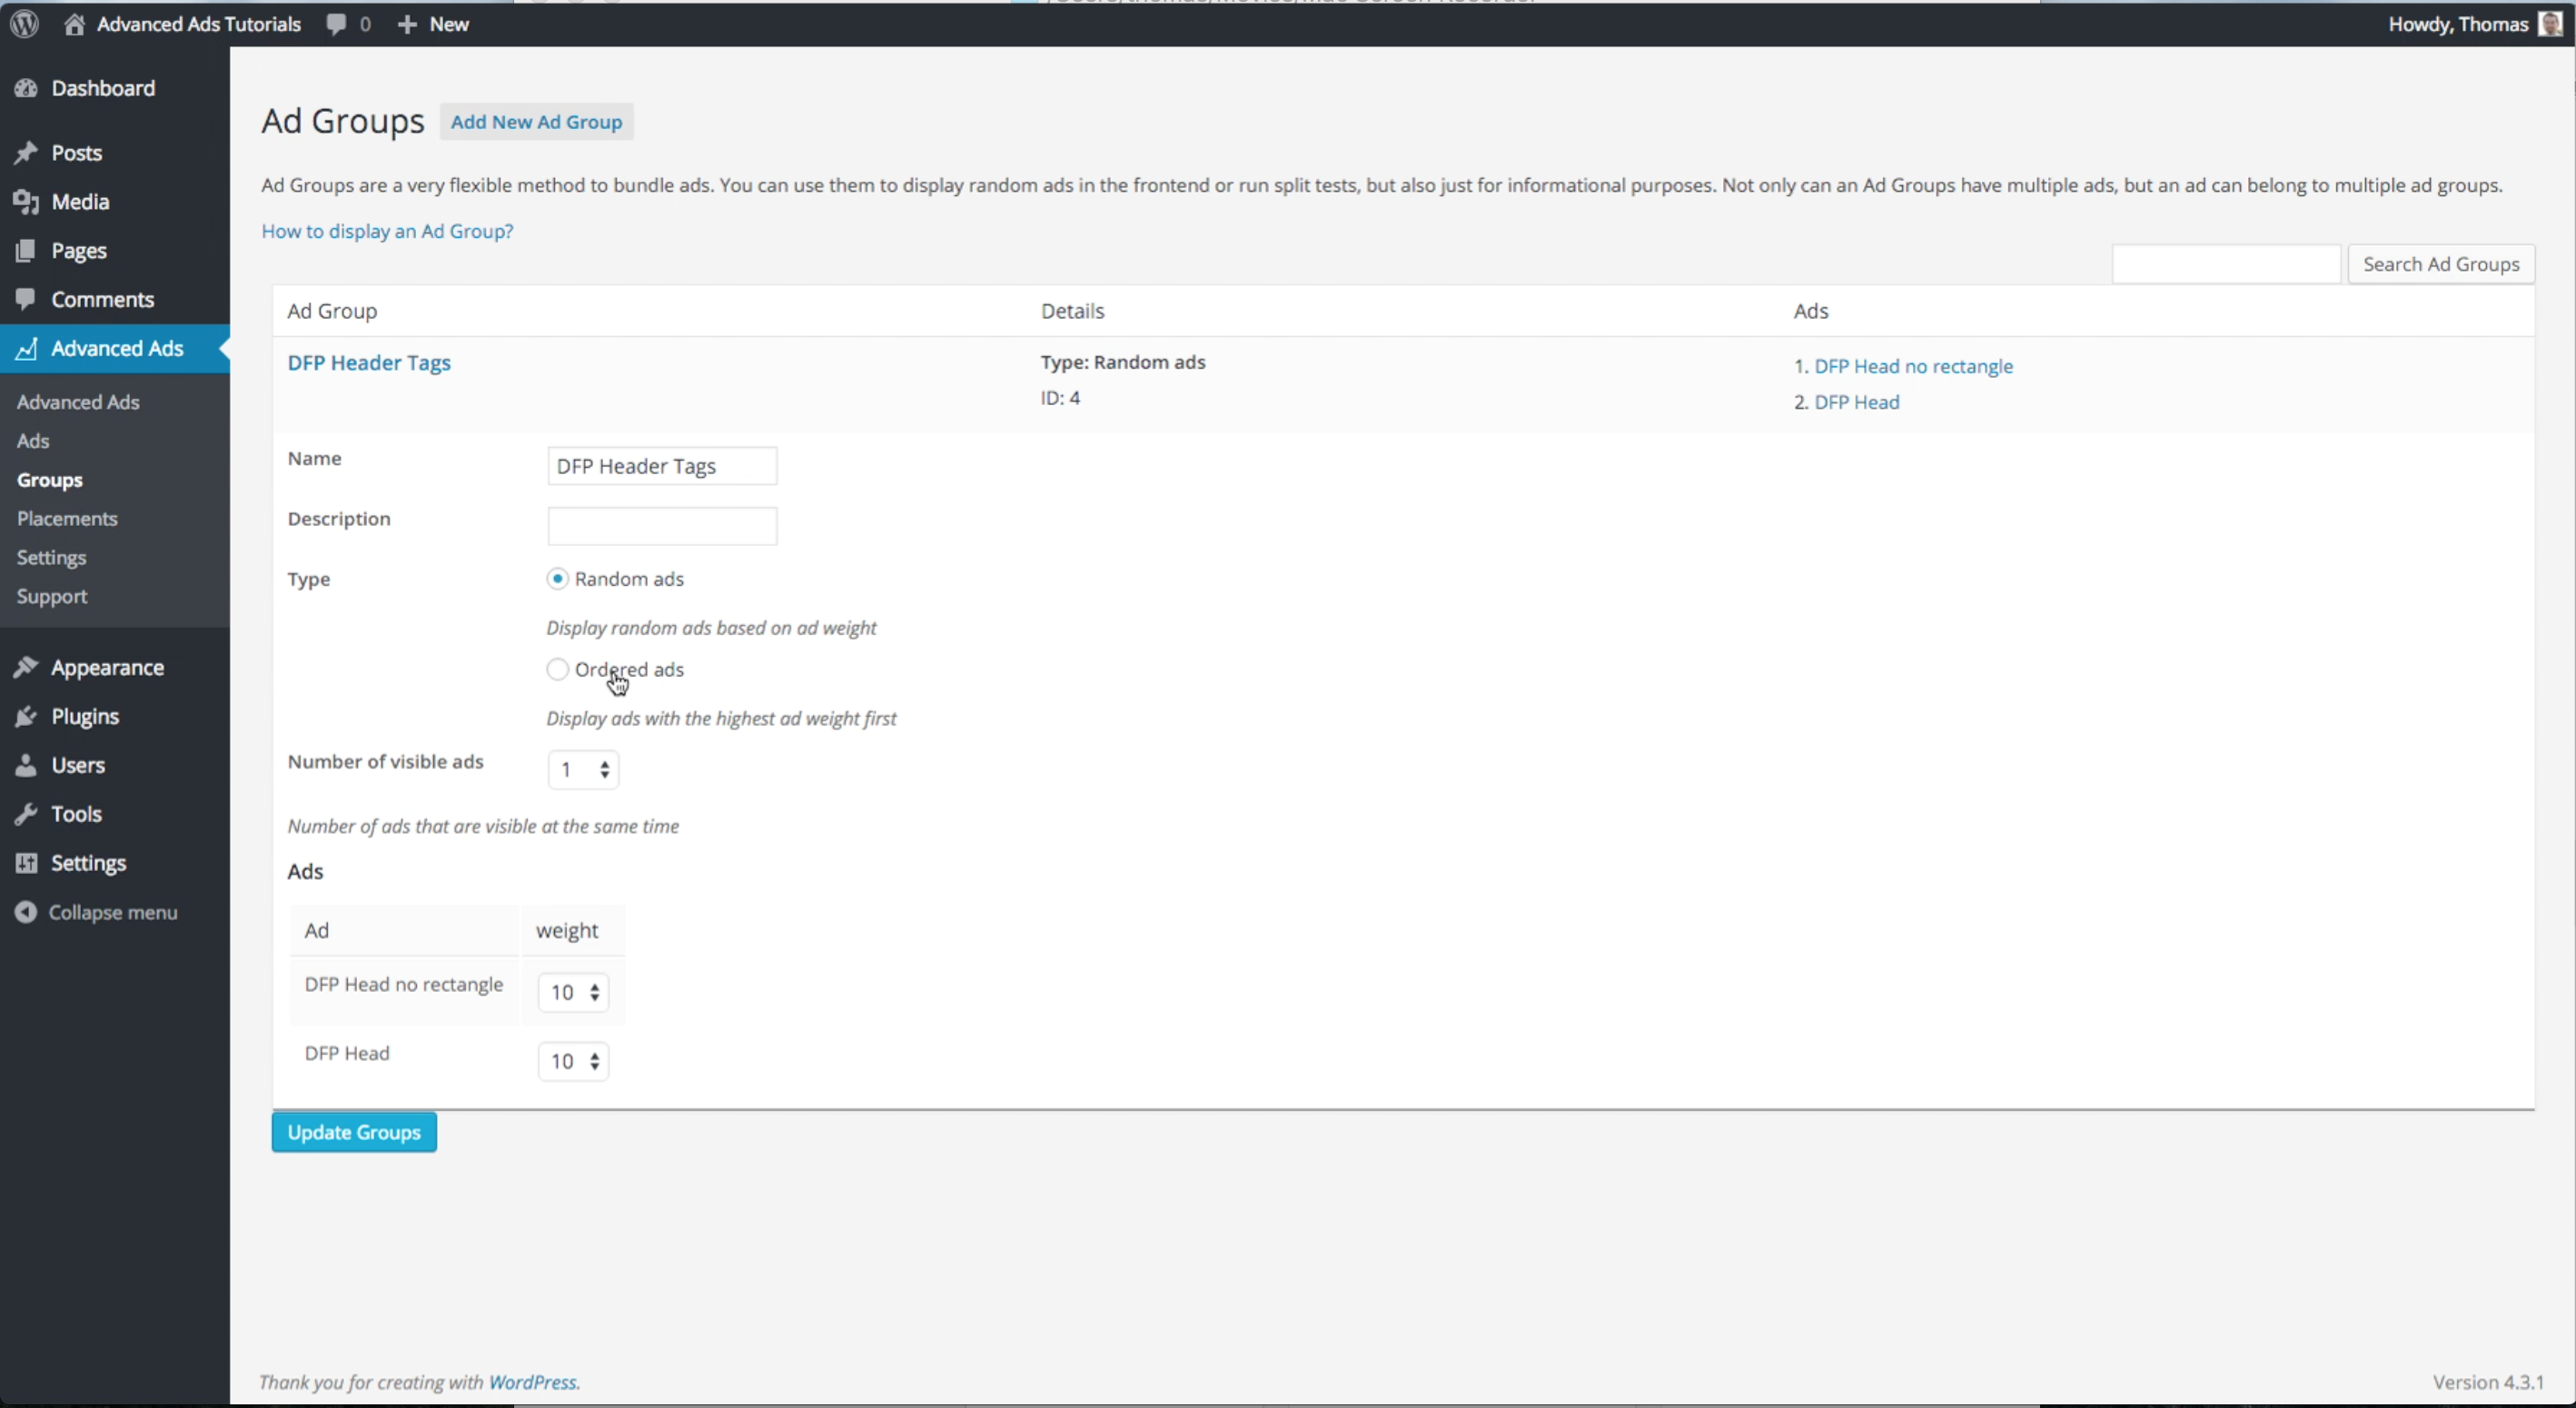 Ad group with different DFP header tags
Click on Ordered ads. At the bottom of the screen, you will see that the ads are ordered. In the image above, both ads have an ad weight of “10”. We only have two options, so we set the one that needs to be checked last to “9”. It is DFP Head on our list. The highest number always runs first. Anything set to “1” will always come last. It is important to remember this.
Then save it, and you are don
Debugging DFP ads
Especially when getting started with Google DoubleClick, ads sometimes stay blank for no apparent reason.
In this case, publishers might not know whether it is related to the setup in DFP or Advanced Ads. Therefore, we introduced the “debug DFP ads” item in the “Ad Health” menu in the admin bar in the frontend.
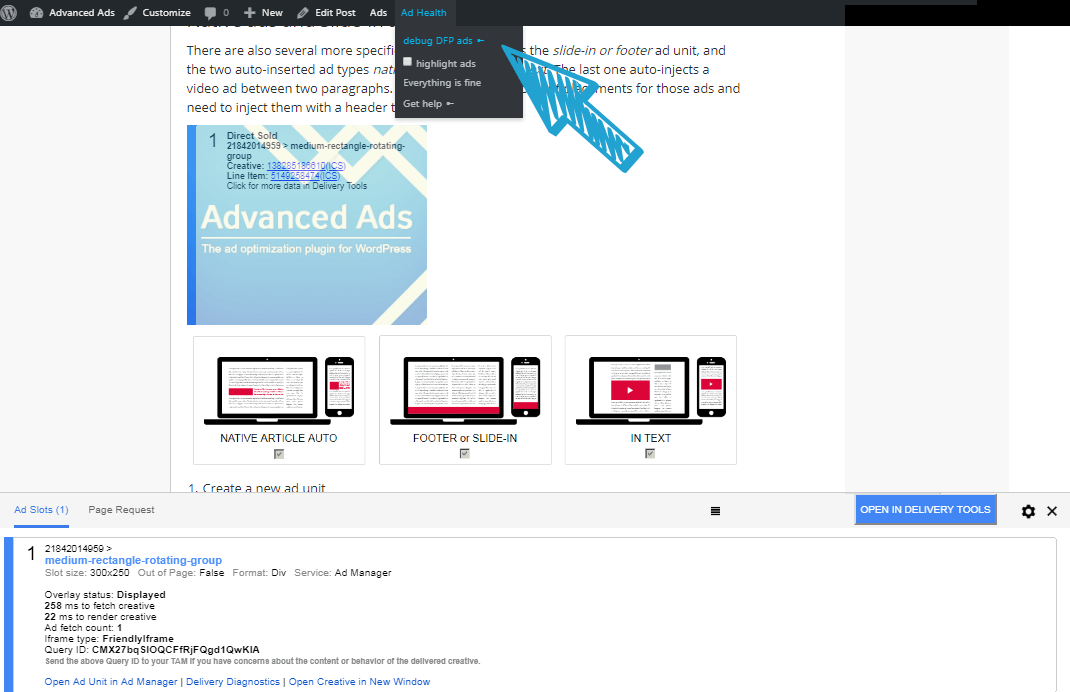 The Google DFP debug mode
When you click on it, Advanced Ads adds the googfc parameter to your URL, and reloads it. If you implemented the DFP code correctly, you would see overlays and additional windows on the screen. If you don’t, there is a problem with the implementation through Advanced Ads.
The DFP debug output will stay visible to you until you close it.
Conclusion
The best way to use Google DFP is to have the same ad units on all sites. It’s easier if you have them in the header or sidebars. But in some cases, you will need to break them up as we explained in the second half of the article, to create different ad setups.
This is to avoid the problem months later when you notice your click-through rates are lower than they should or could be. The problem is that your ad unit is counted too often, more often than displayed. It is a problem with Google DFP, but Advanced Ads can help you to solve it, as explained above.
Further reading

Starting in 2009, Thomas’ own word game website grew to 40 MM page impressions per month. He then built Advanced Ads to help his colleagues to place ads and test different ad positions and networks tests without any coding skills. Thomas now enjoys improving the product for our more than 150,000 users worldwide.