How to place header ads in your WordPress website
Many users asked me how they could place header ads into the upper part of their website. This article should cover all the options you currently have with Advanced Ads.
What is the website “header”?
Contents
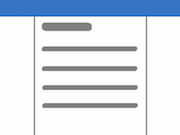
It depends on your theme what the header really is, but one could say that it is the upper visible part of your website that doesn’t change (much) on all pages. It often contains a logo or navigation. For wpadvancedads.com, I would consider the green highlighted area on the screenshot to be the header.
“header” vs. “head”
You might sometimes need to place an ad code into the “head” part of your website. You should not confuse that with the “header”. The “head” is the invisible part at the top of your website’s source code and no place for visible header ads. Some ad networks or servers like Google Ad Manager need to place code there that pre-loads content, which will show up later.
 headeThe head is not the header
Methods to place header ads
These are the basic methods to put an Advanced Ads ad into the header:
1. PHP function / Manual Placement
If you are familiar with PHP and know how WordPress themes are working, you can place the ad manually into the header of your site.
You can either use the function for an ad the_ad(), a group the_ad_group(), or a placement the_ad_placement().
I prefer to use the Manual Placement, because then you can go back to anytime to the Placements overview page to adjust the options or change the ads or group that should appear without touching the source code again.
To use the Manual Placement, go to Advanced Ads > Placements and create a new placement with the type that is represented by the following image:

Choose a name that helps you remember where you are going to place the ad and choose the ad or group that should be displayed if you created it already.
Now, open the template file with the header code in it. This is very likely the header.php file in your theme folder. From there on you must find your way to the position in the code where you want to place the ad.
You can get the PHP code for the placement by clicking on the show usage link on the placement page. However, I prefer the following extended version of that code to make sure that it doesn’t break your site if Advanced Ads is not available:
div {
overflow: auto;
}
.shcb-language {
border: 0;
clip: rect(1px, 1px, 1px, 1px);
-webkit-clip-path: inset(50%);
clip-path: inset(50%);
height: 1px;
margin: -1px;
overflow: hidden;
padding: 0;
position: absolute;
width: 1px;
word-wrap: normal;
word-break: normal;
}
.hljs {
box-sizing: border-box;
}
.hljs.shcb-code-table {
display: table;
width: 100%;
}
.hljs.shcb-code-table > .shcb-loc {
color: inherit;
display: table-row;
width: 100%;
}
.hljs.shcb-code-table .shcb-loc > span {
display: table-cell;
}
.wp-block-code code.hljs:not(.shcb-wrap-lines) {
white-space: pre;
}
.wp-block-code code.hljs.shcb-wrap-lines {
white-space: pre-wrap;
}
.hljs.shcb-line-numbers {
border-spacing: 0;
counter-reset: line;
}
.hljs.shcb-line-numbers > .shcb-loc {
counter-increment: line;
}
.hljs.shcb-line-numbers .shcb-loc > span {
padding-left: 0.75em;
}
.hljs.shcb-line-numbers .shcb-loc::before {
border-right: 1px solid #ddd;
content: counter(line);
display: table-cell;
padding: 0 0.75em;
text-align: right;
-webkit-user-select: none;
-moz-user-select: none;
-ms-user-select: none;
user-select: none;
white-space: nowrap;
width: 1%;
}
]]><?php if( function_exists( 'the_ad_placement' ) ){
the_ad_placement('PLACEMENT_SLUG');
} ?>
Code language: HTML, XML (xml) Be sure to replace the second line with what you find below the show usage link on the placement page.
Save the template file, and you are ready to make use of this placement.
In this manual, you can find some specially designed functions to be used in your frontend and theme files.
Child Themes
One problem you might run into with this method is updates of your theme. When you replace the changed file with a new version, your changes will be lost. So if possible, create a child theme for such manual changes.
2. Theme option
There are many themes out there that already provide basic ad placements and options to put content into a predefined position in the header.
This varies a lot from theme to theme, so I can only give general advice here.
Many themes already offer widget positions to customize typical header locations. If you use such a theme, choose the Sidebar Widget placement in Advanced Ads to insert ads or groups there.
Other themes offer options to place code at predefined (ad) positions. If the options allow shortcodes, create a Manual Placement like described under “PHP function / Manual Placement” and find the shortcode below the show usage link. If the theme option does not support shortcodes, but PHP then use the PHP code from above. Using the shortcode should always be the preferred choice.
If your theme provides dedicated positions for ads but does not support shortcodes or PHP in the options, then use Custom Position as described in the next step.
3. Custom Position placement
The Custom Position placement lets you choose any position in your theme for your ads. It is the best way if you want to be the most flexible and are not experienced with coding.
This placement comes with Advanced Ads Pro and has this symbol:

There is a dedicated page in the manual which also includes a video on how to use the Custom Position placement.
If your theme offers a dedicated option to place code at a specific position and the methods described under “Theme option” do not work, then use the second option of Custom Position and place the static div container in the theme option to allow Advanced Ads to place an ad there.
4. Insert ads into Genesis Theme header
Many publishers are using the Genesis theme framework or a child theme built on top of this. The Genesis theme comes with many hooks that allow you to insert content on very different positions.
However, not all child themes offer an interface to make use of this, so I wrote the Genesis placement add-on.
This add-on offers a placement that allows you to target the hooks. They include a few header positions too, which you can test to move your ad to the correct position.
When choosing this option to place the ad in your website’s header, just look out for this placement symbol:

5. Sticky Header Bar
A very prominent and visible position to place an ad into your website’s header would be a sticky bar at the top of your site. This placement is above the other content and can scroll with the rest until closed by the user. It has the best performance data from all positions.
With our Sticky add-on, you can create such an ad. Just look out for this placement:
Is the header a good ad position?
Finally, I would like to share my opinion as a publisher and consultant about the header position.
If you are using performance-based ads (where you get paid for clicks or other actions), the header position is a sub-optimal placement. The reason is simply that people are interested in the content of your site, not the header. They also quickly learn which elements are there and don’t look at this position anymore. An exception from this is the method that I mention in #5 on the list above.
If you work with AdSense and check the active view stats, you might even find that this metric, showing how many times the ad was visible for a second, is quite low. The reason is that people quickly scroll down to see the real content. The smaller the device, the shorter the time spent on the header is.
The more new visitors you have, the better the performance of the header ads might be. It is also a good position for internal ads or those that don’t need to be clicked to earn your money. Some ad networks like their ads there too, despite the rather low performance.

Starting in 2009, Thomas’ own word game website grew to 40 MM page impressions per month. He then built Advanced Ads to help his colleagues to place ads and test different ad positions and networks tests without any coding skills. Thomas now enjoys improving the product for our more than 150,000 users worldwide.


