how to connect 2 4×4 posts together

Most DIYers and carpenters have some ideas of how to connect wood together with glue, nails, screws, and bolts. However, when it comes to splicing pieces together for structural purposes, we may admit to needing help. How to connect 2 4×4 posts together is a common question on many sites, so we decided to put together a helpful guide.To connect 2 4x4s use a half-lap joint secured with construction adhesive, two steel plates, and four to six 1/2″ or 5/8” through bolts. Posts that support roofs or platforms should lap between 20” and 24”, other structures should connect for 6” to 10” along the centerline.Reading: how to connect 2 4×4 posts togetherIn this guide, we’ll identify when to splice 4x4s and explain several current methods that are Code compliant. We’ll also identify and explain the strongest way to join 4x4s. By the end of your read, you should understand how to join 4x4s end to end, and when it is acceptable to do so.How to connect 2 4x4 posts together

When to Connect Two 4X4 Posts Together?

Contents

There are many reasons to join 2 4x4s together. Making a post longer, cut too short, repairing a post, building a longer piece for a skid, and post-to-beam connections are the most common reasons.

Extend Posts

Adding a privacy barrier or roof shelter to a deck is a frequent reason to make existing railing or deck posts taller. Extending fence posts to raise the height of the barrier is another reason to lengthen 4×4 posts.Two other reasons rest on transportation and availability issues. Carrying and connecting two 8-foot lengths is easier than transporting a 16-foot length, especially if traversing woodland trails. The availability of long 4x4s at many small suppliers is often limited due to low demand, making splicing a necessity.

Repair

Wood is susceptible to rot or damage. Repairing a 4×4 is usually easier than dismantling and rebuilding a fence, deck, or other structure. Especially if the post is set in concrete or supporting other pieces. Figuring out how to hold everything up while repairing the 4×4 may be more difficult than the repair itself.

Build Long Skids

Joining 4x4s for horizontal use instead of vertical use is done in a similar way. The orientation of the cuts should maximize lateral strength while preventing the retention of penetrating moisture. The stresses applied to the skid will also affect the type and orientation of the connection. A pull force versus a downward force affects the joint differently.

Post to Beam Connection

Fastening a 4×4 post to a beam or beam to a post can be done in a variety of ways depending upon the purpose and where the connection occurs. Using specialized brackets is a common way to secure pieces together and support a butt joint. A Mortise and Tenon connection will look better but may not provide the necessary support strength due to the dimensions of the wood.

Carpentry and joinery are ancient trades packed with specialized terminology and tools. A scarf joint is any connection where two pieces of wood overlap or lap flush in the same grain direction. Connections must withstand vertical and horizontal forces or stresses, so it is important to consider those when choosing a joint. Strength and resistance to compression or tension can be improved with glue, straps or plates, and bolts.There are a number of popular ways to connect two 4x4s together to extend their length, some are easier than others. It is advisable to check local Codes for any requirements and have a Structural Engineer check it, especially if it will support or cover people. Additionally, any cuts or holes into treated wood should be painted with an end-cut solution containing Copper Naphthenate or Sulfate.Pro Note: When using untreated or galvanized metal on pressure-treated wood it is recommended the contact surfaces be protected with bitumen tape. The tape helps prevent corrosion, and seals against moisture. Always use stainless steel or coated fasteners with pressure-treated wood. Hot-dipped galvanized will last longer than untreated steel fasteners, but stainless will outlast them all. If near saltwater, stainless steel bolts and plates are better than hot-dipped galvanized ones.

Butt Joint With Steel Plates
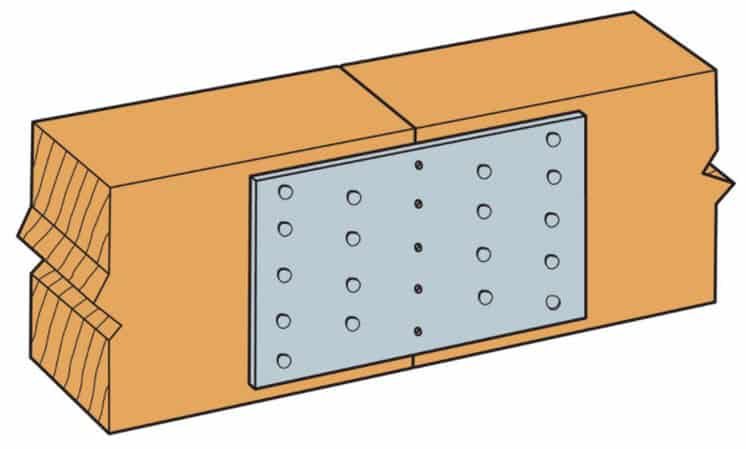
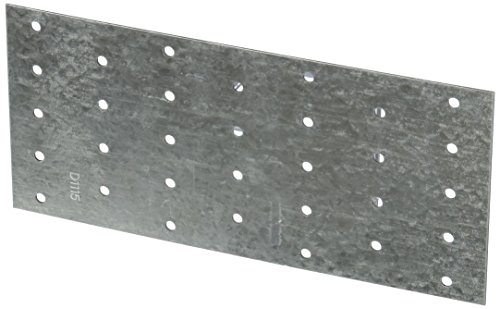
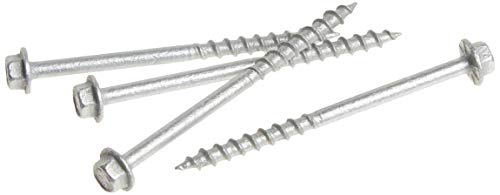
Joining 4x4 postsThe simplest way to connect two 4x4s is with a butt joint. Trim the ends to be joined so they are square and smooth. Any angle, however small, can act as a shear line, and a smooth flat surface makes for a better connection.If attaching a 4×4 to extend an existing one or replace a damaged section, the work needs to be done where the initial post is. To connect two lengths to be erected assembled; it can be done on a flat surface like a floor, deck, saw-horses, or a table. Simpson Strong Tie Simpson Strong Tie TP37 3-1/8-inch by 7-inch Tie PlateThere are different lengths, widths, and thicknesses of steel plates or straps for use when securing a butt joint. Some are untreated steel, others are galvanized, stainless steel, or coated in ceramic or plastic. Plates may be predrilled like the Simpson Strong-Tie plates with staggered holes to prevent splitting; others need to be drilled for the fasteners. Two plates should be used to brace and reinforce opposing sides and to prevent buckling.To drill steel plate for 1/2″ threaded rod or bolts, mark where the holes need to be. Depending on the thickness, drill a pilot hole and ream the hole larger by increasing the bit diameter a couple of times. Opposing plates should have matching holes for through bolts.There should be two bolt holes for each connected piece. Most Codes require 1-1/2” between the edge of the wood and bolt hole, which doesn’t leave much space to off-set fasteners on a 4×4.For through bolts or rods, secure the plate in place with clamps, ensure posts align and are level, and mark the holes. Remove the plates and bore through the posts. Treat the holes with wood preservative, clamp the plates into place, put washers on the bolts and push them through the holes, add another washer, and thread on the bolts. Check the levels again as you fully tighten the bolts.To connect the Simpson Strong-Tie (SST) or other pre-drilled plates to the 4x4s, align and level the posts with the plates and clamp everything tightly together. Some plates have a mid-line set of holes that can align with the joint and still have enough holes for screws. Simpson Strong-Tie SD9212R100#9x2.5 Conn ScrewOff-set opposing plates by 1/2 the distance between rows of holes, that will make it easier to fasten them. Use appropriate fasteners like SST #9 x 2-1/2” structural-connector screws to attach the plates to the posts.Follow the manufacturer’s instructions or Structural Engineer’s recommendations for the screw pattern.Read more: how to clean rainbow flip flops leatherPros

  • Quick, simple, and easy to install
  • Good vertical strength
  • Staggered fasteners prevent splitting
See Also  Ice cream sims 4 cc

Read more: How to change entity crammingCons

  • Poor lateral strength
  • Difficult to align
  • Not aesthetically pleasing

Half Lap Joint

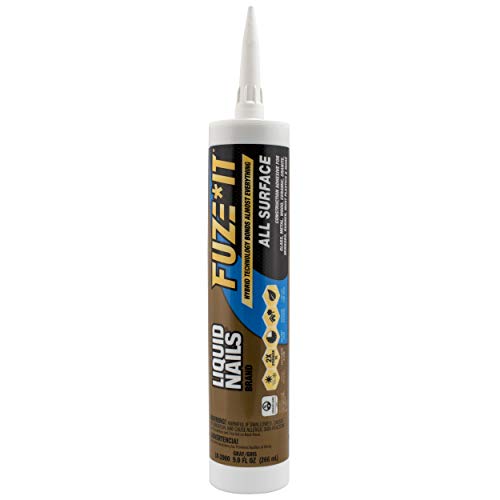
Connecting 4x4 posts together - Half Lap JointA lap joint, also known as a shiplap or half-lap scarf joint, has been used to join wood into longer lengths for more than a millennium. A half lap is a joint that overlaps by half the thickness of the pieces being joined for a less visible joint. It increases the wood to wood contact for a better connection and strength. The joint looks like a chair seat with a high straight back.To make a half-lap joint, measure to find the centerline of the two pieces and mark both sides at the end and near where the cut will end to form the seat. Measure from the end and mark the desired length of the cut and mark it on both sides and pieces. While the depth is always half, the length of the cut will depend on use and compliance with local building codes.There are several ways to remove the wood to do the lap; however, the lengths and location do play a part. A basic hand saw, hammer, and chisel, or all three have worked for centuries. Electric or battery-powered skill saws or reciprocating saws are a modern convenience that may make the task easier. I’ve seen a good hand sawer do up a set of half-laps in the same amount of time as a reciprocating saw, and with much more accuracy.If both pieces are moveable, lay them out on horses or a flat surface, and measure and mark them. Using the tools of choice, remove the necessary wood from both pieces to form the seat and back of the joint. If one piece is under a deck or still holding up a fence or railing, arm and headroom may determine which tool gets used.Careful and accurate measurement and cutting are needed so structural integrity isn’t compromised. Do not overcut either the vertical or horizontal cuts, or you create a shear line.What the pieces will support and your location will determine the length of the lap. Posts supporting roof or platform structures have different requirements than fence post or mailbox post extensions. A 10” lap with six structural screws or three 1/2″ or 5/8” through bolts will work for a privacy fence, while a 4” to 6” lap with 4 structural screws or two 1/2” through bolts will do for a mailbox post.Roof or deck post slices commonly need to be Code compliant. Some jurisdictions require posts to have a 24” lap with two 18” steel plates to sandwich the mid-section of the connection. Four 1/2″ or 5/8” through bolts secure the joint in a slightly staggered pattern that maintains 1-1/2” between the centerline of the bolt and the edge of the wood.Another locale requires the lap to be 22” long with five 1/2″ or 5/8” through bolts with washers. Check before you countersink bolts as some areas don’t approve it for structural 4×4 supports. The bolts need to be staggered and be 1-1/2” in from the edge, no closer than 3” to the ends of the lap, and 4” between bolts.Wind loads and other lateral forces may need to be considered when orienting the direction of the lap. A connection with cuts perpendicular to the force is stronger than those parallel to the stress. When splicing four corner posts to support a roof structure, it may be recommended to alternate the orientation of the lap. Liquid Nails 56198673380 LN-2000 FuzeIt All Surface Construction Adhesive (9-Ounce) , GrayTo further strengthen half-lap joints use a construction grade adhesive like Liquid Nails or Loctite PL Premium. They are rated for interior-exterior use, waterproof, paintable, and even cure in sub-zero temperatures. We suggest fitting the joint together and clamping it in place, and then drilling the holes.Separate the joint, apply the compound evenly, and then reseat the two pieces using several through bolts to hold the alignment. As the bolts are tightened, the viscosity of the glue makes the pieces want to slide out of alignment, making clamping difficult.Read more: how to clean rainbow flip flops leatherPros

  • Easy to make
  • Very strong vertical and lateral joint
  • Excellent long grain to long grain connection
  • Resists twisting
See Also  how to say i see in japanese

Read more: How to change entity crammingCons

  • Saw skill
  • Accuracy
  • Time-consuming

Dowel Joint

Lengths of 3/8” to 1-1/4” dowels can be used to add lateral strength to butt joints. Carefully measure to bore and align 1 to 4 holes in the ends of each 4×4 and drill the holes between 1” and 3” deep. Cut the dowels to lengths of 2” to 6”, sand the cuts, glue, and tap into place.Coat the protruding piece of dowel with glue, or pour some glue in the holes of the upper pieces, and push it onto the dowels. Tap into place with a hammer if necessary.Similar butt joint reinforcement connections may be made using two to four biscuits inset into matching grooves cut into the ends of the 4x4s. Alternatively, cut a matching groove in the butt ends and glue in a wooden spline. Dowels, biscuits, and splines all reinforce the alignment and provide some lateral reinforcement.The use of dowels for butt joints connecting light-use posts is often helpful. However, for structural purposes, attach two steel plates with structural connector screws or 1/2” through bolts to opposite sides of the joint is commonly required to add more strength too.Read more: how to clean rainbow flip flops leatherPros

  • Improve lateral connection
  • Inexpensive joint

Read more: How to change entity crammingCons

  • Difficult to vertically align accurately
  • May produce a shear fault

Butt Joint With Hollow Pipe Insert

A hollow 10” to 24” metal pipe, 1” to 1-1/2” in diameter, inserted into a hole drilled vertically into the center of the ends of the two 4×4 to be butt joined, provides additional lateral reinforcement. The pipe is secured into the vertical holes with construction adhesive. Two 1/2″ through bolts are inserted into the top and bottom post pieces in holes bored through the wood and pipe.Read more: how to clean rainbow flip flops leatherPros

  • Improved lateral resistance
  • Less visible connection
  • Strong vertical joint

Read more: How to change entity crammingCons

  • Special tools required
  • Post may twist out of alignment
  • The pipe weakens the lateral strength of wood

Modified Half Lap Joints

Connecting two 4x4 postsThere are numerous ways to modify a half lap. Some involve elaborate cuts and may even include a wooden key pin to secure the joint. The less complex joint retains the traditional parallel and perpendicular cuts and is easier for the novice or beginner.The interlocking half-lap connection has an additional ‘tooth’ or tenon cut into the end of the chair back of the lap. The ‘tooth’ has a receiving channel cut into the opposing base of the other post. The two post lengths slide latterly together, so accuracy is paramount. The joint is often secured with construction adhesive combined with 1/2″ or 5/8” through bolts with washers or steel plates.Read more: how to clean rainbow flip flops leatherPros

  • Strong lateral and vertical seam
  • Highly aesthetic joint

Read more: How to change entity crammingCons

  • High level of skill
  • Require more time

Interlocking Tapered Scarf Joint

Join two 4x4 posts togetherA tapered scarf or scarph joint is a diagonal joint cut on a 1:8 to 1:12 slope and is as old as the half lap joint. It is commonly found in beams, skids or other horizontal members joined together with wooden pegs or bolts and plates. The scarf joint requires some modifications when used to extend a post.A nibbed scarf joint has the pointed ends of the slope cut perpendicular to the outside face of the timber or slightly sloped counter to the scarf. It forms a flat end or seat with the long cut being sloped – it looks like a chair with a high sloped back. The flat end, coupled with the diagonal connection across the long grains improves the vertical or compression strength.When used to extend skids, the nibbed scarf often has a stepped slope called a hook. The hook adds another opposing plain against which lateral pull forces can ‘hook’ on. The hooked and nibbed, or nibbed scarf may also have a key or notch cut across the matching sloped faces to allow a wedge to be driven in to lock the joint together.For increased strength, apply construction adhesive to the cut faces and connect with 1/2″ or 5/8 inch through-bolts with washers or through the steel plates.Read more: how to clean rainbow flip flops leatherPros

  • Stronger than half-lap or butt joints
  • Withstands twists and bends
  • Strong vertical and lateral connection
  • Ideal for skid or post extensions
See Also  How To Gate Your Brand On Amazon

Read more: How to change entity crammingCons

  • Measurements accuracy
  • Cutting skill
  • More difficult than the half lap

Post Cap/Base Brackets
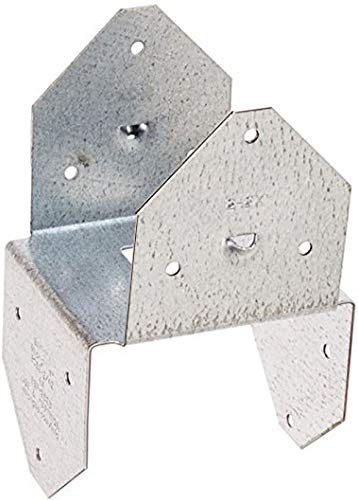
Simpson Strong Tie BCS2-2/4-20 18-Gauge Double 2x4 Post Cap/Base (20-Per Box)There are different metal brackets and sleeves that can be used to reinforce a butt joint between two 4x4s. The 12 to 18-gauge galvanized, powder-coated, or stainless steel post cap/base brackets, such as those from Simpson Strong-Tie Double 2×4 Post Cap/Base, provide a strong connection. Use structural connector screws, 10d common, or 1-1/2” #9 SST screws to fasten the brackets to the 4x4s.The length to be extended and its purpose determines if post ties or brackets should be used. Supporting a mailbox or light fence is more acceptable than using them to lengthen a post to support a roof or deck structure. The use of a bituminous membrane or paste between the wood and metal will help prevent moisture damage and corrosion of the metal.Read more: how to clean rainbow flip flops leatherPros

  • A quick and simple connection
  • Some vertical strength
  • Easy to install

Read more: How to change entity crammingCons

  • Weak lateral resistance
  • Not aesthetically appealing

What Is the Strongest Way to Join 2 4X4 Wood Posts?

Joining 4x4s together to extend their length can be as easy as a butt joint or as complex and elaborate as a keyed, double tenoned scarf joint. However, some cuts are better done where the timbers can be rolled easily and joints tested for alignment and fit. When working on posts under load or limited space, simpler connections are better.Our choice for the strongest and easiest way to join two 4×4 posts is a half-lap joint that is glued, plated, and bolted. Cutting a half lap into an existing fixed post is easier than all other cuts, except the butt joint. The two required cuts per post are simple and doable even with limited space.A glued, plated and bolted nibbed tapered scarf joint is stronger than a half lap but not as easy to cut in limited space. Although it too has two cuts per 4×4, accurate sawing is more difficult. The skill level and aesthetics of the finished joint influence the choice of connection. A poorly sawn joint won’t make for a strong connection.

Conclusion

The best way to join two 4x4s to extend a post is with a half-lap. The simple cuts make it ideal for a beginner or pro to make, and it’s easier to do in limited space. Adding glue, plates, and bolts increases the lateral and twist resistance to form a very strong connection.Hopefully, you have a better understanding of how to connect two 4x4s, and which joint will provide the strongest connection. If you found the guide helpful, please share it with others. As always, your comments and suggestions are appreciated.Read more: How To Wear Leg Warmers: Top 13 Style Checks

Last, Wallx.net sent you details about the topic “how to connect 2 4×4 posts together❤️️”.Hope with useful information that the article “how to connect 2 4×4 posts together” It will help readers to be more interested in “how to connect 2 4×4 posts together [ ❤️️❤️️ ]”.

Posts “how to connect 2 4×4 posts together” posted by on 2021-08-27 02:23:29. Thank you for reading the article at wallx.net
Rate this post
Back to top button