Instant pot cheese soup recipes
Creamy and thick! This cozy fall soup cooks up quickly in your Instant Pot.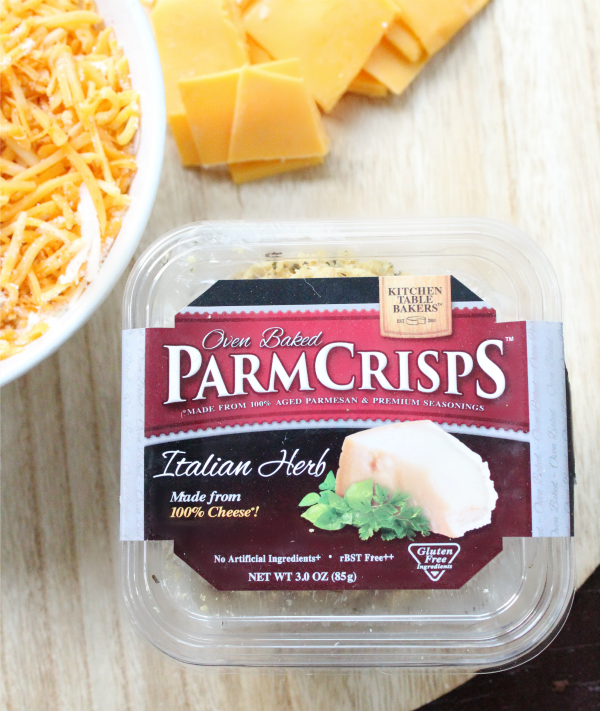 It’s only been a few months since my beloved crock pot fell out of favor and I bought a new Instant Pot. takeoutfood.finest is okay. Let me be more specific..Read more: Instant Pot Cold Meat Soup Recipe The first time I used it, great. Can’t consider how fast it was in making our dinner! However, in the next few times I used it, it was a bit buggy. In fact, most likely it’s about my other half. I’ve tried just a few recipes for the deformed pot function, and most of them don’t overheat. However, there’s a specific research curve to it, and I’m still working on that. I use the slow cook on it and it really works incredible! Also, I haven’t even tried the yogurt maker function yet but, nevertheless, once it’s done, I guarantee you will let you guys know how it works. ???? Definitely one of the recipes that I’ve made many, many times, in my Instant Pot with pressure cooker is this soup. choice. Hope you guys don’t takeoutfood.finest simply really like cheese at my house. ???? So our soup has 4 cheeses. 4! Then we sprinkled the black pepper with some crushed Italian Herb ParmCrisps. Read more: Best soup recipes for vitamix Plus, they’re also 100% cheese and gluten-free! Have fun enjoying ParmCrisps or high with bacon, bitter cream or some inexperienced takeout. Enjoy with this soup.
If you are looking for a great recipe to start off with your pot, this Instant Pot 4 Cheese Soup is the one for you. It’s scrumptious, easy to make, tastes great and is great for our future chilly climates!
Please Note: I have purchased a free ParmCrisps package from the vendor. All opinions, as always, are my own. link and weekend potluck
 Read more: Ninja foodi . pressure cooker soup recipe
Last, Wallx.net sent you details about the topic “Instant pot cheese soup recipes❤️️”.Hope with useful information that the article “Instant pot cheese soup recipes” It will help readers to be more interested in “Instant pot cheese soup recipes [ ❤️️❤️️ ]”.
Posts “Instant pot cheese soup recipes” posted by on 2022-03-31 18:55:05. Thank you for reading the article at wallx.net


