The ultimate guide for native ads in Google Ad Manager
Lately, the word “native” seems to be all over the internet. There are native apps and native ads. Native instruments and even native deodorant. But today, we’ll focus on native ads as trafficked through Google Ad Manager, which, to put it simply, can be understood as advertorials. In that, they are ads created to match the look and feel of your website as much as possible.
As this article is rather long, we’ve broken it up. Just head over to a specific section if you know where you are stuck. Otherwise, get yourself an excellent coffee and get ready to dig!
Why the need for native ads?
Contents
Let’s start with some history. Mostly, native ads have been developed in response to ad fatigue. Today, the average person, according to some estimates, gets to see between 6,000 and 10,000 ads per day. Ad fatigue — indifference to advertising as a result of being exposed to too many ads — is, of course, not a new phenomenon. And yet, in the last few years, it has become increasingly relevant for publishers to address it.
One reason is the shift to mobile, which has reduced the number of ads that the average user can be exposed to on any given page.
Another has been the increase in ad-block usage.
A third has been the wave of technological developments that have made it possible for advertisers to measure viewability, i.e., the extent to which a digital ad has been seen and not just scrolled by.
Google introduced native ads in Google Ad Manager (Previously Doubleclick for Publishers) already in 2015, but it wasn’t until 2017 that native formats made the jump to the programmatic space. Today, you can use native ads across all of your platforms like web, apps, and video, as well as for any of your campaign types.
Why appear native ads to the eye as content?
And because native ads are supposed to blend in with the publisher’s content — that is, with the content on your site — they increase the likelihood that the reader won’t jump over. Psychologically, what allows readers to bypass ads is the phenomenon of habituation. After repeated exposure to the same ads, readers learn to recognize the ad, so they skip over. (The ad also becomes less appealing to the brain, like old news).
Native ads, when done well, will appear to the eye not as ads but as content. Assuming the reader is visiting your site to check out your content, they will check out the native ads as they scan through the website to find what they are looking for — whether that’s an answer to a question they have or to a desire to be entertained.
According to Google itself, native ads in Google Ad Manager tend to attract higher CPMs and higher viewability rates. You should definitely give them a try for two reasons:
- As they blend in better with your site, they’re also more stylish and appealing to the eye
- By using native, you’re likely to see an increase in the performance of your ads, both because of higher demand and higher CPMs
When using our Google Ad Manager plugin for WordPress, you can place native ads automatically using the various placements for the content or between posts on category pages.
All good news then? Yes, but the setup of native ads in the Google Ad Manager account can be slightly confusing. We’ve run ourselves through the process to give you here the quick(ish) and dirty guide to native ads made simple! Please pay attention to the nuances, though: both when it comes to implementation and reporting, there are a few tricks that are definitely worth keeping in mind!
Starting with…
How is native different from a regular ad?
Let us spell it out simply. Native ads are:
- preferably created using a specific ad size, called “fluid”
- “styled” — i.e., made to look like you want — thanks to native styles, for example, the ability to customize the look and feel of individual components within your ads, such as the call to action (Would you like it to be green?) or the padding around your body text
- NOT created as specific ad units
When we first tried to create a native ad, the above info would have been extremely valuable. We had a hard time figuring out where exactly to attach our native style with the ad unit.
The answer is… it’s complicated.
But also really straightforward if you follow our steps and learnings.
What kind of ad size is “fluid”?
“Fluid” is the Google-recommended ad size for a native ad. This ad size automatically adjusts to the width of its parent container and resize its height to fit the creative content. This means that the fluid ad size is also fully responsive and will work seamlessly with all of your responsive ad tags.
In action, in our ad unit code, the fluid size looks like this:
div {
overflow: auto;
}
.shcb-language {
border: 0;
clip: rect(1px, 1px, 1px, 1px);
-webkit-clip-path: inset(50%);
clip-path: inset(50%);
height: 1px;
margin: -1px;
overflow: hidden;
padding: 0;
position: absolute;
width: 1px;
word-wrap: normal;
word-break: normal;
}
.hljs {
box-sizing: border-box;
}
.hljs.shcb-code-table {
display: table;
width: 100%;
}
.hljs.shcb-code-table > .shcb-loc {
color: inherit;
display: table-row;
width: 100%;
}
.hljs.shcb-code-table .shcb-loc > span {
display: table-cell;
}
.wp-block-code code.hljs:not(.shcb-wrap-lines) {
white-space: pre;
}
.wp-block-code code.hljs.shcb-wrap-lines {
white-space: pre-wrap;
}
.hljs.shcb-line-numbers {
border-spacing: 0;
counter-reset: line;
}
.hljs.shcb-line-numbers > .shcb-loc {
counter-increment: line;
}
.hljs.shcb-line-numbers .shcb-loc > span {
padding-left: 0.75em;
}
.hljs.shcb-line-numbers .shcb-loc::before {
border-right: 1px solid #ddd;
content: counter(line);
display: table-cell;
padding: 0 0.75em;
text-align: right;
-webkit-user-select: none;
-moz-user-select: none;
-ms-user-select: none;
user-select: none;
white-space: nowrap;
width: 1%;
}
]]>googletag
.defineSlot('/1234567/AdvancedAds', ['fluid'])
.addService(googletag.pubads());
Code language: JavaScript (javascript) To add fluid to your ad units, simply add “fluid” as an ad size to your existing ad units and updating your hard-coded tags accordingly. We recommend starting with one ad unit only to test.
Use our Google Ad Manager Integration to load and place the ad unit including all sizes set up in your GAM account without manually adjusting any code.
The key-take-away
Native refers to the ability to style an ad using components. Fluid is the recommended ad size to do that, as it adjusts seamlessly based on those components, which — including a logo, an image, and text of varying length — may therefore float within the allowed space, thus making the ad at once customizable and well designed.
The secret’s in the style
Next, you should head to your Ad Manager account and find the “Delivery” Tab. Within Delivery, click on the “Native” tab to access the Native Styles interface.
Before we move on, pay attention to Google’s handy guide called “Native Best Practices”. It showcases some great examples to help you identify how you want to style your ads from a design perspective. How to think about mixing and matching? What about typography? It’s all in there!
Go to Delivery > Native to create your native ad style.
Still, the great thing about Native styles is, you can always restyle them later. So, for now, hit “Create Native ad”, and follow along.
A new tab will open, giving you the options below:
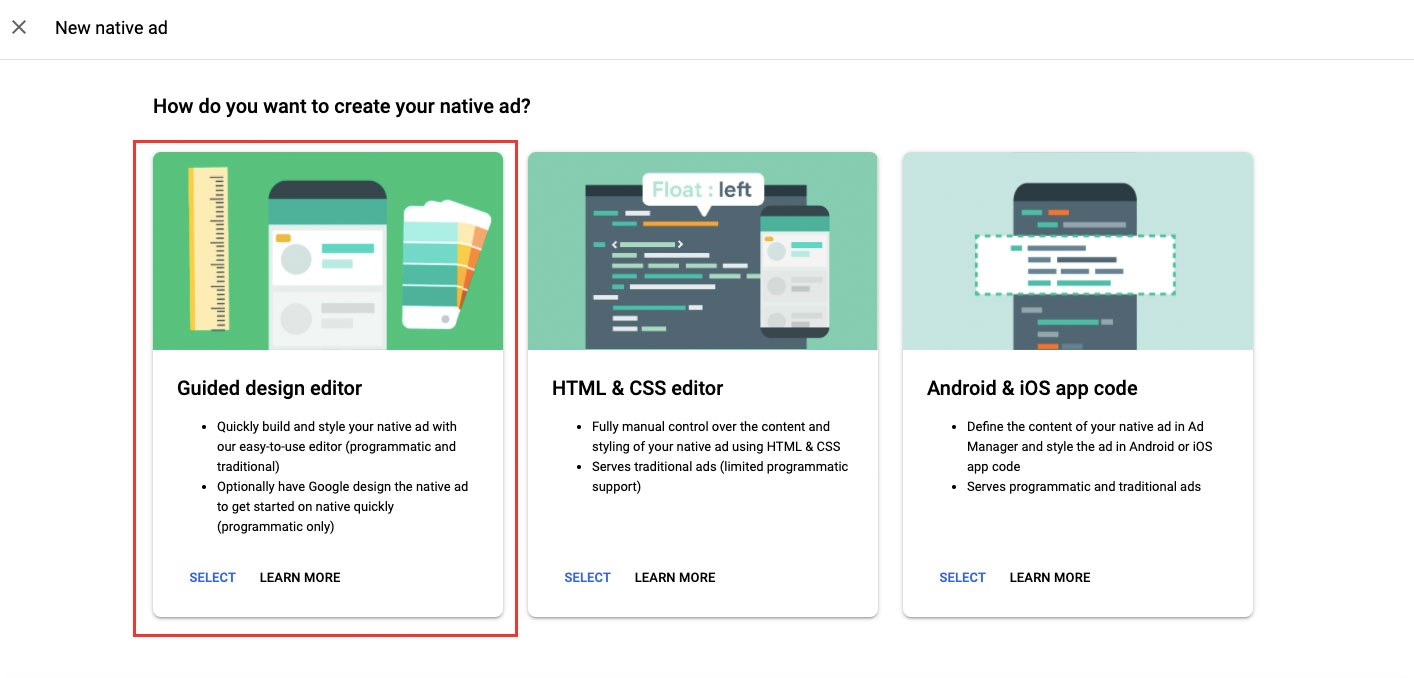 Choose the Guided design editor to simply create native Google Ad Manager ads.
As a newbie, we highly recommend trying with the Guided Design editor first, although it’s great to know about the HTML and CSS editor options.
Worry not: the Guided design editor still allows you to customize your ad using CSS, so don’t go for the fancy (HTML & CSS editor) option unless you truly need to. One good reason to choose the HTML editor is to create a native ad for an ad size that is not commonly supported. Still, bear in mind that that ad size will only work for traditional campaigns and not for programmatic ones.
We chose the “Guided Design Editor” and clicked “Select”, which brought us here:
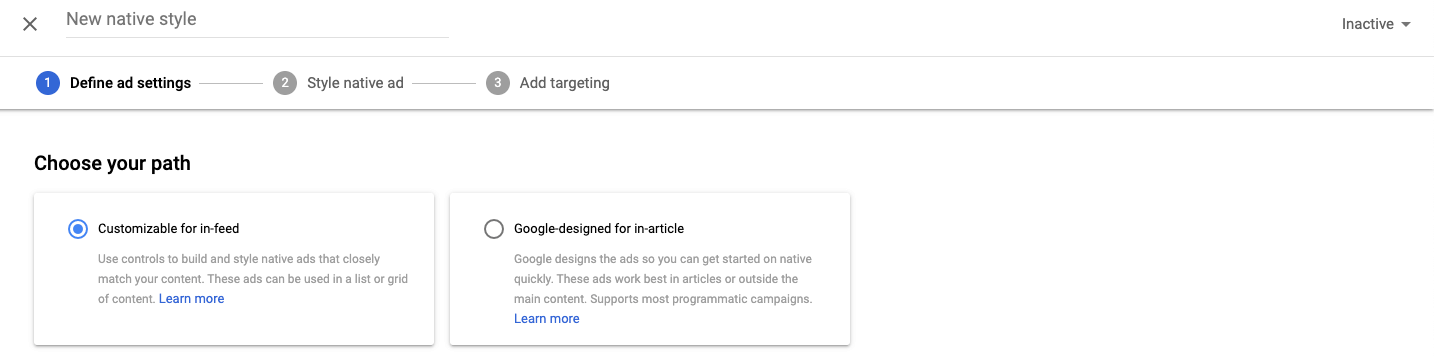 Choose “Customizable for in-feed” even if you want to place the native ad within an article.
In this tab, we get to create our new native style.
Which template or native path to choose: Customizable for in-feed OR Google-designed for in-article?
Customizable for in-feed is the default option and the one we recommend. Unfortunately, it’s not the option we chose the first time around, and that led us to 24 hours of (agony) wondering why Native ads were not serving.
The reason?
“Google-designed for in-article” only works with programmatic ads. So, if you create an in-article style and create a standard campaign to which you upload your own test ads (aka, a traditional campaign), that’s not going to work.
Use “Customizable for in-feed” to make sure whatever campaign you choose, your test native implementation does work.
Ad settings for native styles
Next, you’ll have to select whether to design your own ads or let Google do that for you using AI: you can determine this next to “Define Ad settings”.
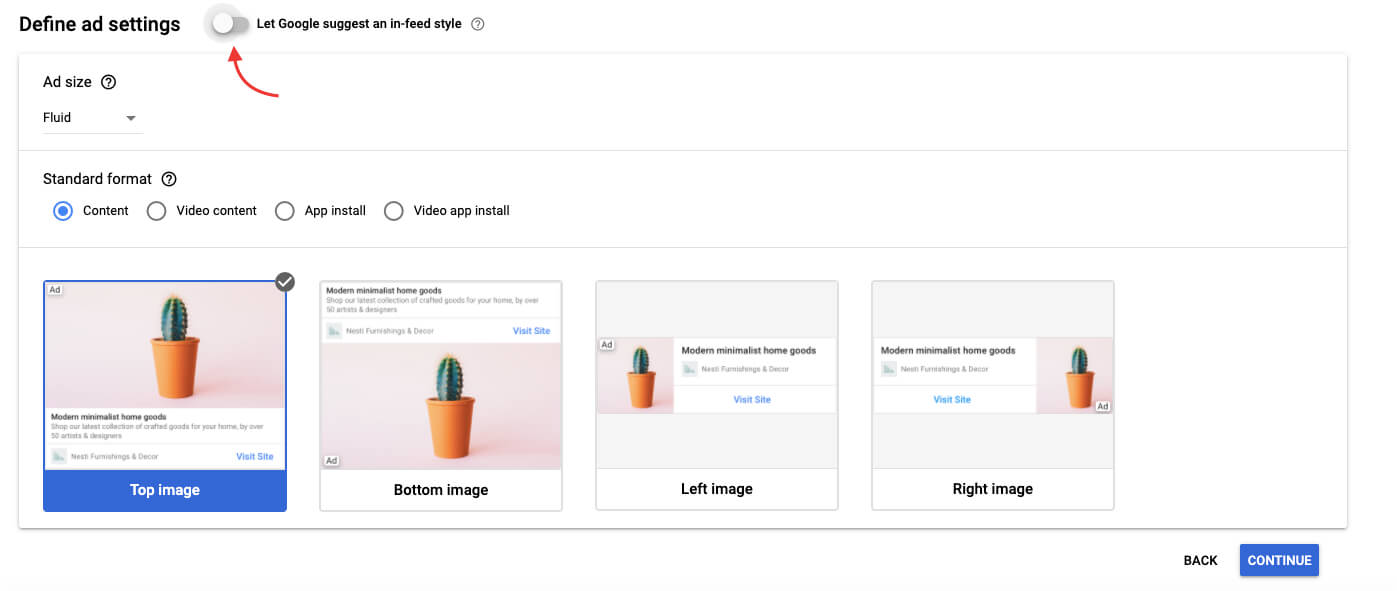 You can set up the native ad style manually or Google Ad Manager can assist you with that.
If that’s the option you opt to go for, you’ll have to feed Google a URL where the native ad shall appear: Google will scan the page and adjust the ad’s look and feel to the design on that page.
 Let Google define a style based on the URL where the native ad is going to show up…
In our case, we preferred to design the ad ourselves.
Therefore, for the ad size is “fluid”, we chose that the ad would be a “Content” ad — suitable for both web and mobile web — and selected the “Top image” Layout.
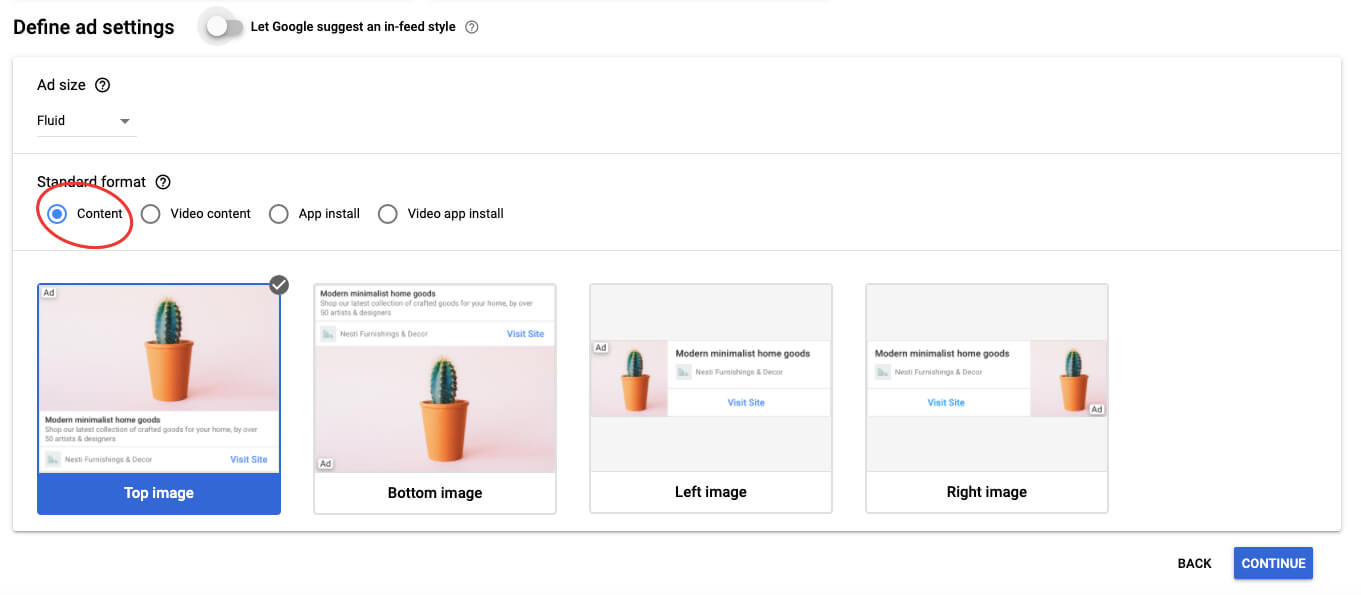 or choose the “Content” format for any Google Ad Manager ads displayed on websites.
A style to match your look and feel
In the next interface, we styled the ad according to the look and feel of our Advanced Ads blog:
- First, in Global styling, we changed the font to “Open Sans” to make it match with the font on our site
- We also chose the background color which we use on our right-hand side column, a light grey
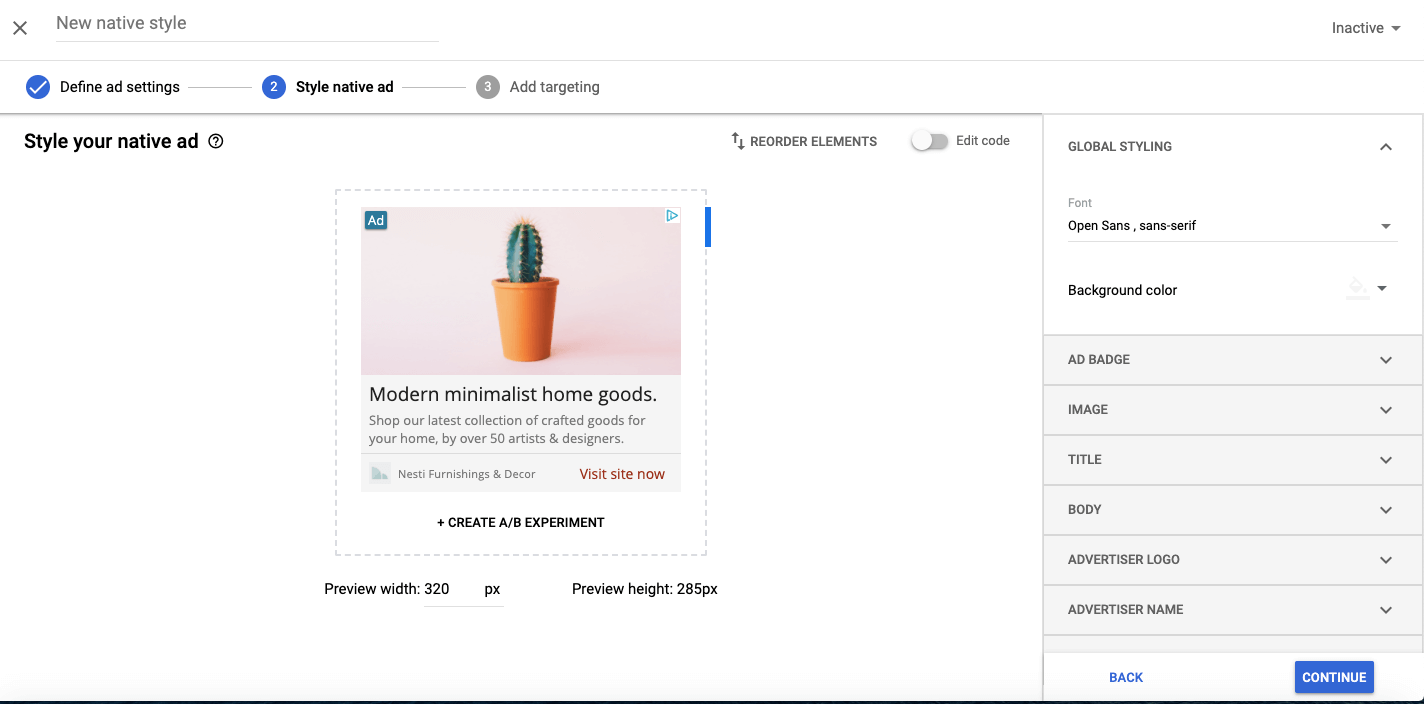 Preview the native ad while entering various styling options, like the font and text color.
- Next, we changed the ad badge’s color to green to make it look like the color of our headline. And we made the call to action “Visit site now” brown, just like on our website.
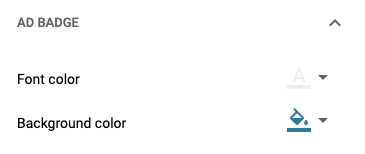 Color settings of the ad badge
After this make-over, the ad now looks better matched with our content, so we are almost ready to hit save.
The last steps include:
Naming the style using descriptors and conventions: We chose (Ad size, Colours, Strategy) so that we went for (“Fluid_ Brown, Grey, and Green_Matching”)
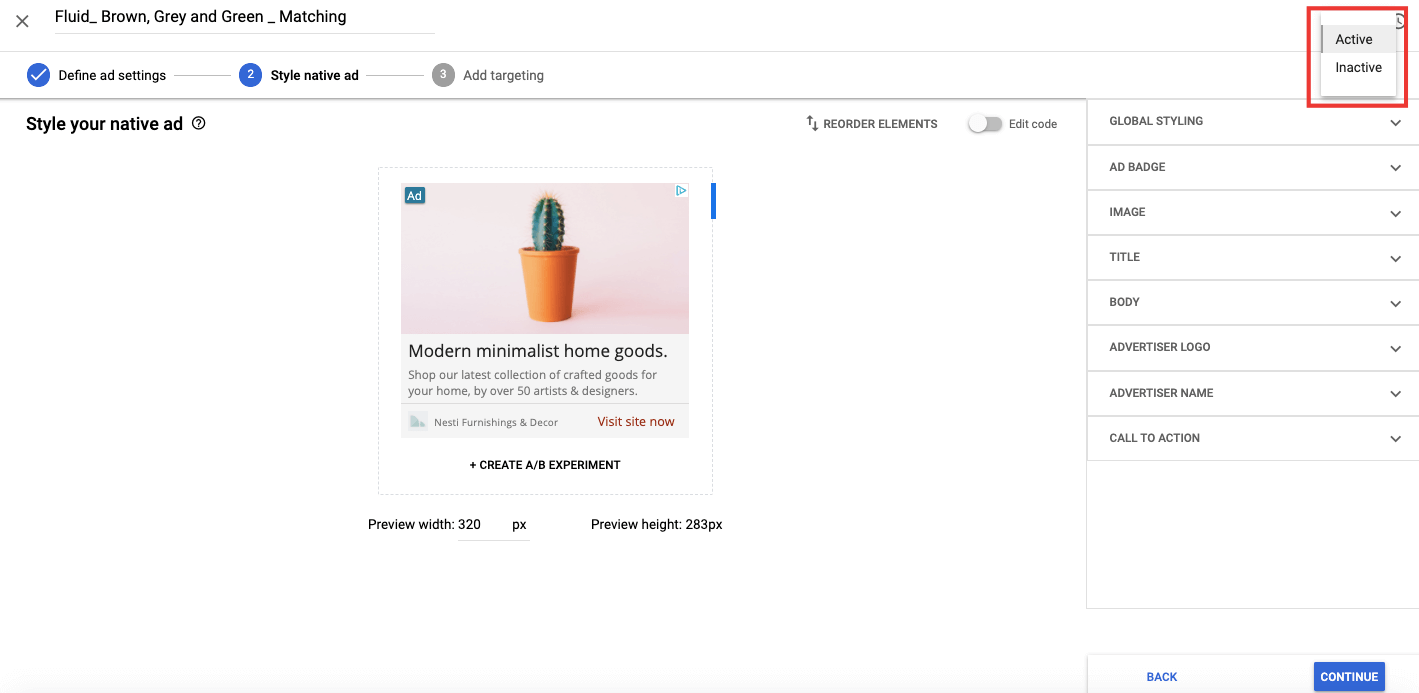 Activate the ad at the top right of the edit screen.
Marking the Native Style as “Active”, up on the top right corner. Do this now ????
Targeting’s in style
Finally, it’s time to target this Native style.
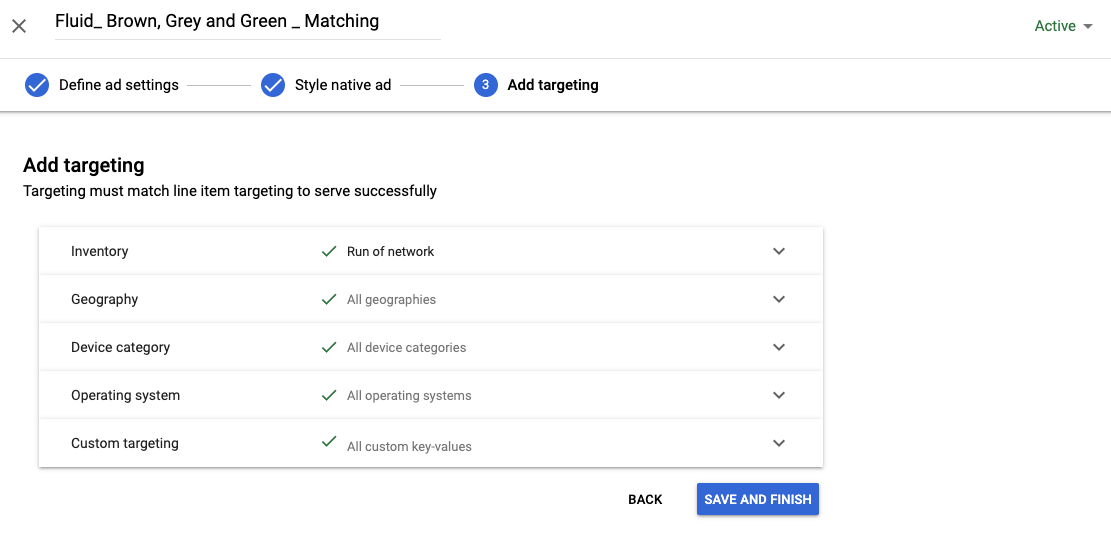 Our tip: Limit ad targeting as little as possible on a test site.
In the beginning, you might want to go broad (I.e., not choose any specific targeting).
Ideally, in due time, you will develop native styles for your different ad units, assuming that they are located on different page types, which will have a different look and feel. Here the point is to think about page type (not URL): Do your article or blog pages differ significantly based on category? For example, do you have a food blog where you color-code the pages according to the main staple used? If so, you want to create different native styles for each color-code. You would be able to do this, for example, using key-values under “Custom targeting”. Look out for an article on this coming out in the next few weeks!
For the time being, just hit “Save and Finish”.
Your native style is ready to go!!
Lining up your native goods (on native and line items)
For your first test, we recommend creating a brand new line item.
There are a few things you need to pay attention to in this step:
Start by searching for “Native” in the Expected creatives field.
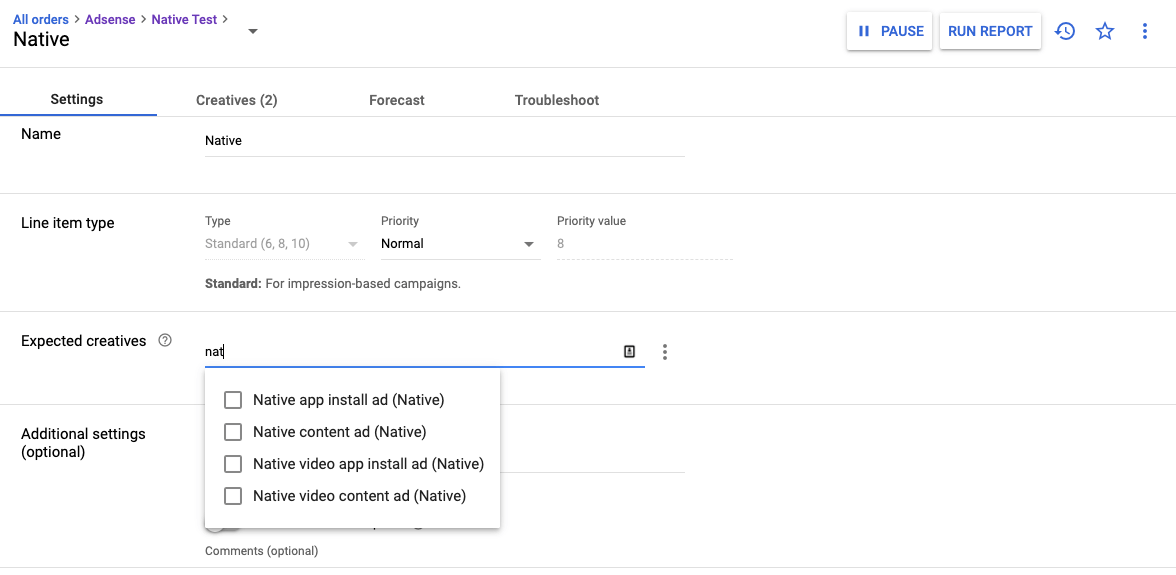 Choose “Native content ad” to run native ads here.
In our case, we have created a “native content ad” style, so that’s the one we’ll choose in this step.
So, all in all, this is what our first line item selection looks like.
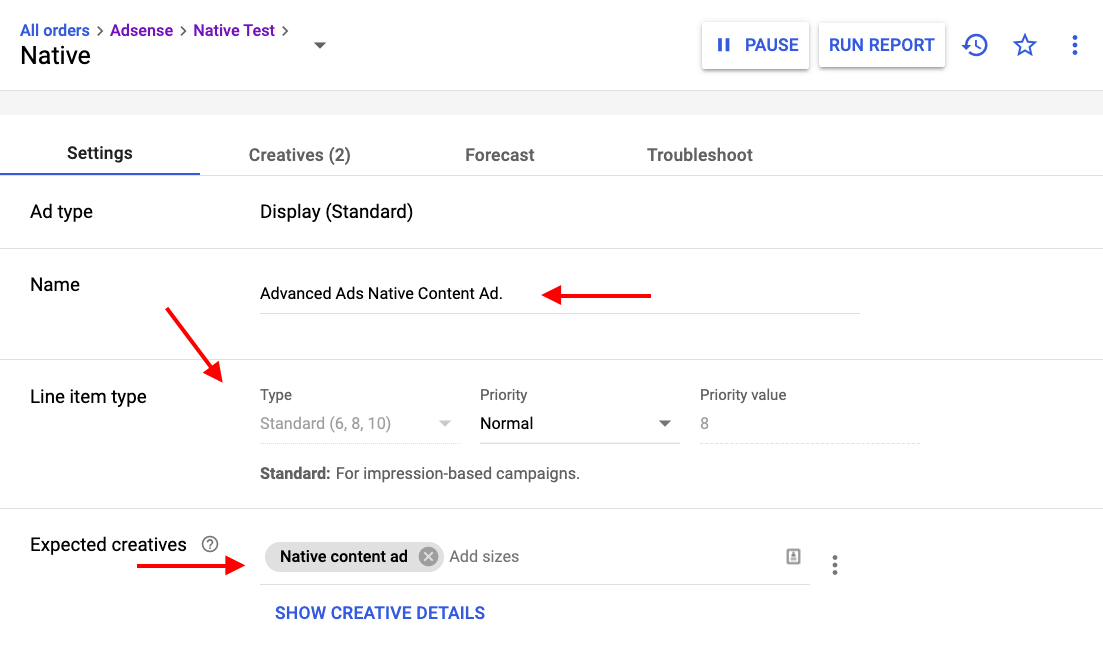 Basic line item settings for our GAM native ad.
- targeting Run of Network (i.e., everything, which ultimately means that only the ad unit called “AdvancedAds” will run native because this targeting is set at the level of the native style
- targeting AdvancedAds.
To put it in other words, targeting any other ad unit at the line item level will not result in delivery against that ad unit unless it is also targeted in the native style.
Some other “nice to know”s
- You can target native alongside any other expected creative size (e.g., 300x250px) in the same line item. In that case, you’ll have to add a creative for the native style and another for your regular ad size. Technically, this implies that if your targeted ad unit is coded for sizes “fluid” and “300×250”, both creatives will run against this inventory, both being assigned to the same line item. To report on this, you will then be able to look at line-item level reporting and/or run a more specific report by ad size under the reporting tab.
- This means you can add native ads to any of your existing line items by merely adding the native style you’re using as an expected creative.
From a style to your style… for your every client (creatives, creatives, creatives)
(How to add your customer’s creatives so that they look like you)
At this point, you’re probably familiar with the “Needs creatives” warning button. To add a creative, you can click on “Add Creative” or “New Creative”.
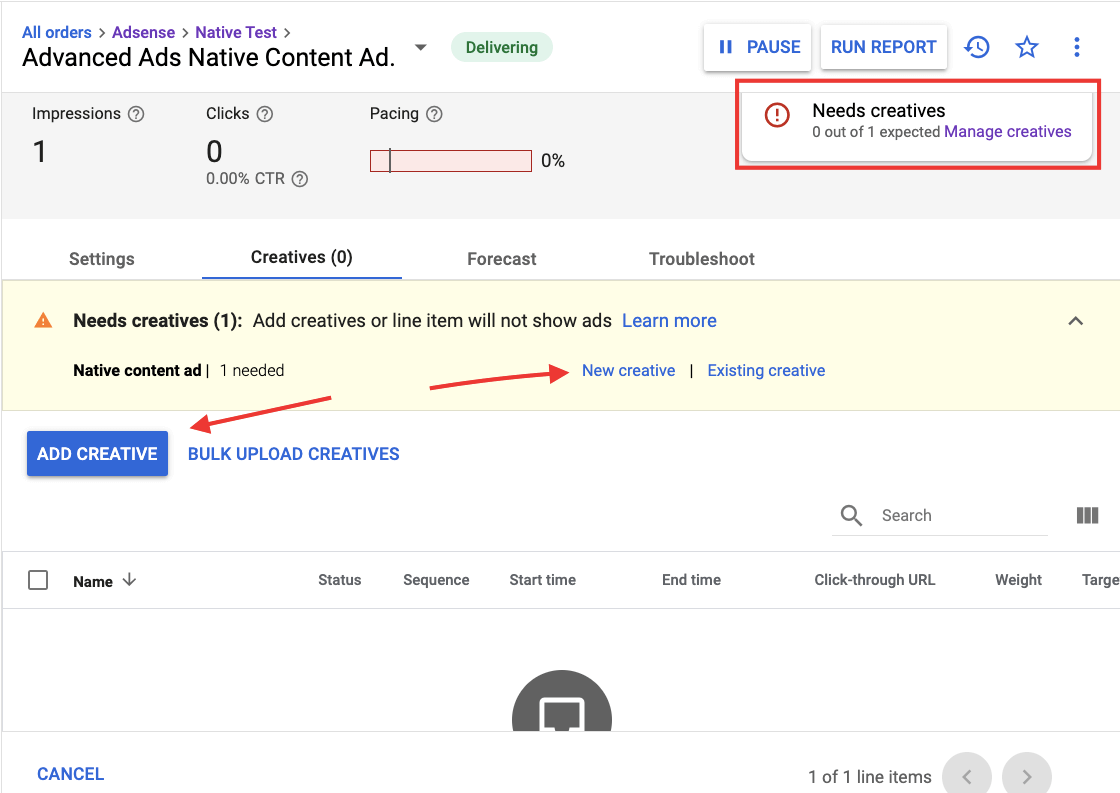 Google Ad Manager will tell you if a creative for your native ad is missing.
As you do so, you’ll be redirected to the creative type selection tab, where — unless you have added other sides along with the native style to your line item — only “Native format” will be eligible.
 Another trap: “Native format” is the only choice you really have in our use case.
As you select it, you’re invited to choose the appropriate template.
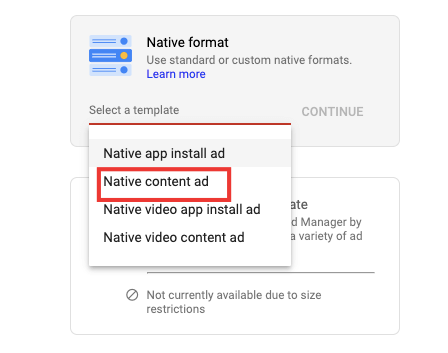 Once again, choose “Native content ad”.
In our case, it’s again “Native content ad”. Select it, then hit “Continue”.
The native creative settings tab will pop up, as per the image below. As you can see, the target ad unit size, i.e., “Native” is pre-defined. Give your creative a name, and add your click-through URL.
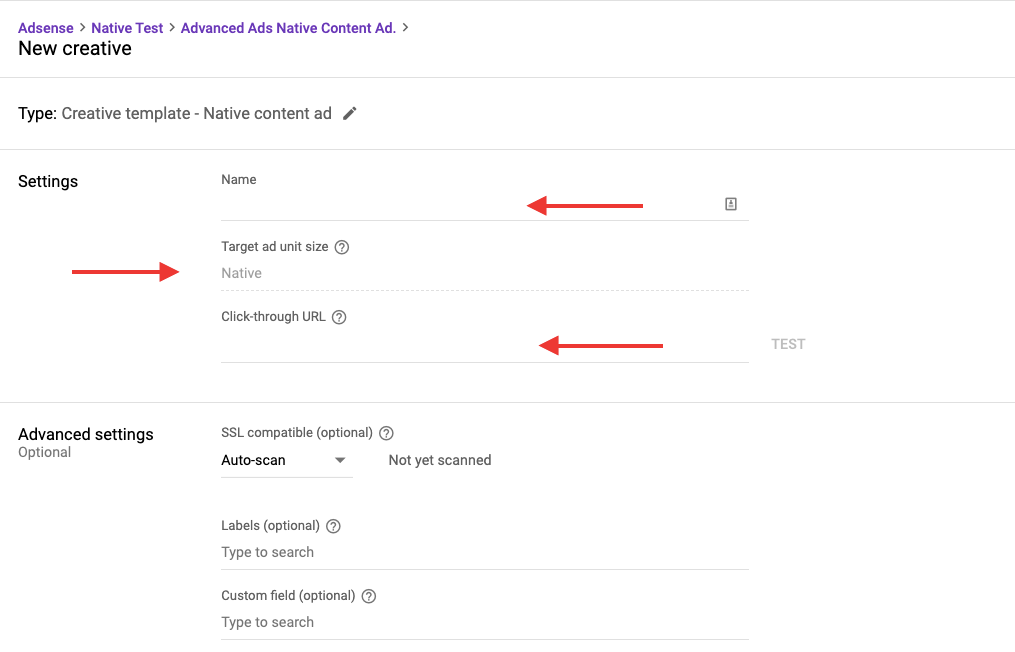 Start the creative setup process with a name and click-through URL.
In our case, we’ve added the following name and click-through URL:
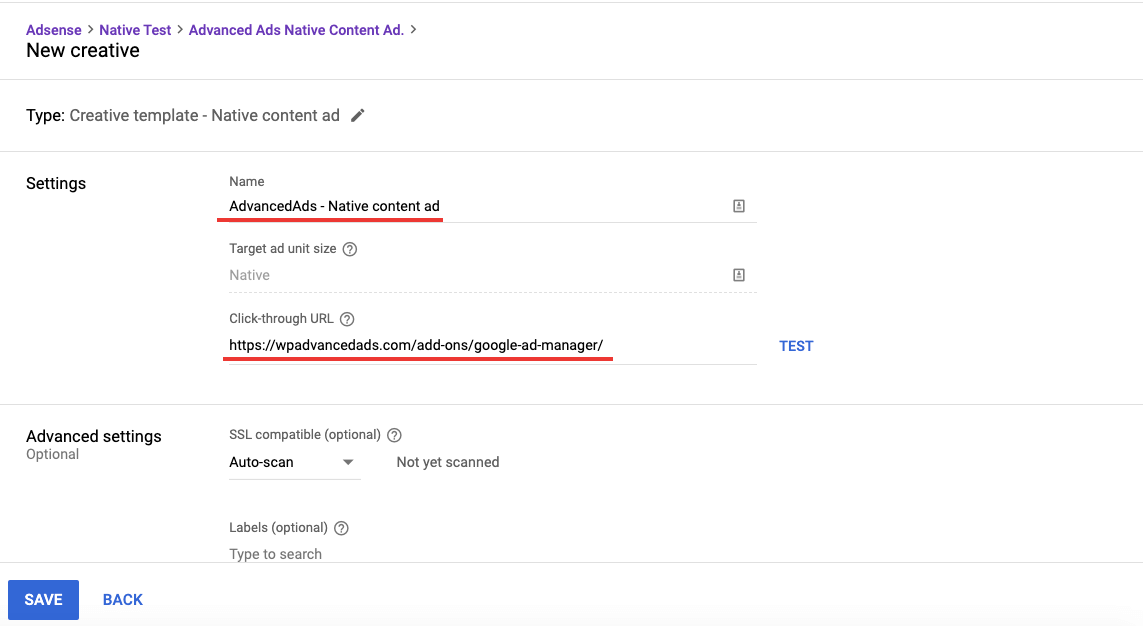 Example of the creative settings.
We recommend handling “Advanced settings” and “Associated ad technology providers” as you usually would.
In the next step, we’re going to focus on the creative components, which Google Ad Manager calls the “user-defined variables”.
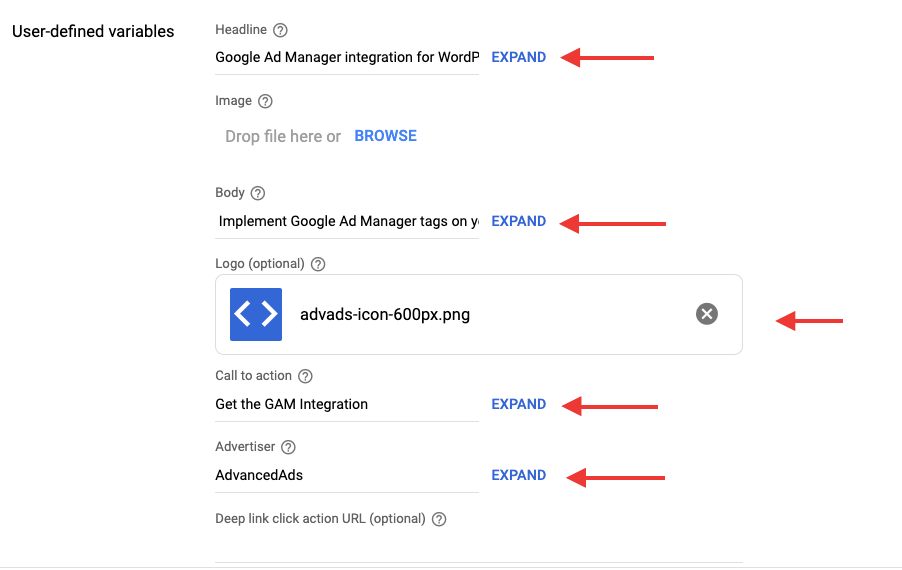 The information you add here are eventually visible in the native ad on your website.
It’s important to note that you must upload an image (whereas the logo is optional). There are set requirements as to minimum image and logo size, and you can check those by hovering over the question mark.
You will also need to indicate:
- Headline
- Body
- Call to action
- Advertiser
The remaining parameters are optional.
Upload/ insert your variables, then hit “Save” and go on to the preview.
Previewing your native ad
Next, check out the preview. To do so, in the settings of the creative, you just saved, hit “Preview”.
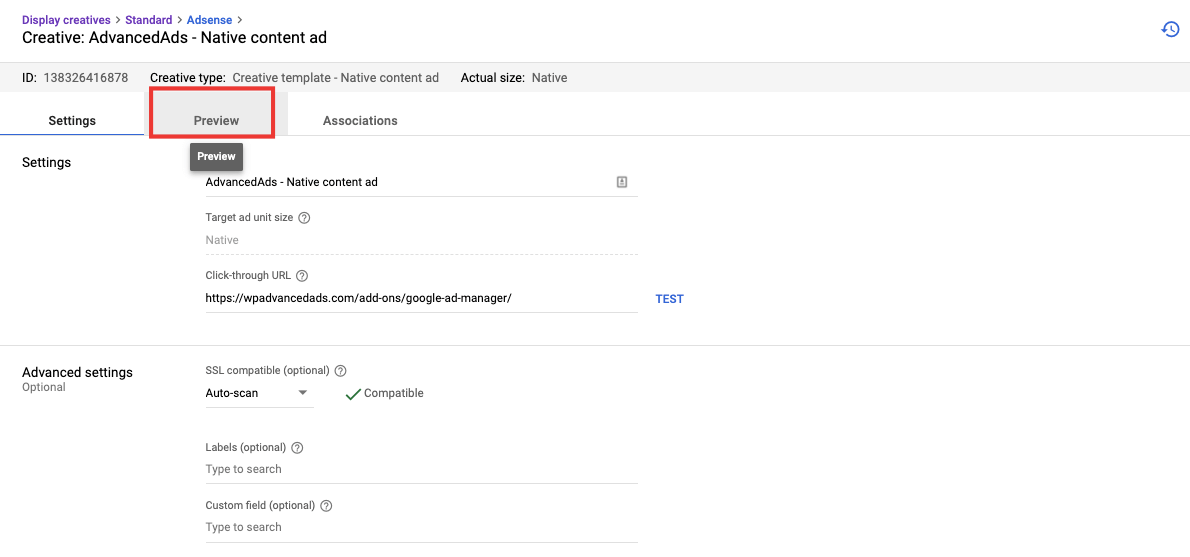 The Preview allows you to check how the ad might look without actually delivering it.
Here’s what we got:
Below your image, you’ll find the information about which native style is in use and the creative size of your template.
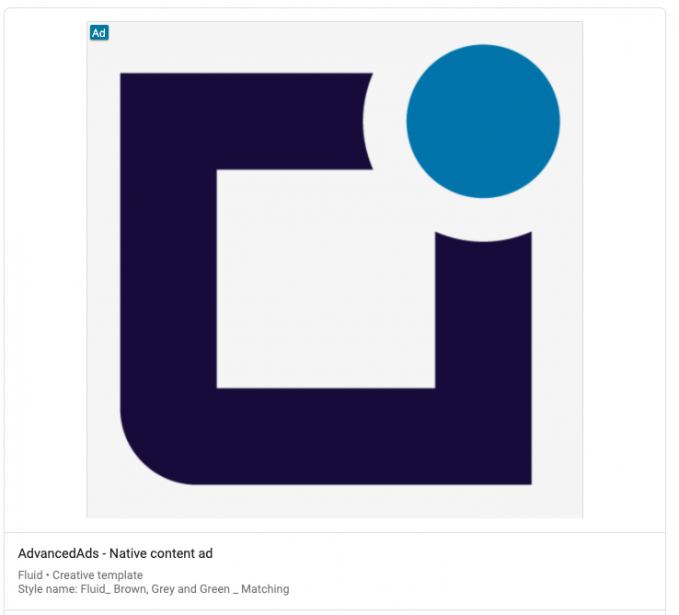 The native ad we created in this tutorial in the preview.
Placing native ads
Once you created your native ads and assigned them to an ad unit, you can just update the ad unit code on your site. If you are using our WordPress Ad Manager plugin, you can update existing ad units with a single click in the backend to automatically load the changes.
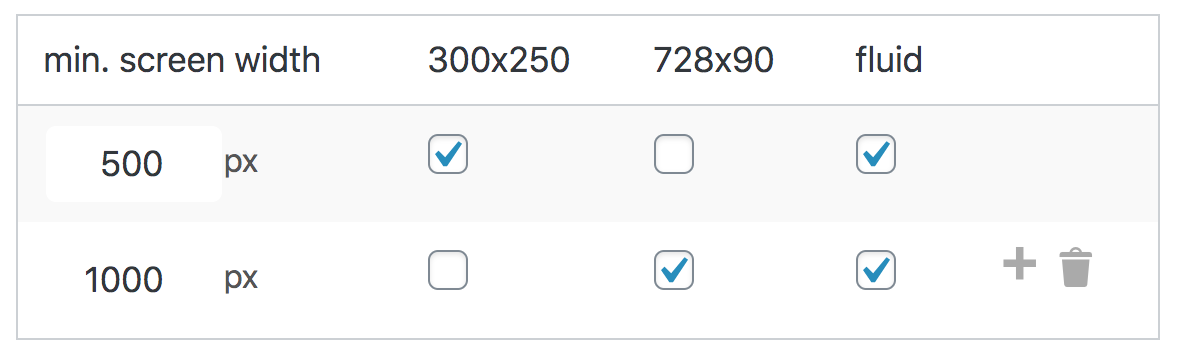 Choose “fluid” to serve native Ad Manager ads based on the available screen size using Advanced Ads.
And that’s it!! You’re now an expert on how to traffic native creatives!
In a future article, we will cover how to report on native impressions optimally.
Stay tuned!
Resources

Stefania started her career in online marketing at Google in 2011, where, after a couple of years as a Google Ads specialist, she moved over to the Sales side, to support publishers small and large with their ad monetization strategy. Stefania speaks 5 languages fluently and is based on the Galician coast, where she enjoys hiking and writing.


