How to set up Google AdSense Auto Ads in WordPress
This page is also available in German
AdSense Auto Ads are a simple way to get started showing ads on your WordPress site. This feature allows AdSense to decide where, how many and which ad sizes to place automatically. As a publisher, you only need to set it up once and can forget about manually handling each ad individually.
In this tutorial, we show you how to set up AdSense Auto Ads on your WordPress site.
How to set up AdSense Auto Ads
Contents
You can either read the detailed instructions on how to add AdSense Auto Ads to WordPress below or watch this short video (1:00 min).

Video: 01:01min
Click on the preview image to load and start the video from YouTube. By clicking you agree that your information will be sent to and processed by YouTube, LLC, 901 Cherry Avenue, San Bruno, CA 94066, USA. Read more
Get the AdSense Auto Ads code from your Account
Global and site-specific options are only different regarding the sites included. We are using the Global settings in this tutorial
- log in to your AdSense account
- navigate to My Ads > Auto ads
- Auto Ads can be enabled globally for all sites in your account or only for some of them using the group option
- select the ad types you want to enable with Auto Ads on the Choose global settings page
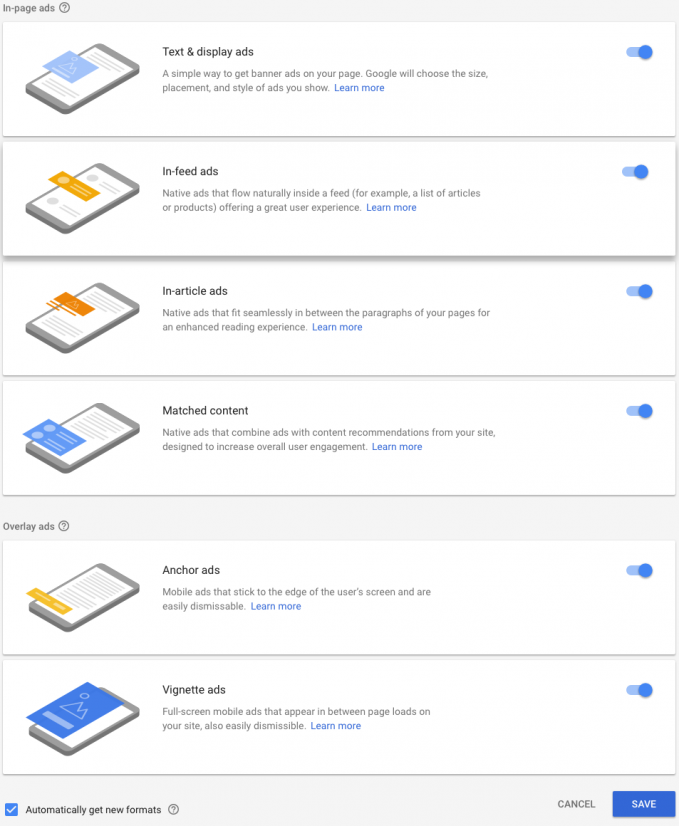
- leave the Automatically get new formats option enabled if you want to use new ad formats once they become available
- click Save
- copy the code from the Place code on your page box and either place it manually between the <head>…</head> tags or follow the steps below if you are running a WordPress site.
Insert AdSense Auto Ads code in WordPress
The Auto Ads code is the same code you would insert into your site to verify your AdSense account or to Page-Level ads (which are now replaced by Auto Ads). There is a chance that you already have or had it on your site.
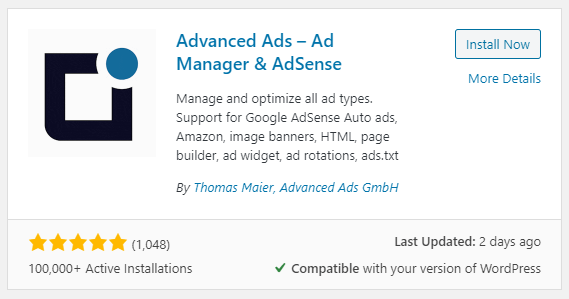
Using WordPress, you can use our free Advanced Ads plugin. It can place the Auto Ads code automatically into the correct spot on your site without you needing to touch the code.
Installing Advanced Ads
Follow these steps to install Advanced Ads from within your WordPress backend. You can also take a look at the video tutorial:
- log in to your WordPress backend
- click on Plugins in the WordPress menu
- click on Add New on top of the plugin page
- search for Advanced Ads in the search field
- select Advanced Ads from the results and click Install and Activate
 Advanced Ads on wordpress.org
- After you activated the plugin, you can go to Advanced Ads > Settings > AdSense
- Enter the publisher ID in the AdSense ID field. You can find it in the URL when you are logged into your AdSense account.

- enable the Auto ads option

No further coding is needed. The code will be placed automatically in the right place in your code.
It might take up to 48 hours for ads to show up on your site now.
Display AdSense Auto Ads only on specific pages
You can also display Auto Ads on specific pages, categories or other segments of your site when you manage the Auto ads code using Advanced Ads. The setup is a bit different from above.
- get the Auto Ads code from your AdSense account
- go to Advanced Ads > Ads in your WordPress admin panel and create a new ad
- choose the Plain Text & Code ad type
- enter the Auto Ads code into the code editor field
- go to the Display Conditions box and select the conditions, e.g., “Specific Pages” or other Display Conditions
- Publish the ad code
- go to Advanced Ads > Placements and create a new Header code placement (the one with </head> on the icon) and assign your last ad to it
- save the placements
- if you enabled Auto Ads through Advanced Ads > Settings > AdSense, as described above, disable it there.
Disable Auto ads delivered through manually placed AdSense ads
It is possible that Auto ads keep showing up even after you removed all Auto ad codes because AdSense can deliver them through every manually placed AdSense ad as well.
You need to disable this behavior in your AdSense account if you want to keep manually placed AdSense ads without Auto ads.
- go to Ads > Overview > By site and click on the Edit icon next to your site
- disable the Auto ads option in the Site settings to disable Auto ads completely on that site
- or the Page exclusions option to stop them from specific pages
AdSenes Auto Ads on AMP
You can enable Auto ads on AMP pages in Advanced Ads > Settings > AdSense > AMP > Enable AMP Auto Ads.
Reporting for AdSense Auto Ads
There is no dedicated report for Auto ads. If you want to test the performance against manually placed ads you can use the Ad formats report and see how formats like Anchor, Vignette, etc., are doing.
Customizing AdSense Auto Ads
You can make basic settings for Auto Ads in your AdSense account. In addition, you can further customize the appearance of these ads on your website using some CSS.
Ad Label
If you want to add an individual ad label to the Auto Ads on your website, you can do that with a little bit of code.
You can find detailed instructions with code examples for such an individual label in the Ad Label manual.
Margins and Padding
Auto Ads have margins and padding to the content, creating white spaces that, in some cases, can interfere with the design of a website. You can adjust this behavior by adding some custom CSS to define, for example, fixed margins above and below the Auto Ads.
The following CSS rule causes the spacing above and below the ad to be 15px.
div {
overflow: auto;
}
.shcb-language {
border: 0;
clip: rect(1px, 1px, 1px, 1px);
-webkit-clip-path: inset(50%);
clip-path: inset(50%);
height: 1px;
margin: -1px;
overflow: hidden;
padding: 0;
position: absolute;
width: 1px;
word-wrap: normal;
word-break: normal;
}
.hljs {
box-sizing: border-box;
}
.hljs.shcb-code-table {
display: table;
width: 100%;
}
.hljs.shcb-code-table > .shcb-loc {
color: inherit;
display: table-row;
width: 100%;
}
.hljs.shcb-code-table .shcb-loc > span {
display: table-cell;
}
.wp-block-code code.hljs:not(.shcb-wrap-lines) {
white-space: pre;
}
.wp-block-code code.hljs.shcb-wrap-lines {
white-space: pre-wrap;
}
.hljs.shcb-line-numbers {
border-spacing: 0;
counter-reset: line;
}
.hljs.shcb-line-numbers > .shcb-loc {
counter-increment: line;
}
.hljs.shcb-line-numbers .shcb-loc > span {
padding-left: 0.75em;
}
.hljs.shcb-line-numbers .shcb-loc::before {
border-right: 1px solid #ddd;
content: counter(line);
display: table-cell;
padding: 0 0.75em;
text-align: right;
-webkit-user-select: none;
-moz-user-select: none;
-ms-user-select: none;
user-select: none;
white-space: nowrap;
width: 1%;
}
]]>.google-auto-placed {
margin-top:15px !important;
margin-bottom:15px !important;
}
Code language: CSS (css) Troubleshooting AdSense Auto ads
If AdSense Auto ads are not displaying then please check out AdSense Auto ads not showing up for detailed debugging information.

Starting in 2009, Thomas’ own word game website grew to 40 MM page impressions per month. He then built Advanced Ads to help his colleagues to place ads and test different ad positions and networks tests without any coding skills. Thomas now enjoys improving the product for our more than 150,000 users worldwide.


