How To Record Google Meet Without G Suite

Many of us are now part of more meetings and video conferences than ever and thanks to services like Google Meet and Zoom, reaching out to others is as easy as clicking a button. While starting and joining meetings is a pretty simple affair, you might want to save a recording of the meeting you’re a part of to analyze the topics that were discussed, revisit your teacher or trainer’s lessons again, or to just keep them stored as a memory.So, how would you record a session on Google Meet? Can you record calls with just audio or video or both? That’s what we’re going to discuss in this post.Reading: how to record google meet without g suiteRelated: How to Share Audio on Google Meet

Does Google Meet have a record option?

Contents

Yes, but not for free. While Google allows users to record a call via Google Meet, the feature is currently only accessible to customers of G Suite Business Standard and Plus, Enterprise, Education Fundamentals (but only through the end of 2021), Education Standard, Education Teaching, and Learning Upgrade, and Education Plus. What this essentially means is that you will have to pay at least $12 per user per month to be able to record your video calls on Google Meet.▶ How to record a Google Meet video meetingEven if the feature was available on your G Suite account, using the Record option inside Google Meet comes with its own demerits. For starters, you need to send requests for all participants in a meeting for their consent to record the proceedings of the call. While this may be a good thing in terms of privacy, wait for a while for everyone to accept the consent and then start a meeting recording can result in a waste of time.Another thing to know is that your recording may lose important discussions if someone fails to accept the consent, thus resulting in an incomplete recording. Besides this, you may or may not see the recording option on your Meet screen if your organization hasn’t enabled the feature for your account.If you don’t want to be bothered by these problems, then you should most definitely read further and get to learn how you may still be able to record audio or video from your Google Meet calls without paying for a G Suite membership.Related: How to End Meeting in Google Meet: Step-by-step Guide

Recording Google Meet meeting without permission

Well, that’s possible, yes. Check out the methods below to record a meeting on Google Meet without permission on your regular Gmail account. It isn’t easy and requires some setup, let alone trusting an extension from Google Web Store, but if you want it desperately, it’s probably worth it. Let’s check out the methods to record both the audio-only and video+audio meetings.

Record Google Meet Calls (Audio Only)

If all you want is to record the audio during a Google Meet, then the Fireflies Chrome Extension that is a great way to do just that. This extension is available free-of-cost on Google Chrome and you may even be able to use them on some Chromium-based browsers. You can use this method to record audio on Google Meet from both Windows and Mac.

Install Fireflies Chrome Extension

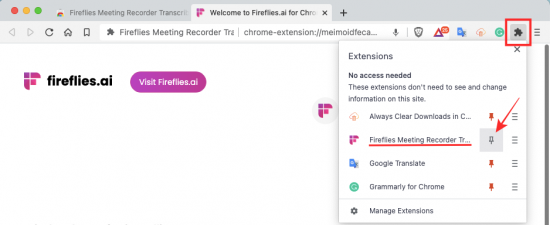
To get started, install the Fireflies Chrome Extension from the Chrome extension store. Inside this extensions page, click on the ‘Add to Chrome’ button from the top right corner.If you’re asked to confirm this installation, do so by clicking on the ‘Add extension’ button.After the extension has been installed, click on the Extension icon on Google Chrome’s Navbar and then select the Pin icon adjacent to the ‘Fireflies’ extension.This will make sure the Fireflies extension is easily accessible during Google Meet calls.

Set up your free Fireflies account

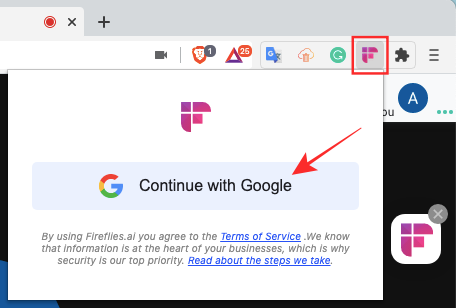
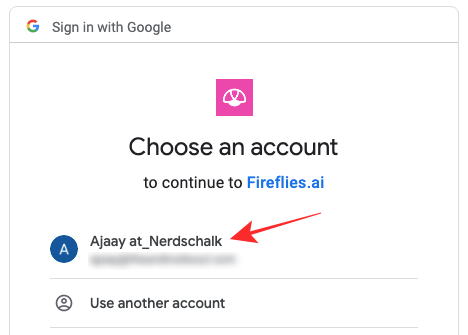
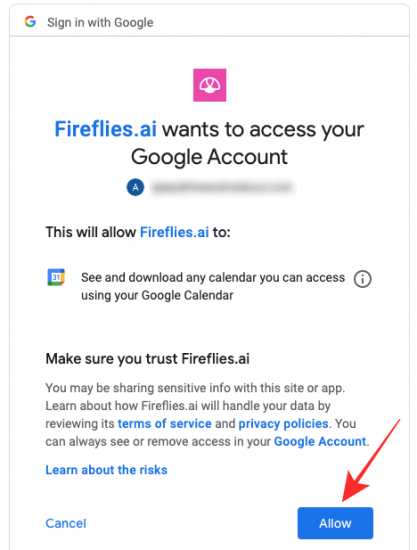
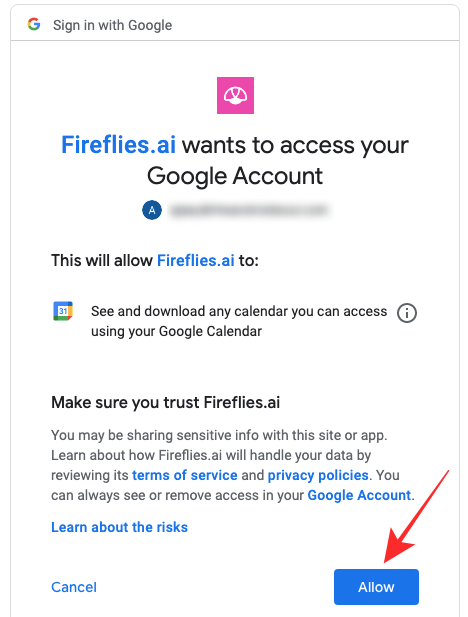
Once the Fireflies extension has been enabled inside Chrome, you can proceed to set it up using your Google account. Fireflies requires you to give it access to your Google account so that your meetings can be recorded and the service can also maintain a dashboard for you.For this, click on the Fireflies icon from the Extensions toolbar at the top right corner of Google Chrome. In the menu that appears, click on the ‘Continue with Google’ option.blankYou will now need to choose the Google account you use for your Google Meet calls.blankOn the next screen, Fireflies will prompt that it needs your permission to access your Google account’s calendar for it to work properly. Click on the ‘Allow’ button to proceed.blankThat’s it. Your Fireflies account is now set up through Google. You can go ahead and start recording your current session.
See Also  How to show ads on bbPress pages

Record audio from Google Meet

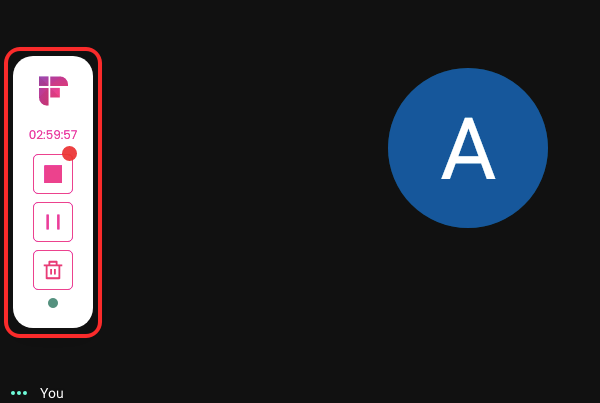
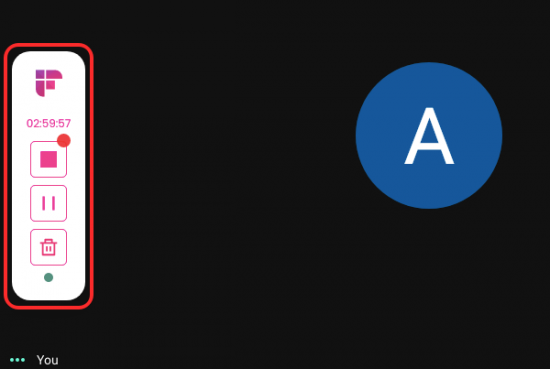
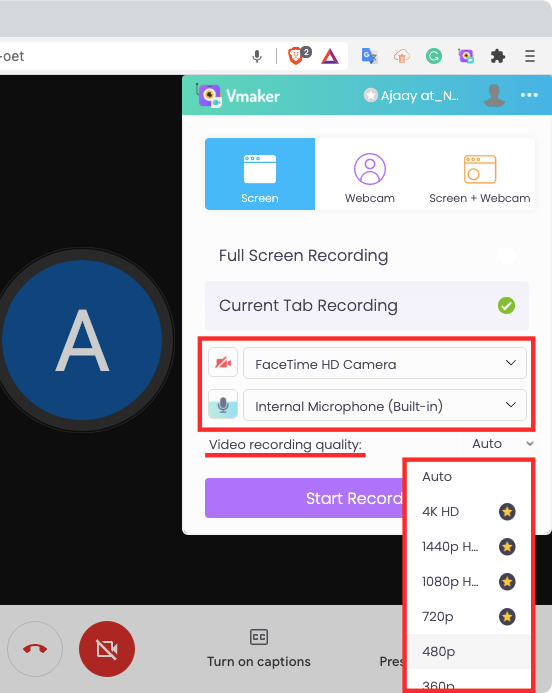
When you’ve set up Fireflies and linked it with your Google account, you can start recording at any time. For this, go to topqa.info and join/start a video call with your desired participants. When you’re inside the meeting on Google Meet, click on the Fireflies icon from the extensions bar, and then select the ‘Start Recording’ button when an overflow menu appears.blankYour meeting’s audio will now be recorded and a Fireflies widget will appear on the left-hand side of the meeting screen when the recording commences. To check if the recording is in progress, look out for a green icon at the bottom of this widget.blankAt any time, you can pause a recording by clicking the Pause icon on the Fireflies widget.If you don’t want to save your recording, click on the Trash icon at the bottom of the widget.To stop your recording and save it, click on the Stop icon inside the Fireflies widget.Your recording will end as soon as your click on the Stop icon and when that happens, you’ll get an option to name your recording and add mail IDs of users you want to share it with. Fireflies gives you the option to share the recording with people from your domain, all participants of a meeting, or just yourself.blankOnce you have entered the email addresses of people you want to share with, click on ‘Finish’.Your recording will take a few minutes to be visible in the Fireflies library.
Access your recordings on Fireflies

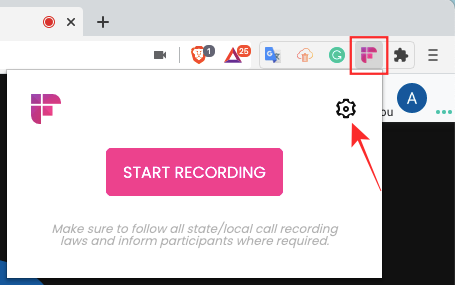
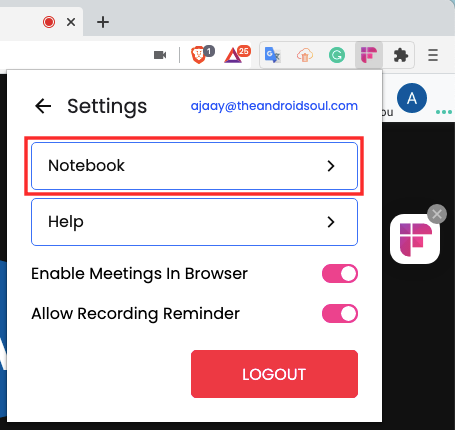
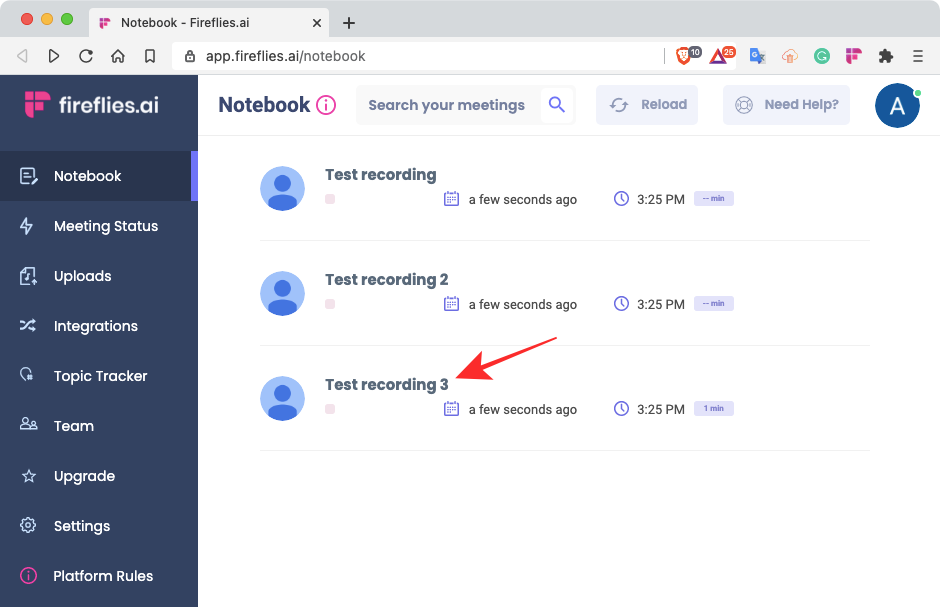
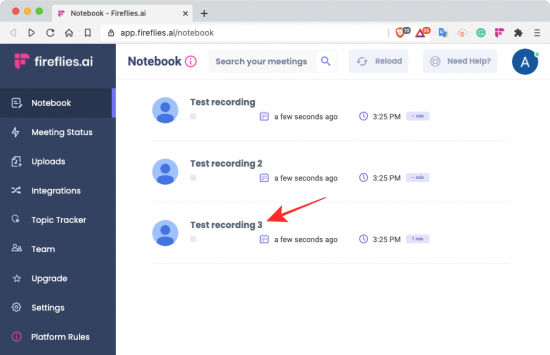
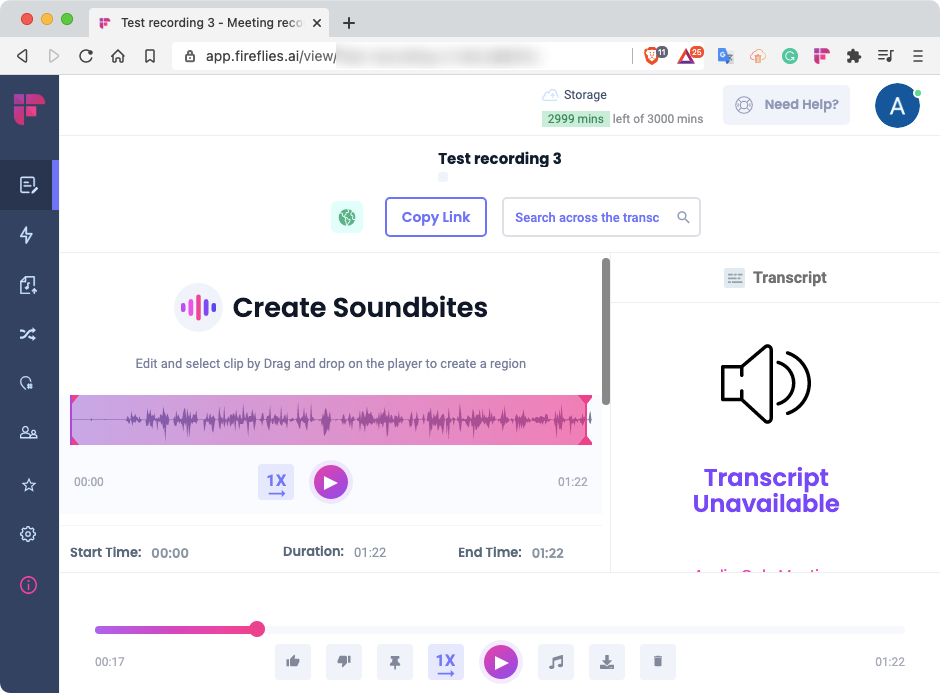
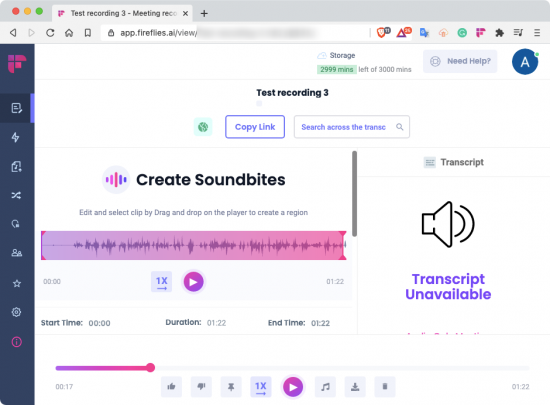
You can get access to all of your recordings at any time within your Fireflies Notebook page. You can also get to this page by clicking on the Fireflies extension icon on Google Chrome.Read more: How to respond to hey text from a guyClick on the cogwheel icon at the top right corner of the Fireflies extension popup.blankInside the popup, click on the ‘Notebook’ option.blankThis will take you to the Notebook page that lists all of the audio recordings from your meeting on Google Meet. To play a recording or access its details, select it from the Notebook.blankYou should be able to see your recording and all of its details on the next page. Here, you can play/pause the recording, download it, pin it, change playback speed, edit the clip to save your desired part, or delete it. You can also use the ‘Copy link’ button on the page to easily share the audio clip with others.blank

How many recordings can you make on Fireflies?

Basic features on Fireflies are available free-of-cost and that includes being able to record audio for up to 3,000 minutes for free, moments, shareable links, playback speed control, time-stamped notes, and more. For higher storage capacity, you can opt for the service’s paid plans – Pro, Business, and Enterprise, the cheapest of which starts at $18 per month per user.Related: How To Freeze Your Screen or Camera on Google Meet

Record Google Meet Calls (Audio & Video)

If recording just the audio of a Google Meet call doesn’t do the job for you, you can use Vmaker on your desktop to store both audio and video recordings of a meeting. When you use Vmaker, you only have the option to record video and audio together and not just audio.While there are a ton of tools that let you record Google Meet calls, we chose Vmaker simply because the service is available for free without any limits to the number of sessions you can record and store and lets you record your screen as well as the feed from your webcam. At the time of writing this, the service is available as a desktop app only on macOS while users on Windows will have to suffice with a Chrome extension. An app is expected to release on Windows, Android, and iOS soon.Related: How to see everyone on Google Meet on PC and Phone

See Also  How long to bake boneless chicken breast at 400

On Windows and Mac (Using Chrome extension)

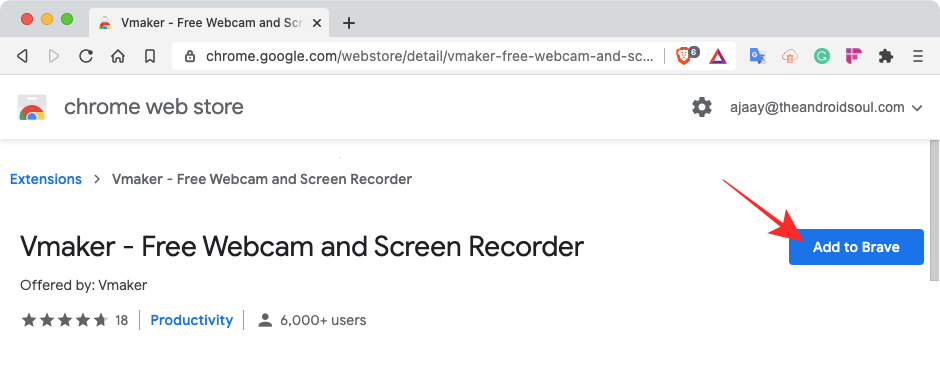
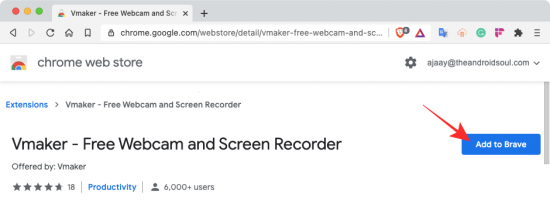
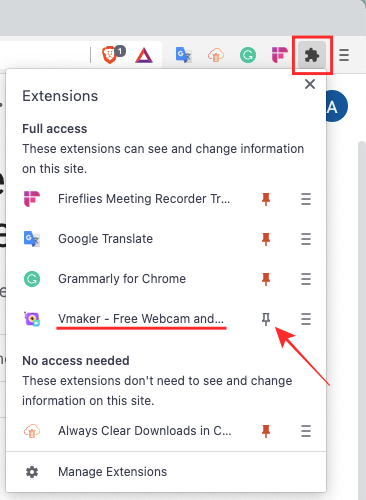
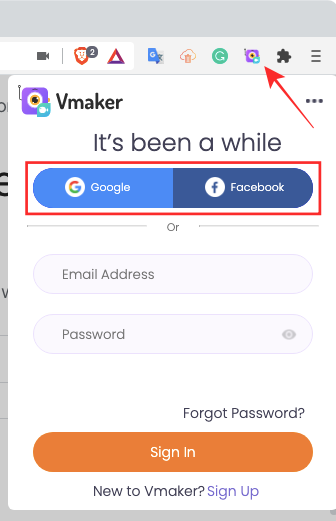
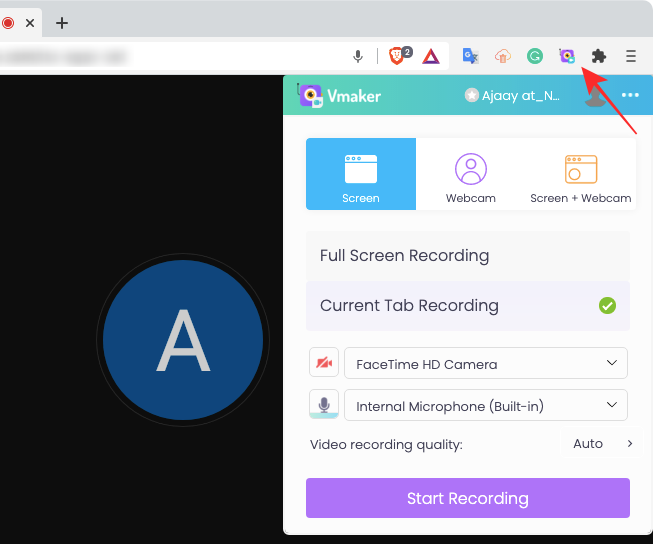
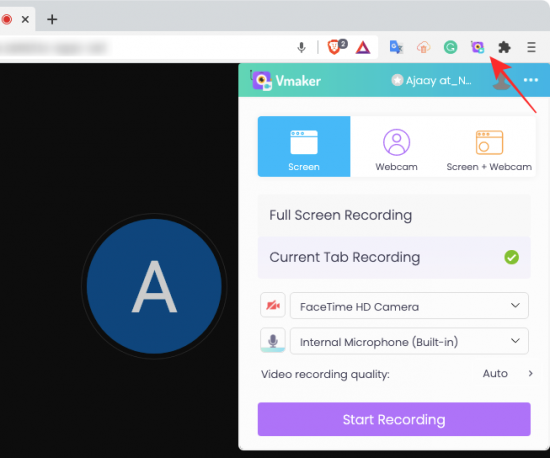
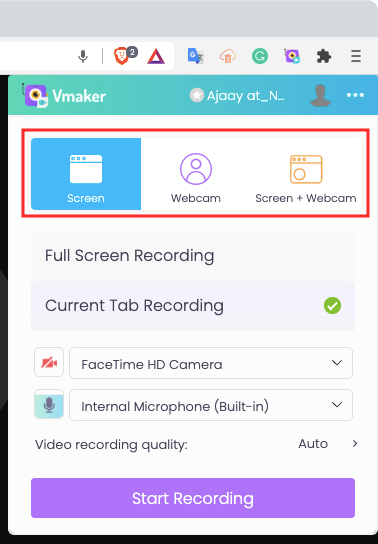
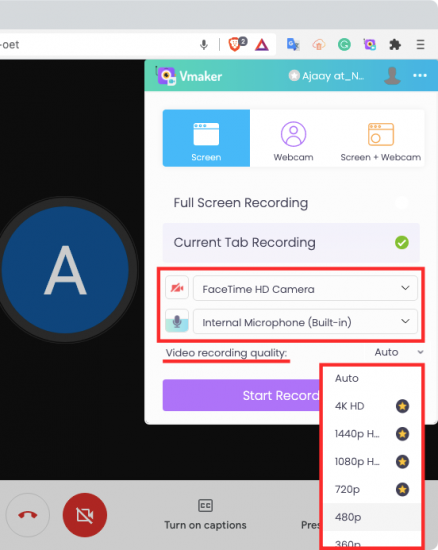
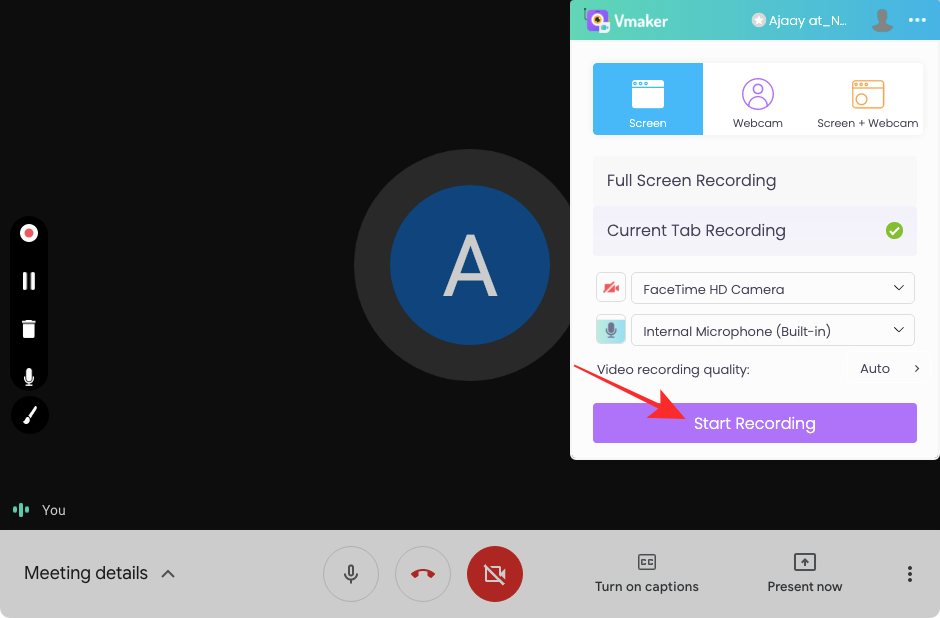
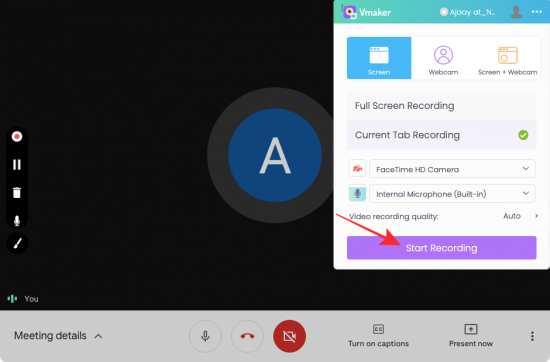
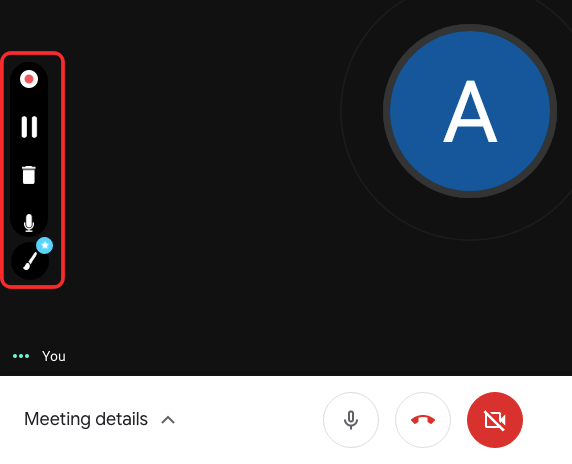
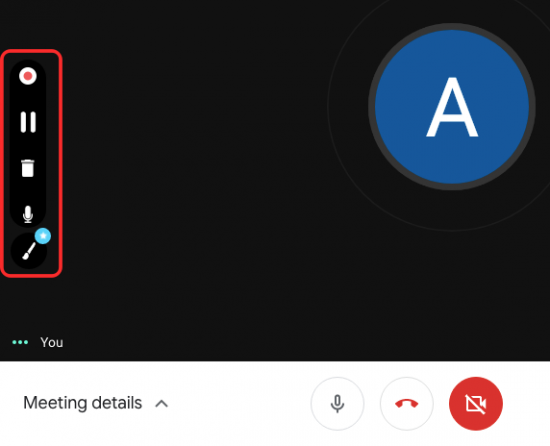
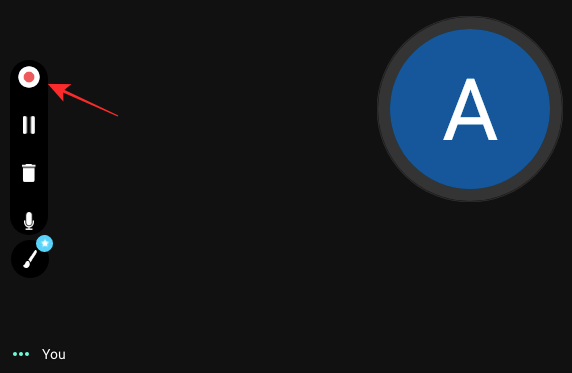
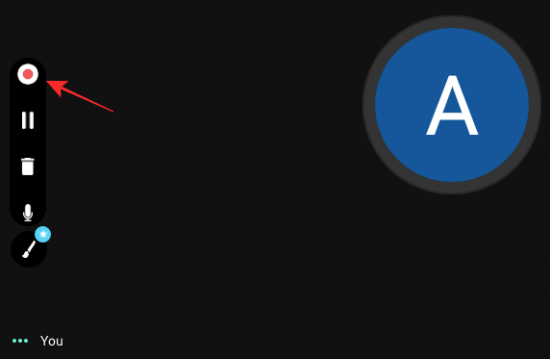
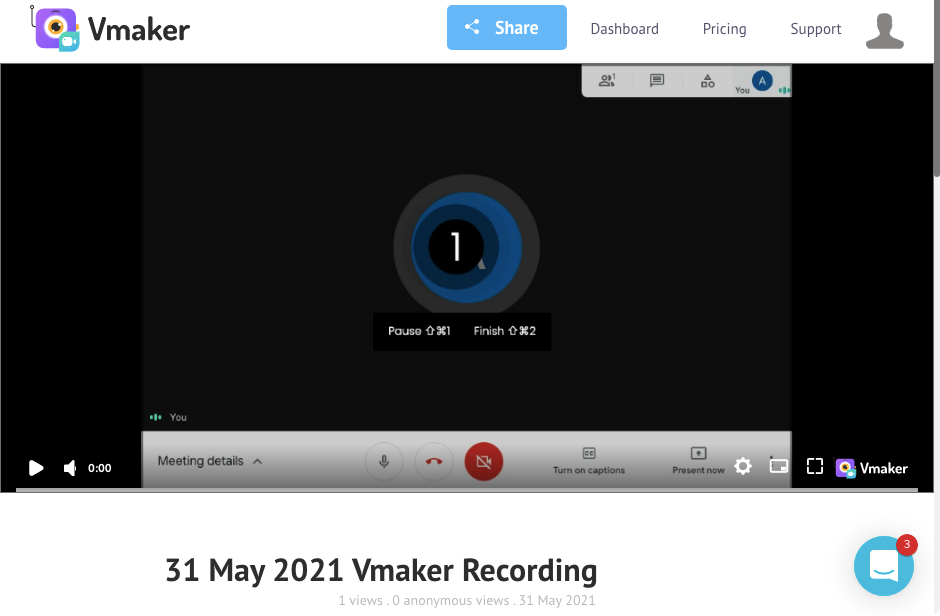
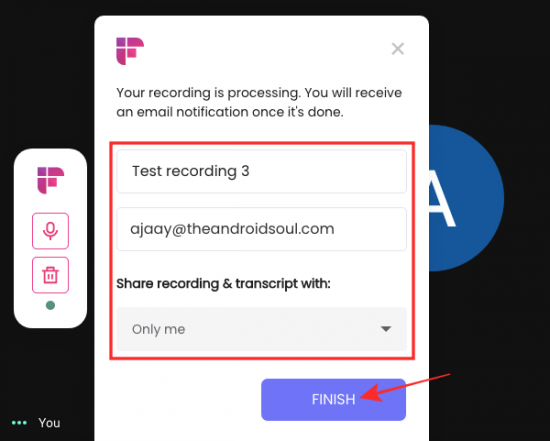
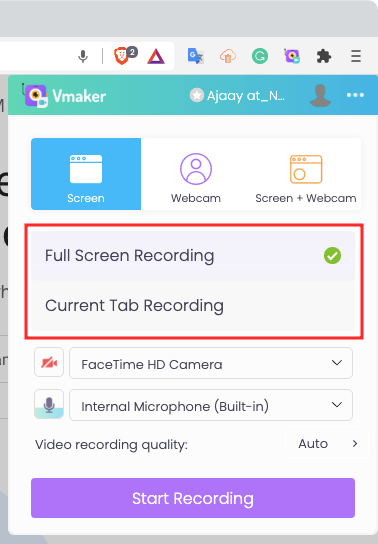
Since Vmaker currently doesn’t have an app on Windows, we’re going to use the Vmaker extension from the Chrome Web Store. You can also follow this method on macOS if you wish to have Vmaker as an extension and not as an app. Now, install the Vmaker extension by clicking on the ‘Add to Chrome’ button.blankYou’ll be asked to confirm this installation which you can do by clicking on the ‘Add extension’ button.After the extension is installed, click on the Extension icon on Google Chrome’s Navbar and then select the Pin icon adjacent to the ‘Vmaker’ extension.blankThis will make sure the Vmaker extension is easily accessible during Google Meet calls.Once Vmaker is available inside Google Chrome, you need to sign up on Vmaker to start using the service. To do that, click on the Vmaker extension icon from the Extensions bar and wait for the Vmaker popup to load.On the next screen, you will be able to choose whether you wish to sign up using your Google or Facebook account or through other means. Choose the method you wish to sign up with and authenticate the account as required.blankOnly after you have signed up on Vmaker, you will be able to see all the features provided by the service. Now, you can start or join a video call on Google Meet to get started.Once a meeting commences, click on the Vmaker extension at the top right corner. This will bring up an overflow menu that lets you select how you want to record the meeting and choose the device you want to use for recording the session.blankAt the top of this Vmaker extension, you can select the type of recording you want – Screen, Webcam, or both.blankWhen you select ‘Screen’ or ‘Screen + Webcam’, you will have the option to choose whether you want the recording to capture a single tab or the whole screen.blankYou can also configure the input device – your camera and microphone. You can choose the default input device you want to use by clicking the dropdown menu adjacent to the Camera and Microphone icons. Additionally, you can see if the extension has access to these devices as they’ll be struck out when they are disabled.blankYou can also change the video quality of your recording by clicking the dropdown next to ‘Video recording quality’ and then choosing your preferred setting.Once you’ve set up the recorder with your chosen configuration, click on the ‘Start Recording’ option.blankThis will initiate your video recording and when this happens, you will see the Vmaker widget on the left-hand side of your meeting screen. This widget will expand and offer more options when you hover over it. When you hover over the widget, you can pause the recording, delete it, and disable the microphone.blankWhen you’re done recording your meeting, click on the Record icon (the one at the top of the widget).Read more: Reheat Chicken Wings In Air Fryer | Top Q&AblankThis will stop the recording instantly and your recording will appear inside a new tab on Google Chrome. You can play it by clicking the play icon and you also get to expand the video to a larger view.blankYou can scroll down on this tab to access more options for the recording. From here, you can delete the recording, edit it, duplicate, download, and share it with others. When you share the recording, anyone with a link to your recording will be able to view it.blankIf you wish to access all of your recordings made using Vmaker, click on the Vmaker extension and then click on the 3-dots icon inside the popup menu.blankNext, click on the ‘My videos’ option from the new menu that appears.blankA tab will open up on your browser showing you all the videos that you have recorded with Vmaker. You can simply click on a recording you want to play or hover over a video’s 3-dots icon to get additional options like edit, play, duplicate, move, share, delete, or copy link.blank
On Mac only (Using Vmaker app)

If you’re on macOS, you’ll be happy to know that Vmaker is available as a dedicated app for your Mac. You can download the app from Vmaker directly by clicking this link. You can then install the app using the DMG file that would be downloaded on your system.Once the Vmaker app has been installed, open it and set it up for the first time using your Google/Facebook account or via an email address in a similar way to how we showed you on the Vmaker extension.When you open the Vmaker app and set it up for the first time, you will be asked to give it all the necessary permissions on your Mac like access to Camera, Microphone, Accessibility, and Screen Recording. While the app redirects you to the relevant section inside System Preferences, you can manually access these controls by going to System Preferences, > Security & Privacy > Privacy, and then choose the settings you want to give Vmaker access to. After opening the individual sections for Camera, Microphone, Accessibility, and Screen Recording, you can enable permissions for Vmaker by checking the boxes adjacent to its app name.blankAfter you have granted Vmaker all the necessary permissions, you can now go ahead and click on the Vmaker icon from your Mac’s Menu bar at the top. Now, you don’t HAVE to configure the following settings before a meeting but we advise you to do so in order to record your meeting as early as possible since some of you may need to tweak more options than others.When you click on the Vmaker icon, Vmaker’s main menu will be visible allowing you to customize your recording options. Just like its Chrome extension, the Vmaker app also shows you options to select the type of recording you want – Screen, Webcam, both, or Schedule (the last one isn’t available on the extension and is a paid feature).blankWhen you select ‘Screen’ or ‘Screen + Webcam’, you will have the option to choose whether you want the recording to capture a single window or the whole screen.blankThen there’s the option to configure the default input device you want to use for the recording – your camera and microphone. Also available is the ability to change the video quality of your recording which you can do by clicking the dropdown next to ‘Video recording quality’. Paid users also get to customize window size manually.blankOnce you’ve made all the necessary tweaks to Vmaker, you can go ahead and enter a meeting on Google Meet. To start a recording now, click on the Vmaker icon from the Menu bar at the top. When Vmaker opens, click on the ‘Start Recording’ button.blankIf you selected the ‘Record a window’ option, you will be asked to choose a window and then click on ‘Start Recording’ again.blankThis will start your recording and you should see the Vmaker widget positioned outside the left edge of the window that’s being recorded. This widget will let you pause, delete, stop the recording or mute the audio in it.blankYou will also see a timer adjacent to the Vmaker icon inside the Menu bar that will show how long your recording is running.blankAfter your recording is complete, you can click on the Record icon inside the Vmaker widget to stop the recording.blankWhen you stop a recording, Vmaker will automatically load the recorded content on your default web browser. From here, you can play it, delete, edit, duplicate, or download the recording. You can also share the recording with others using a link that you get after clicking the ‘Share’ button.blankThe rest of the process is similar to that of using Vmaker’s Chrome extension.That’s all we have on recording a meeting on Google Meet.RELATEDRead more: how to get the wing cap in mario 64
See Also  How long does suddenly salad last in the fridge

Last, Wallx.net sent you details about the topic “How To Record Google Meet Without G Suite❤️️”.Hope with useful information that the article “How To Record Google Meet Without G Suite” It will help readers to be more interested in “How To Record Google Meet Without G Suite [ ❤️️❤️️ ]”.

Posts “How To Record Google Meet Without G Suite” posted by on 2021-10-27 22:15:36. Thank you for reading the article at wallx.net
Rate this post
Back to top button