How to make a cake topper with cricut
Video How to make a cake topper with cricutHi there Daydreamers!As we speak, you’ll learn to make attractive cake toppers along with your Cricut for any event.Reading: How to make a cake topper with cricutNot solely will I train you find out how to make them from scratch in Cricut Design House, however I may even offer you over 10+ SVG cake topper templates that may swimsuit all of your crafting wants. (Christmas, Wedding ceremony, Birthday, Valentines’ Day, and so forth.)You are able to do this mission with any Cricut machine. I used my Cricut Maker, however I’ve notes that may information you in case you have an Discover, Pleasure, Maker, Discover, or Maker 3 gadgets.There are various methods to make cake toppers along with your Cricut, and right this moment I’ll present you all kinds of strategies that may set you up for fulfillment.In a nutshell, these are the methods I’m going to make use of via this tutorial.
- Supplies you want for any cake topper
- How to Make a cake topper with Fonts
- Utilizing the Offset device to make cake toppers
- Print then Minimize cake toppers
- Making cake toppers with Cricut Photographs
- Make cake toppers with the Free SVG Templates I offered you with
Ideally, you’ll learn this tutorial from the start as a result of as we go, we can be implementing the ideas talked about within the previews steps.Word: Since all of the cake toppers undergo the precise chopping and meeting course of, I’ll solely cowl the chopping means of the primary one. (I don’t wish to be repetitive)Are you prepared?Let’s Daydream Into Actuality!
Supplies for Cricut Cake Toppers
Contents
Are you aware what the important thing to creating probably the most incredible cake toppers is?It’s PAPER!Paper is one thing you by no means wish to go low cost on. Particularly in case you are making a cake topper; as a result of though little, this little piece will typically be within the heart of your occasion.Right here’s an inventory of the supplies you’ll want
- Cricut Machine (Maker, Discover Household, Pleasure, Discover 3, Maker 3)
- Glitter Cardstock
- Colourful Cardstock for the again of the topper (non-obligatory).
- Wonderful Level Blade
- Cake topper sticks
- Excessive-High quality Glue (please don’t use low cost or children glue)
- Commonplace Inexperienced Mat
- Scraper (for cleansing up the mat)
- Brayer (non-obligatory, however my favourite device within the Cricut world)
How to Make Cake Toppers with Cricut Fonts
Even for superior Cricut customers, one thing somewhat laborious to grasp is what’s going to fall out after a reduce and what’s going to stick collectively.When making a cake topper, it’s essential to guarantee that every part you need stays collectively.We’ll be making a “Happy Birthday” cake topper with letters to show you this idea.
Step 1 – Add and Edit Textual content
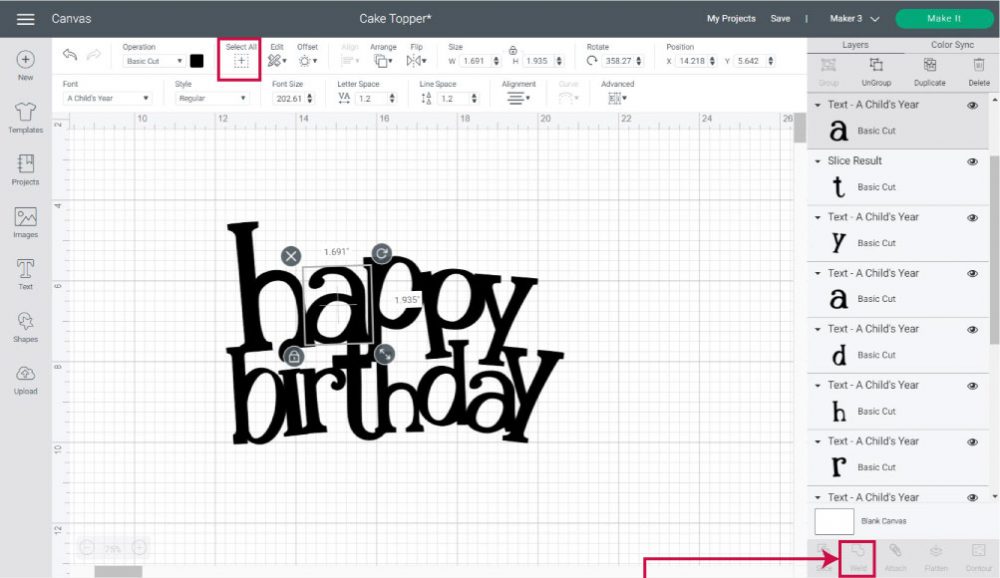
Click on on the “Text” button situated on the left panel of the Canvas and sort in “happy birthday.”Initially, your textual content can be Cricut Sans, however since we’re engaged on occasion ornament, let’s change the font.Choose the textual content, and click on on “Font,” and select your favourite one. I picked the font “A Child’s Year” for this tutorial as a result of it has a great (occasion) vibe.Tip: For cake toppers, I like to recommend you utilize a thick font to supply stability to your mission.As soon as you modify your font, preserve your textual content chosen and go to the highest panel on the canvas, click on on “Advanced,” and select the choice “Ungroup to Letters.”Ungrouping textual content to letters will mean you can edit every letter by itself.To edit every letter, choose it, rotate it, enhance the scale, and unlock proportions from every one of many corners of the choice.You possibly can be taught extra about textual content and find out how to edit it on this helpful tutorial.
Step 2 – Overlap and Weld Textual content
It’s time to offer form to the cake topper and to do this we have to arrange all letters.That is probably the most time-consuming a part of the mission and crucial as a result of it’ll be sure that all the letters stay collectively after your Cricut cuts the cake topper.Begin by overlapping all letters. I made a decision to have “happy” on the highest and “birthday” on the backside.It’s possible you’ll battle to affix all the letters. That’s when rotating and unlocking the proportions of every letter turns out to be useful. If you happen to take note of the screenshot down under, you’ll discover that every part seems completely different.The aim right here is to have every part related.Oh! And don’t overlook the dot from the letter “i.” As you possibly can see, I related the dot (for the letter “i”) with the letter h.When your entire letters are overlapped, choose them and click on on “Weld” (situated on the underside panel) to create a single layer.
Step 3 – Copy and Flip Design
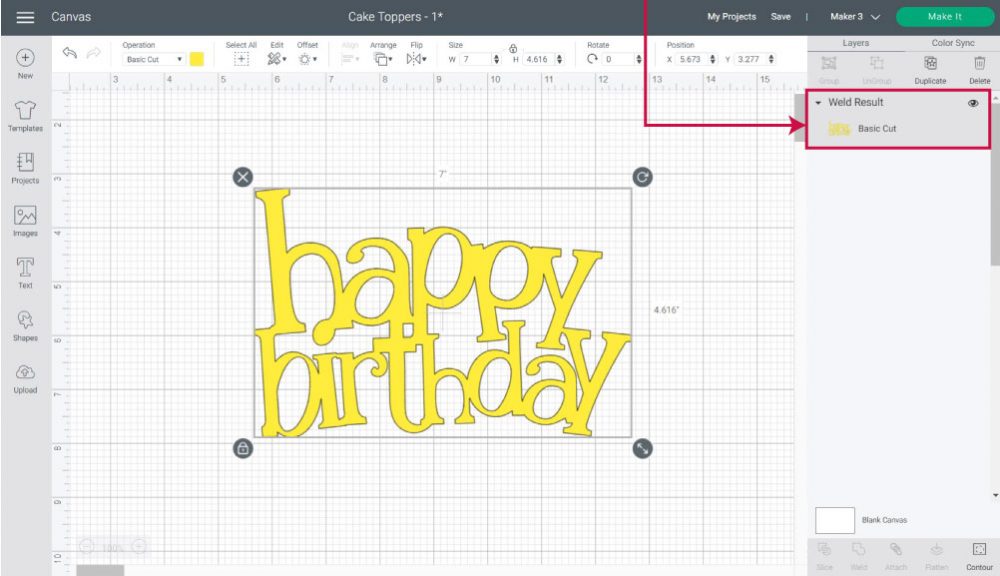
Normally, most cake toppers could have a cute paper on the entrance and a white plain nothing on the again.Nicely…Not right this moment, my good friend!This factor the place you must place the cake in a specific place to cover the “dark side” can be a factor of the previous.Not solely your cake topper will look extra stunning in case you have one other (or the identical paper from the entrance) paper on the again, however it’ll additionally add further sturdiness to the ultimate mission.In different phrases, it’s a win-win.So as to add a distinct colour on the again of the topper, duplicate it (prime of layers panel), choose one of many copies, click on on “Flip,” and choose the choice “Flip Horizontal.”There you might have it; the entrance and the again of the cake topper.
Step 4 – Resize, Change Colour and Make it
You possibly can change the colours of the cake topper. I made a decision to go along with purple for the entrance and a rainbow-like colour for the again.Word: Change colours by clicking on the colour field subsequent to “Operation” (it’s essential to choose the layer first).Additionally, and earlier than you chop the design, test the scale of your mission.If it’s essential to enhance or lower the scale of the mission, guarantee that the highest and entrance of the topper measure the identical.As a reference, mine ended up being 7 X 4.6 in.Necessary: For Cricut Pleasure, your design can’t be bigger than 4.25″ x 6.25″ if utilizing a small mat to 4.25″ x 11.75″ if utilizing a big mat.As soon as you’re joyful along with your design, go forward and click on on the inexperienced “Make it” button.
Step 5 – Reducing Course of
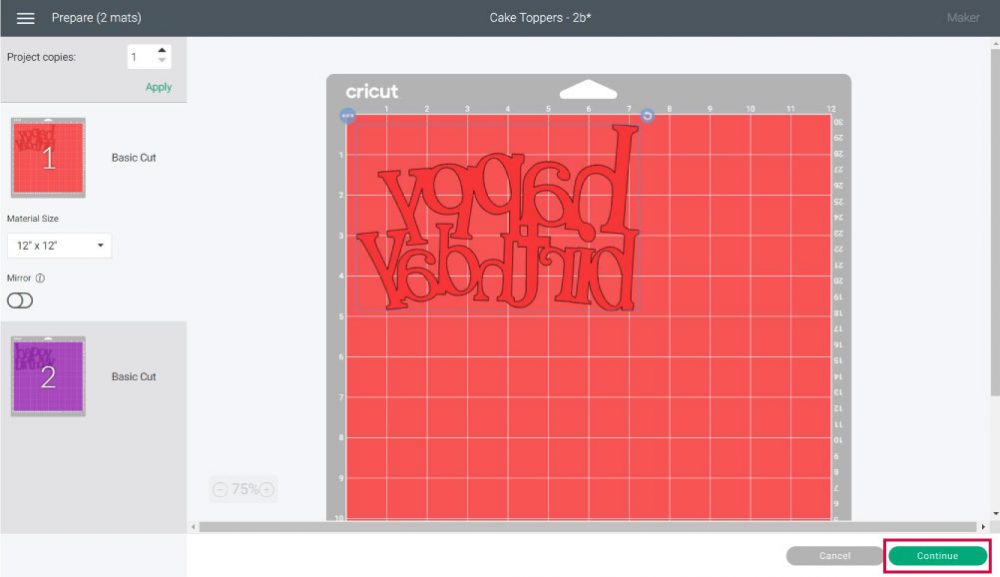
Tip: Newer machines will ask whether or not you wish to reduce on the mat or with out. Choose “Cut on Mat.”If you ship your mission, that is the view you must have. There are two mats that characterize every materials. Though for those who determined to have the identical colour for the back and front, you’ll solely have one mat. If every part seems good, click on on the proceed button.It’s time to decide on your supplies.In case you have a machine with a dial (Discover Household Machines), set it to customized so you possibly can observe alongside on the screenshots.For the instruments, it’s essential to set up the “Fine Point Blade” on clamp “B” and put together your mat. Now, let’s transfer to some actual photographs so you possibly can see what to do subsequent.
For this mission, I can be utilizing a Commonplace Inexperienced Mat.Place the cardstock on prime of the mat and safe it along with your palms, scraper, or with my FAVORITE TOOL on this planet, the brayer!If you happen to don’t have one, make the little funding right this momentRead more: How to make a lego cakeAfter securing the paper to the mat, load it to your Cricut and press the “Flashing Go” button to begin the reduce.Yay!When your Cricut finishes the reduce, unload the mad and take away the fabric from it.One of the best ways to take away the cake topper is by bending the mat and letting gravity do many of the work. (Examine the picture proper above)Now, clear up the mat with the scrapper and repeat the identical course of for the second mat.I used a distinct materials for the second reduce, so I needed to change the fabric from Design House once more.If you’re utilizing one other materials, don’t overlook to make the mandatory adjustments, like shifting the Good Set Dial (Discover household machines) or altering the fabric in Design House.Upon getting each cuts, it’s time to assemble your Birthday Topper.Keep away from child’s glue. It’s not meant for these tasks; they received’t look good as a result of the paper will get moist and bubbly.I like and all the time advocate Beacon 3-in-1 superior glue.You don’t want so as to add an entire lot of glue. Just a little bit goes a good distance. Additionally, as you glue, make sure that every part is aligned.Let the topper dry for somewhat bit, and switch it round to attach the cake topper stick (I used lollipop sticks). The concept is to put the stick in the course of the design; you need it the place you possibly can’t see it when you’re holding it.Additional, on this article, I’ve some examples of the place I had to make use of two sticks.Doesn’t it look attractive?I don’t find out about you, however this put up is already making me hungry for some yummy cake.Earlier than we proceed…Any longer, I’ll assume you learn and understood all the ideas I simply defined. If you’re simply getting began along with your Cricut, I like to recommend you learn earlier than shifting on (I don’t need you to get misplaced).
Making Cake Toppers with the Offset Instrument
In Cricut Design House, Offset is a device that permits you to create a proportional define inside and outdoors of the textual content, photographs, and shapes.The offset device is situated on the highest panel on the canvas space.Do you keep in mind after I stated that every one the layers wanted to be collectively in order that they wouldn’t fall off after the reduce?Nicely, with the offset device, not solely are you able to create a shocking impact in your tasks, however you can too create a placement on your letters and glue individually on the define.Let’s see the next screenshot and have somewhat chat.We’re doing an offset on the “Congrats!” phrase. All letters are connected, however the dot from the exclamation level is unfastened. That means with an everyday cake topper, as I defined earlier than, that dot can be misplaced.Everytime you click on on the offset icon, you will note a lightweight blue define on the form or textual content you’re deciding on on the canvas. For the adjustments to take impact, you all the time must press “Apply.”When you press “Apply,” you possibly can’t modify the options of the define. If you need an even bigger or smaller one, you possibly can simply repeat the method.Each time you set new settings, Design House will keep in mind the one you final used. That is very helpful since you need your tasks to look uniform. If you happen to’re working with completely different offset distances, make sure that to have somewhat word subsequent to you the place you be aware of that as a result of this system received’t keep in mind it.For this cake topper, I added three offsets. Add the primary define, and use it as a reference so as to add a brand new offset.Change colours, and voila!A good looking design!Try how simple it’s to attach and put collectively as effectively.This characteristic (offset device) will deliver your cake toppers to a brand new stage!Try my offset tutorial to be taught all about this setting.
Making Cake Toppers With Print then Minimize
If you happen to’re in a rush and desire a colourful and simple mission, you must make cake toppers utilizing “Print then Cut.” When utilizing your private home printer, your cake topper can’t be bigger than 6.75″ x 9.25″Word: Cricut Pleasure doesn’t help Print then Minimize.For this cake topper, I additionally determined to make use of the offset device to have placement for the letters as a result of they don’t seem to be all welded. If you happen to select to make use of fonts solely, you must do the identical steps I discussed at the start of this text.I did six outlines.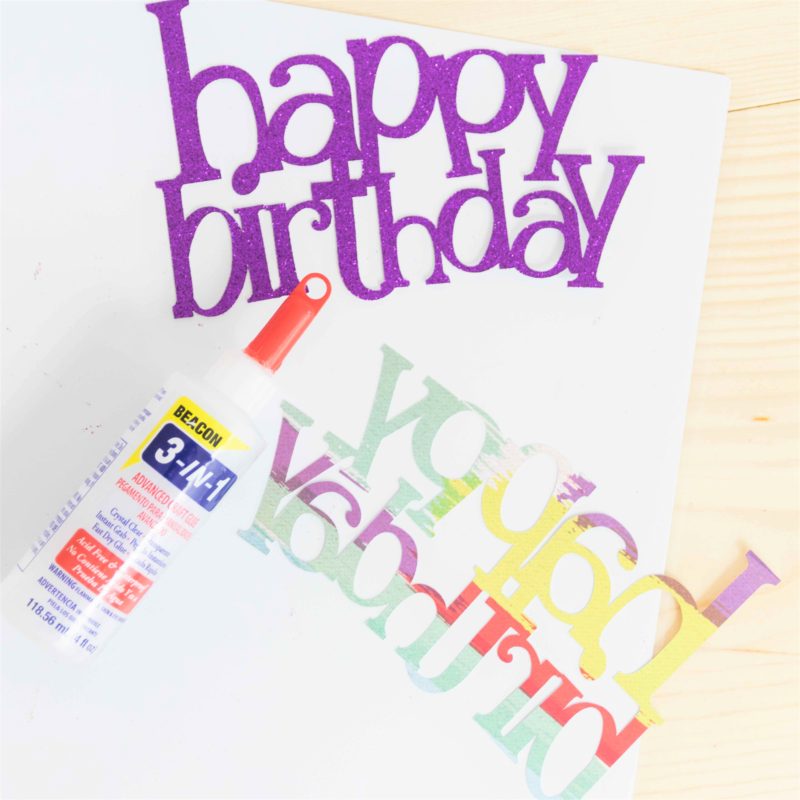 Choose every part that’s a part of your design and click on on “Flatten” on the backside of the layer’s panel.Now, your design is on a single layer and able to go!Click on on “Make it.”The next screenshot exhibits a preview of how your print ought to appear to be.You’ll want to be sure you place the print in your Cricut Mat the precise manner you see it right here.Click on on “Continue.”After leaving the mat preview, you’ll be given the step-by-step to chop your mission.The primary choice is “Print,” It has a button that claims “Send to Printer.” Go forward and click on there.Just a little window named “Print Setup” will open. From this window, it is possible for you to to decide on your printer, add further copies to your mission, activate bleed, or use your system dialog field.After you print, it’s time so that you can select the fabric you printed on. I used Medium Cardstock.Set up “Fine Point Blade,” place printed copy on the mat, load it to your Cricut and press the flashing go button to begin the reduce.
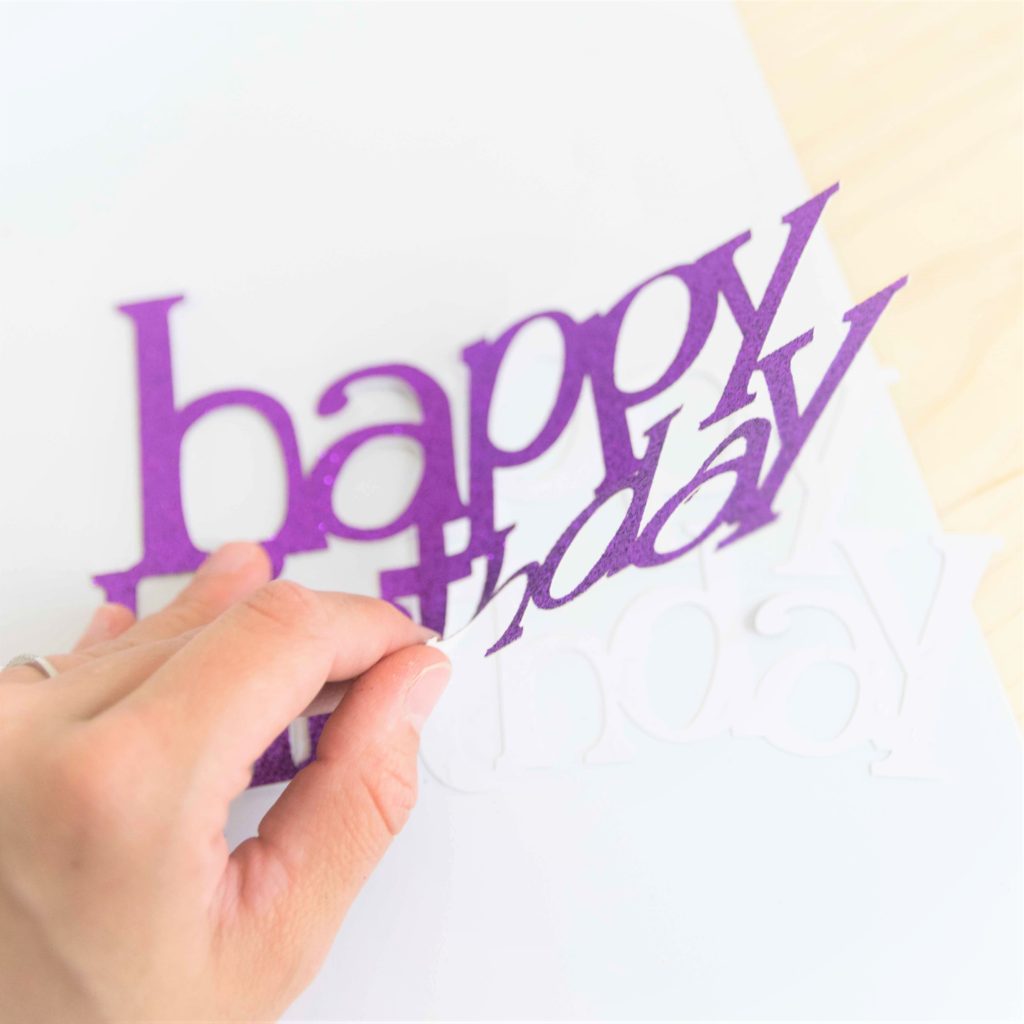 The “Print then Cut” sensor will activate, and it’ll begin studying the body surrounding all the designs that we have to reduce; as soon as it’s executed studying, the Cricut will reduce all of them.When Cricut Design House tells you the Minimize is completed, unload your Mat, take away the cake topper from it.That is the way it seems assembled.
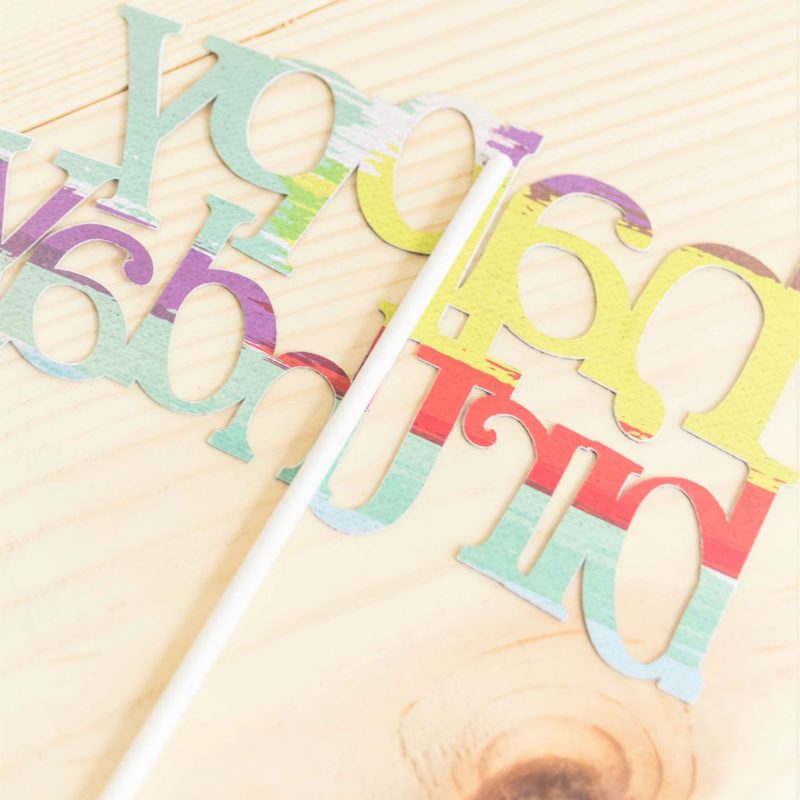
 Doesn’t it look fairly?Study every part it’s essential to find out about Print then Minimize.
Making Cake Toppers With Cricut Photographs
If you’re in search of one thing fast or much more elaborate, you should use Cricut Photographs (situated on the left panel of the canvas).Cricut’s library is full (over 100k) of designs for any event, and you may filter all of them by classes, key phrases, and so forth.If you’re in search of a specific event, you possibly can sort within the phrase that greatest describes it. As an illustration, I filtered by “wedding,” and I obtained lots of choices.Right here’s the factor, not all photographs are for cake toppers!Read more: How to turn shake and bake into shardsIf you wish to reduce immediately with minimal modifying, it’s essential to discover a picture the place all letters look overlapped (simply as we overlapped the birthday topper).Down under, you might have some examples of the cake toppers you may make. Though the choice is intensive so that you can make cake toppers, there’s going to be a time whenever you like a picture that’s not prepared!Just like the picture I chosen on the screenshot proper above. As you possibly can see, every part is separated.Don’t despair although, if that’s what you need, let me present you find out how to make a easy picture from design area right into a cake topper.Step 1: Insert the picture into the canvas space.Step 2: Duplicate (copy/paste) till you might have three copies. Word: in case you have extra traces of textual content or components which might be scattered, it’s essential to have extra copies.Step 3: Use the contour device (backside of the Layers panel) solely to indicate the primary line of every design.For the “about,” you don’t must contour. You solely must delete or cover the pink layer beneath.If you happen to don’t know find out how to use contour, try my tutorial.Step 4: Make the completely different components right into a cake topper by overlapping every line (wild, about, u).Step 5: Choose all traces and click on on “Weld” to have all objects in a single single layer.I made a decision so as to add an additional contact of creativity with glitter!Don’t you suppose it makes the cake topper pop up? How cute will this topper look on a romantic Valentine’s date?

I take advantage of a patterned paper for the again. Subsequent time, I might decide one thing else, however it seems ten instances higher than a boring white background.
Free SVG Cake Toppers
Listed below are the free SVG cake toppers templates that you should use for any of your private tasks.Please don’t share them on social media like Fb teams or the “Public” choice in Cricut Design House. If you wish to share them with somebody, why not share this hyperlink to entry them as effectively?To obtain the information, you NEED to be on a desktop or laptop computer, and it’s essential to click on on the button to set off a obtain file in your laptop.Relying in your browser settings, generally your PC will ask the place to save lots of the file, though, most instances, the information can be in your obtain folder.If the picture opens in a brand new window (this will likely occur due to your browser settings), right-click on it, choose the choice “Save Image As,” and select the place you wish to save the file.SVG information appear to be an online web page file whenever you obtain them.Oh!And simply so you recognize, I even have a library stuffed with free SVG information and Printables for all of my subscribers, a.ok.a Daydreamers. You possibly can see a preview proper right here or get entry by filling this kind.
Making Cake Toppers with Uploaded SVG information
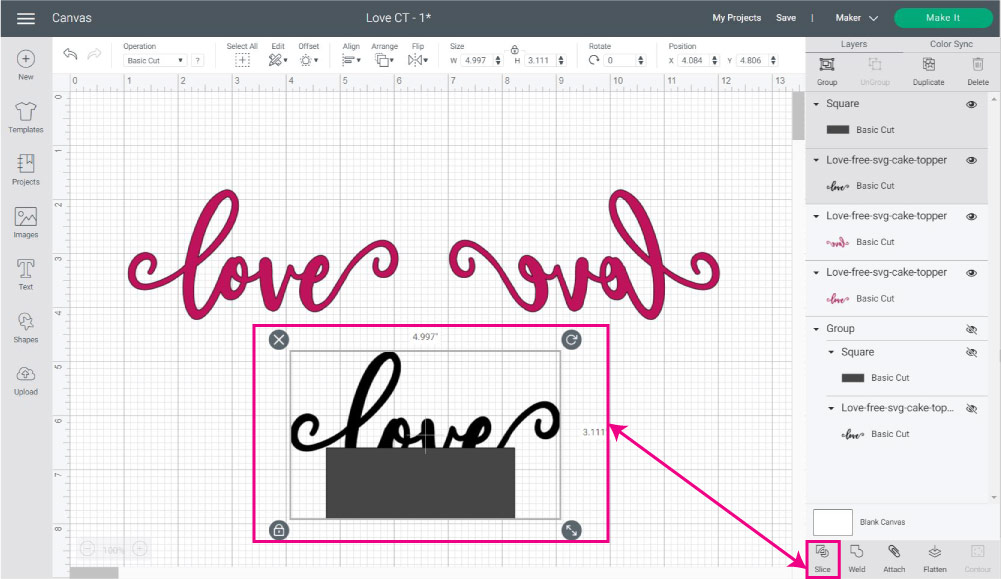
After saving the “Love” file to your pc, log in to Design House and when you’re on the canvas, go to the Add choice (situated on the left panel) and click on on “Upload Images.”Observe the prompts that Design House brings up, and as soon as your picture is saved, you possibly can see it in Just lately uploaded photographs; choose it and click on on “Insert Images.”Duplicate the picture, and flip horizontally one of many copies for the again of the topper.For this cake topper, I wish to train you find out how to add a ravishing embellishment impact.Duplicate the entrance of the topper once more, add a sq. to the canvas (shapes are situated on the left panel), and unlock the proportions to type a rectangle.Have the rectangle cowl the decrease a part of the phrase love like I present you within the screenshot under After inserting the rectangle on the half-bottom of the phrase, choose it together with the phrase and click on on “Slice.”Transfer all of the “Slice Result” items, preserve one of many “lower” cuts, and delete the remainder.Change the colours earlier than you ship the mission to chop. I went with shiny and darkish pink.Look how the additional ornament seems once we place it on prime of the entrance of the topper.If you end up pleased with the colours and measurement, click on on “Make it.”Quick ahead…Look how elegant and refined this Love Cake Topper seems.Take a look at all these different prospects you might have when making Cake Toppers along with your Cricut.Are you planning a child bathe? Look qt this “It’s a Girl” Topper.Tip: Sturdy and double-sided supplies like Metallic Posterboard are additionally glorious for any such mission. (you don’t must make a bottom reduce)


Take a look at the “It’s a Boy” topper. To offer good stability to the topper, I had to make use of two sticks.Isn’t it lovable?

For birthdays you can too use the age of the birthday (woman or boy) like this “One Cake Topper.”It’s easy but additionally elegant.
Try how the paper you select on your tasks could make a distinction!I feel this ‘Yay!” topper would look great on a luau cake!


Let’s not overlook about Christmas!Look how I used among the SVG Recordsdata I offered you with to create two completely different kinds. However you can too obtain this look utilizing the offset device.BEAU – TI – FULThe primary “Merry Christmas Topper” has a background made with Inexperienced Corrugated Paper, and the second topper is fabricated from glitter cardstock solely.Final however not least!If you’re getting married or serving to a good friend along with her wedding ceremony, be sure you use your Cricut to make a Wedding ceremony Cake Topper!The “Ever After” topper is in Cricut Design House underneath the code #M10842C2. The “Mr & Mrs. Cake Topper” is accessible to obtain on this put up (within the Free SVG Recordsdata part).

Aren’t all of them tremendous cute?
Did you want these Cake Toppers?I hope you are feeling inspired to take advantage of stunning toppers on your events and gatherings.Are you aware that it takes me over 25 hours of labor to finish a single Cricut article? I do know, it’s loopy! However I wish to just be sure you perceive EVERYTHING!I might respect your help on Instagram / Pinterest / YouTube / as I’m attempting to develop my viewers to maintain producing nice content material!Read more: How long to bake stuffed chicken breast at 400
Last, Wallx.net sent you details about the topic “How to make a cake topper with cricut❤️️”.Hope with useful information that the article “How to make a cake topper with cricut” It will help readers to be more interested in “How to make a cake topper with cricut [ ❤️️❤️️ ]”.
Posts “How to make a cake topper with cricut” posted by on 2022-01-11 22:31:48. Thank you for reading the article at wallx.net


