Fix ads in your content when scrolling
The Advanced Ads team is the new maintainer of the famous Q2W3 Fixed Widget plugin and now takes care of over 100,000 websites using this plugin.
I see a lot of potential combining the features of Advanced Ads and Fixed Widget when it comes down to improving the visibility of ads and other content, like your custom call to actions and newsletter forms.
The following tutorial contains such a use case. Combining features in Advanced Ads and Fixed Widgets, you can make any element in your content fixed when the user scrolls away. It extends the functionality of Fixed Widget, where this option is limited to widgets in your sidebar only.
Make a content element sticky
Contents
The setup below is based on using Advanced Ads to manage the content of your ads or elements. Advanced Ads cannot only manage ads like AdSense, but any other content, like contact or signup forms or your house ads.
Once you have set up your content in Advanced Ads, there are only three steps left to make it sticky.
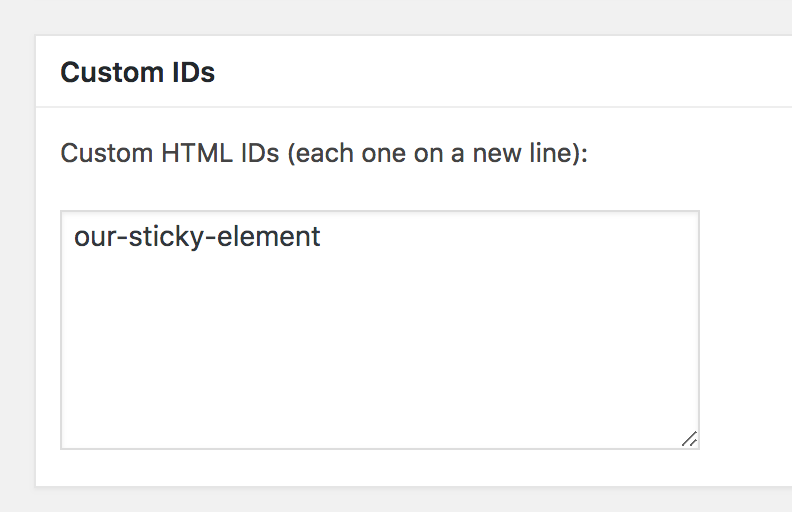
Fixed Widget needs a static and unique ID to make an element sticky on your site. For the following example, we use the our-sticky-element ID, but please feel free to use anything else.
1. Set a fixed ID for the element
Once you created your ad, you need to add a static and unique ID. You can do this on the ad edit screen.
Scroll down to Layout / Output and look for the Container ID option. Enter your ID into that field like shown below.
2. Enter the ID into the Fixed Widget options
When the Fixed Widget plugin is installed you can go to Appearance > Fixed Widget and look for the Custom ID option. Enter the ID you just set for the ad into the field. If you entered something here already then add the ID in a new line.
3. Place the content
When you publish an ad in Advanced Ads for the first time then you are prompted to a field where you can select a placement to inject the ad automatically into the content. You can also take the shortcode of the ad and place it manually into a post.
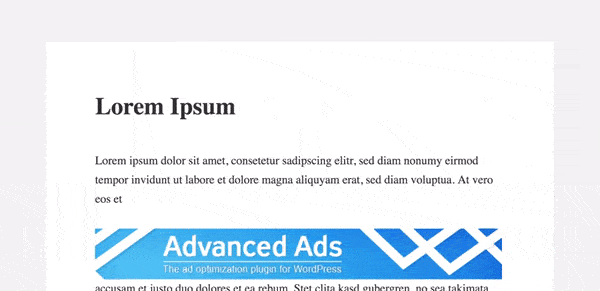
Sticky element – the result
You can see how the result works in the following animation. I placed the ad manually after the first paragraph and once it reaches the top of the page, it gets fixed there.
Do you need help with this setup or want to share some other ideas? Please reach out.

Starting in 2009, Thomas’ own word game website grew to 40 MM page impressions per month. He then built Advanced Ads to help his colleagues to place ads and test different ad positions and networks tests without any coding skills. Thomas now enjoys improving the product for our more than 150,000 users worldwide.


